Removal and replacement procedures 4–45
g. Display assembly (see “Display assembly” on page 4-23)
h. Top cover (see “Top cover” on page 4-30)
i. Bluetooth module (see “Bluetooth module” on page 4-35)
j. System board (see “System board” on page 4-38)
k. Fan/heat sink assembly (see “Fan/heat sink assembly” on page 4-41)
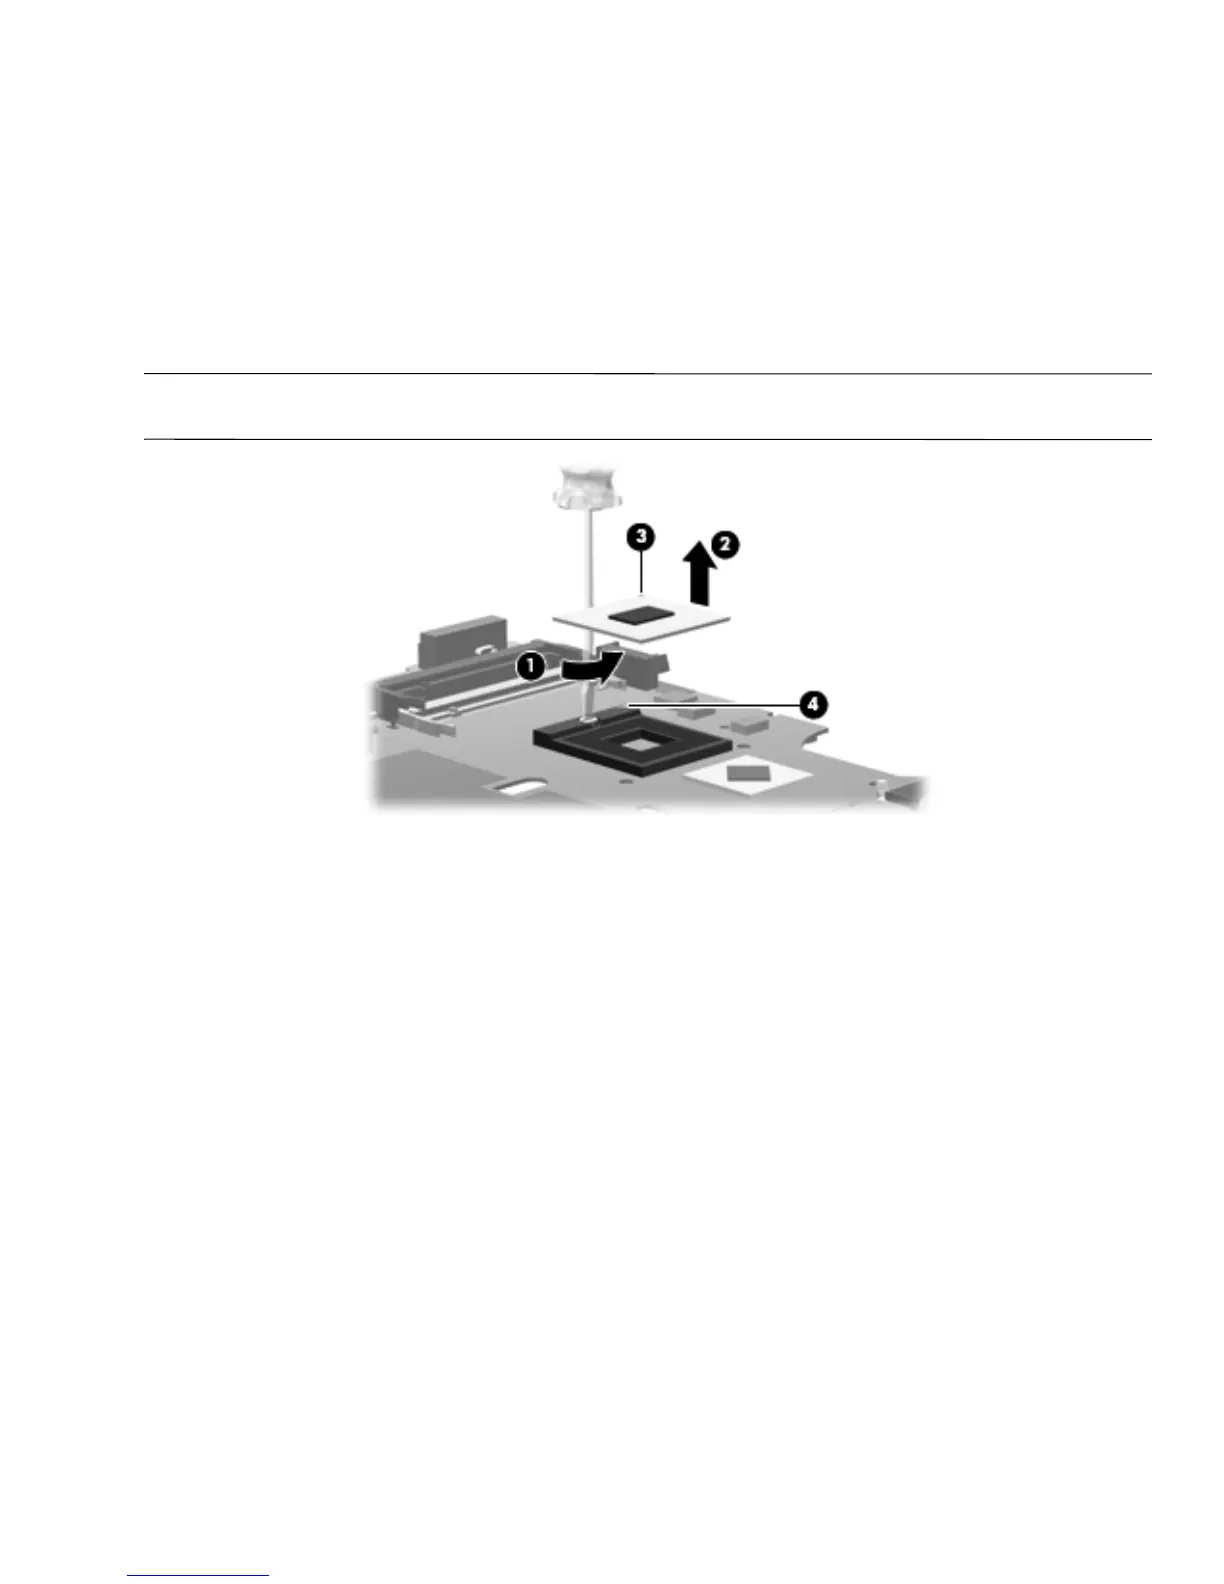
Remove the processor:
1. Use a flat-bladed screwdriver to turn the processor locking screw 1 one-half turn counterclockwise until you
hear a click.
2. Lift the processor 2 straight up and remove it.
✎
When you install the processor, the gold triangle on the processor 3 must be aligned with the triangle embossed
on the processor slot 4.
Reverse this procedure to install the processor.

 Loading...