EasyManuals Logo

HP dc7900 series User Manual

HP dc7900 series
48 pages
To Next Page IconTo Next Page
To Previous Page IconTo Previous Page
Page #25 background imageLoading...
Page #25 background image
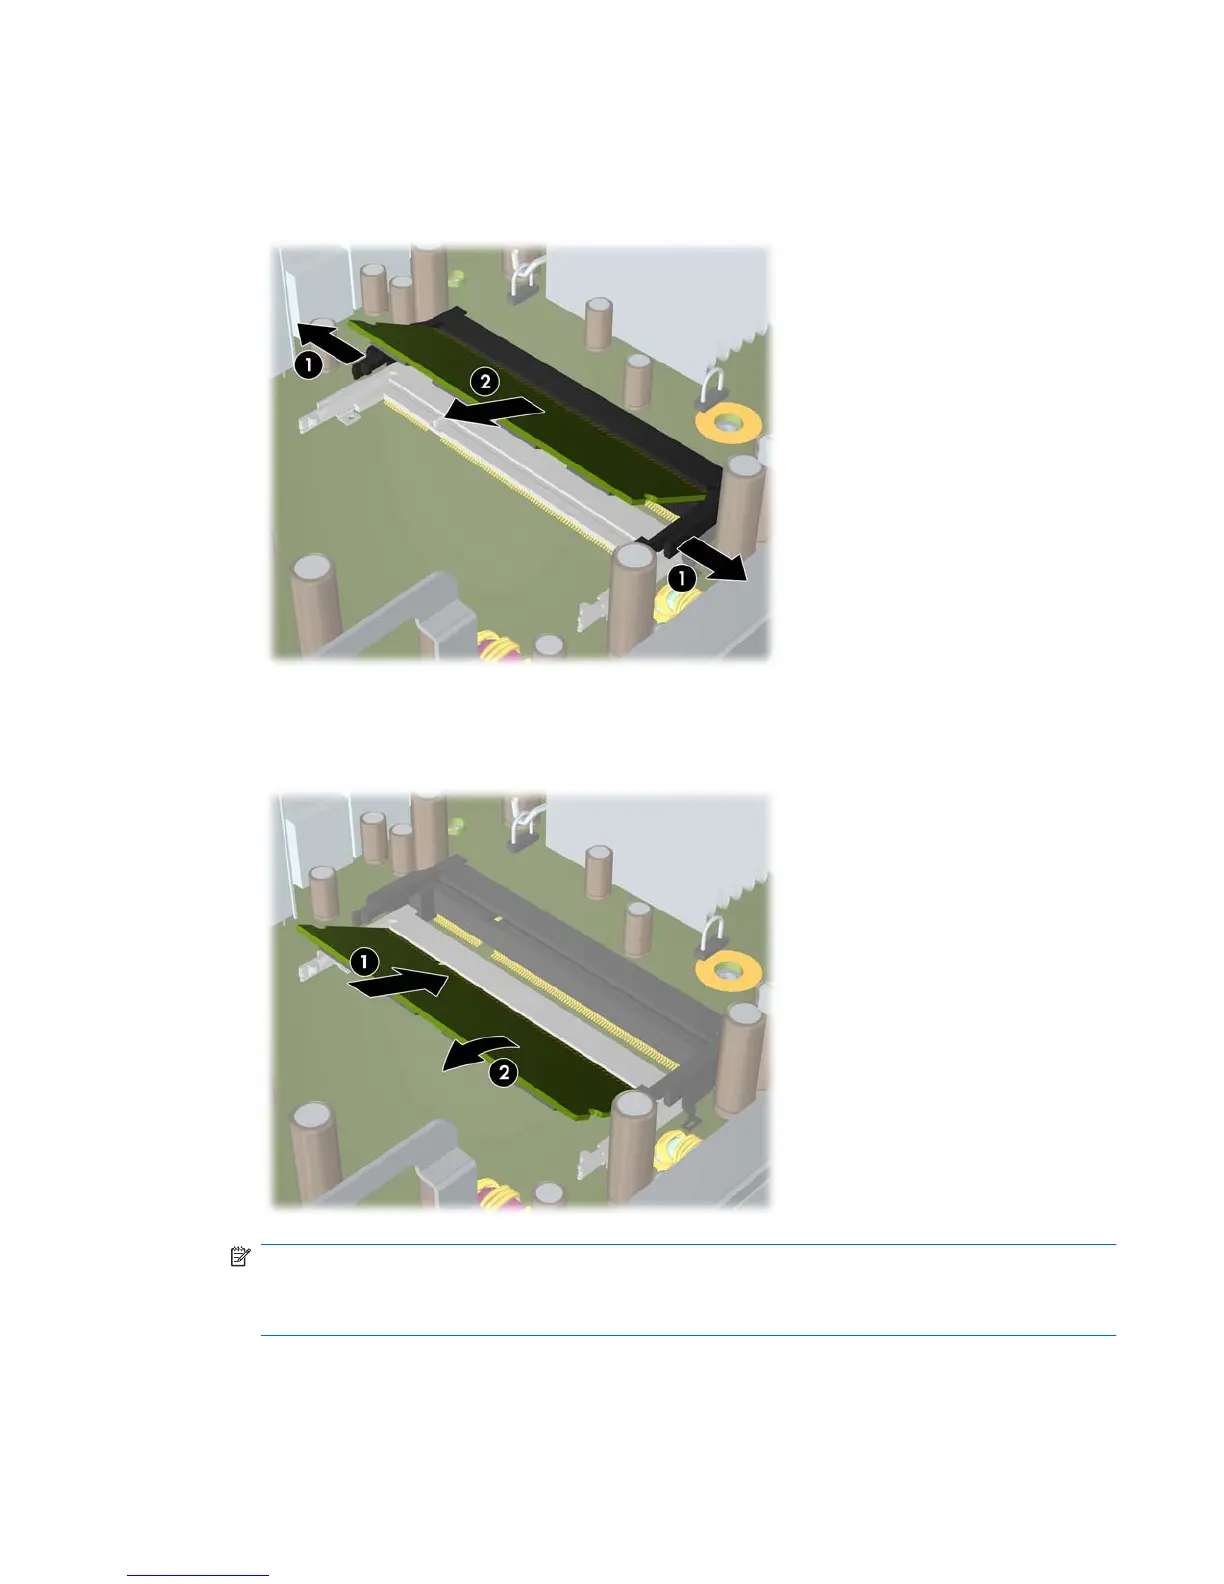
8. If you are adding a second SODIMM, remove the SODIMM from the top DIMM1 socket to access
the bottom DIMM3 socket. Press outward on the two latches on each side of the SODIMM (1) then
pull the SODIMM out of the socket (2).
Figure 2-11 Removing a SODIMM
9. Slide the new SODIMM into the socket at approximately a 30° angle (1) then press the SODIMM
down (2) so that the latches lock it in place.
Figure 2-12 Installing a SODIMM
NOTE: A memory module can be installed in only one way. Match the notch on the module with
the tab on the memory socket.
A SODIMM must occupy the DIMM1 (top) socket.
10. Replace the SODIMM in the DIMM1 socket if it was removed.
11. Replace the access panel.
ENWW Installing Additional Memory 19

Questions and Answers:

Question and Answer IconNeed help?

Do you have a question about the HP dc7900 series and is the answer not in the manual?

HP dc7900 series Specifications

General IconGeneral
ChipsetIntel Q45 Express
MemoryUp to 16 GB DDR2 SDRAM
NetworkIntegrated Intel 82567LM Gigabit Network Connection
AudioIntegrated High Definition Audio
Processor OptionsIntel Core 2 Duo
Storage OptionsSolid State Drive
GraphicsIntegrated Intel Graphics Media Accelerator 4500
Optical DriveDVD-ROM
PortsUSB 2.0, VGA, DisplayPort, serial, parallel, PS/2, audio in/out
Form FactorSmall Form Factor (SFF)
Operating SystemWindows XP
Power Supply240W
Expansion SlotsPCI Express x16

Related product manuals