EasyManuals Logo

HP dc7900 series User Manual

HP dc7900 series
48 pages
To Next Page IconTo Next Page
To Previous Page IconTo Previous Page
Page #27 background imageLoading...
Page #27 background image
Preparing the New Optical Drive
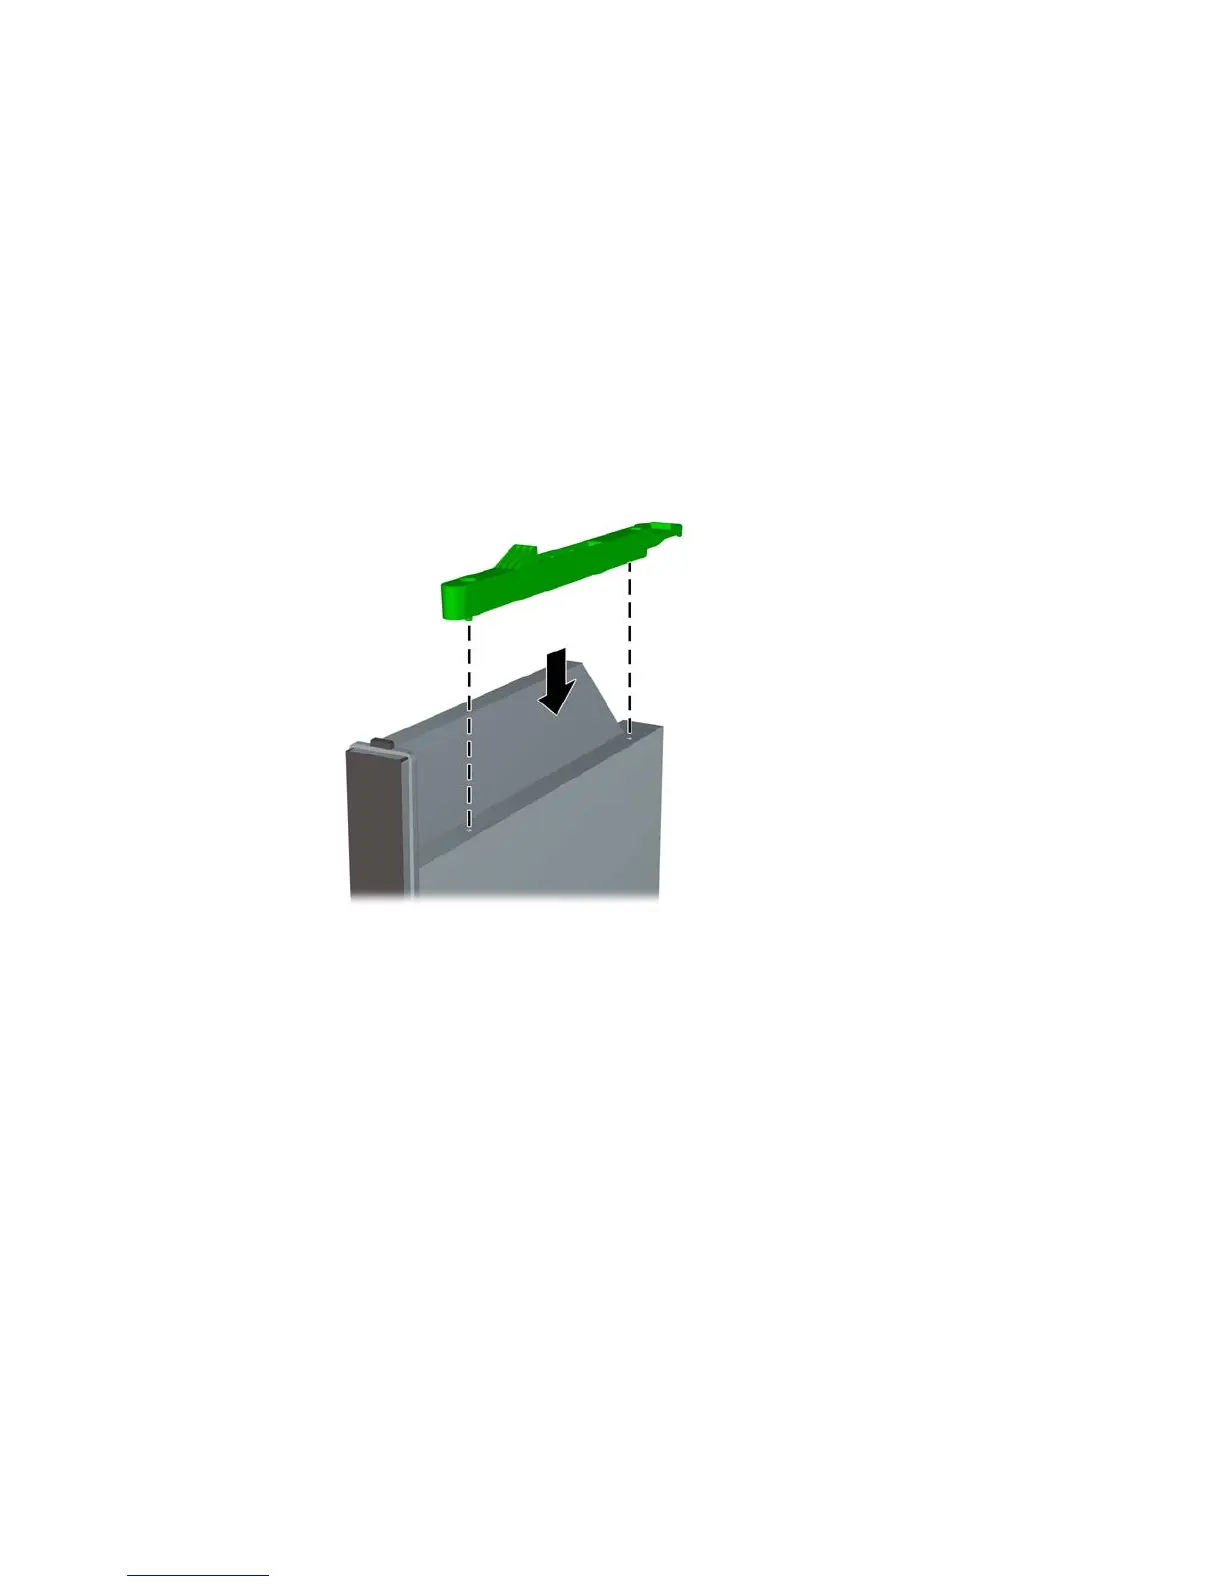
Before the new optical drive can be used, the release latch must be attached.
1. Peel the backing off the adhesive on the release latch.
2. Without allowing the release latch to touch the optical drive, carefully align the holes on the release
latch with the pins on the side of the optical drive. Make sure the release latch is oriented properly.
3. Insert the pin at the front of the optical drive into the hole at the end of the release latch, and press
firmly.
4. Insert the second pin, and press the entire release latch firmly to fasten the latch securely to the
optical drive.
Figure 2-14 Aligning the Release Latch
ENWW Replacing the Optical Drive 21

Questions and Answers:

Question and Answer IconNeed help?

Do you have a question about the HP dc7900 series and is the answer not in the manual?

HP dc7900 series Specifications

General IconGeneral
ChipsetIntel Q45 Express
MemoryUp to 16 GB DDR2 SDRAM
NetworkIntegrated Intel 82567LM Gigabit Network Connection
AudioIntegrated High Definition Audio
Processor OptionsIntel Core 2 Duo
Storage OptionsSolid State Drive
GraphicsIntegrated Intel Graphics Media Accelerator 4500
Optical DriveDVD-ROM
PortsUSB 2.0, VGA, DisplayPort, serial, parallel, PS/2, audio in/out
Form FactorSmall Form Factor (SFF)
Operating SystemWindows XP
Power Supply240W
Expansion SlotsPCI Express x16

Related product manuals