170 Chapter 4 Service Tests, Utilities & Calibrations
Tests, Utilities & Calibrations
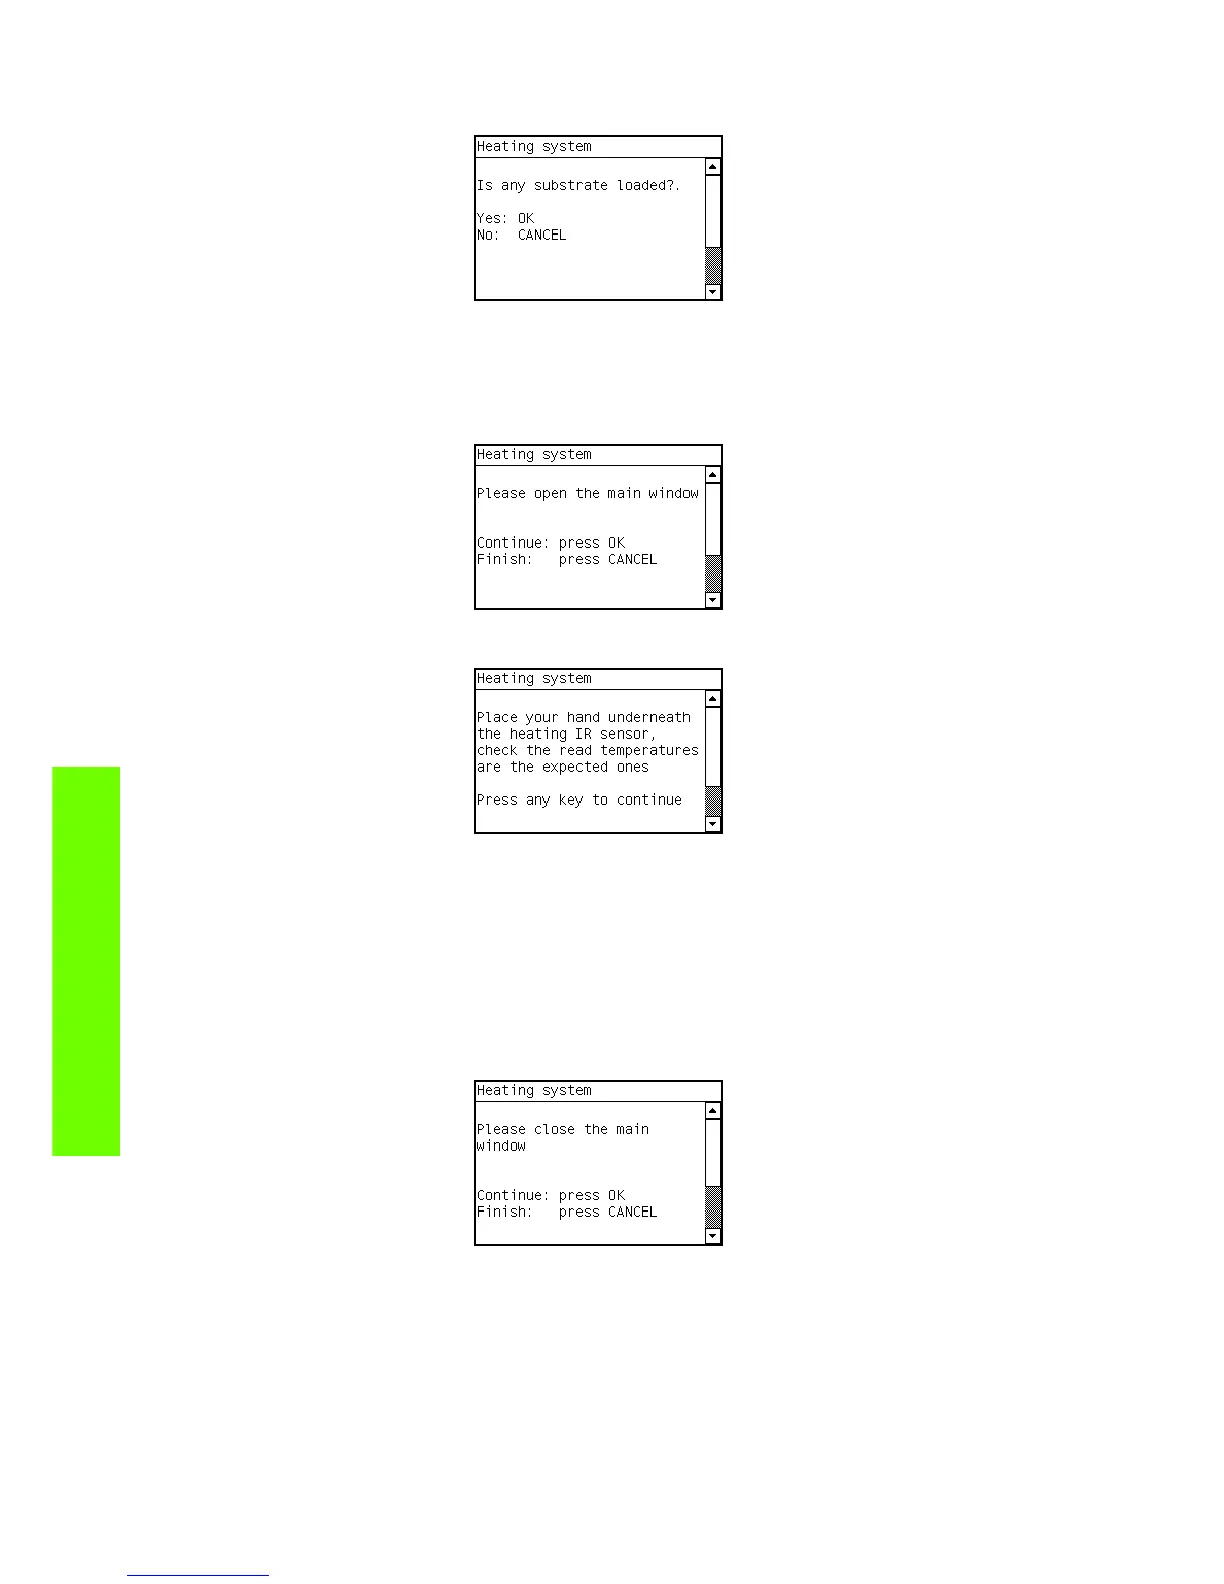
2. The following message is displayed, confirm there is media loaded.
3. The printer displays the current temperature detected by the temperature sensor and checks that the
temperature is stable. If the readings are not immediately stable, the printer turns on the vacuum and
the fans and checks again for one minute (up to 4 times) before displaying a failure.
4. The front displays the following message. Open the window and press OK.
5. The front panel displays the following message.
6. Place your hand under the temperature sensor and check that the temperature detected and
displayed on the front panel changes appropriately.
If the display does not react to the change in temperature, press cancel and check the connections
and cables of the Dryer IR sensor, if everything is connected correctly replace the Dryer IR sensor
⇒
page 496
.
7. If the temperature changes correctly, press OK to continue.
8. The front panel displays the following screen, close the window and press Ok to finish the test.
8.4 Curing IR Sensor
Description
This test checks the connection and functionality of the Curing IR Temperature Sensor.
Procedure
1. Go to Diagnostic tests>8. Heating and Curing>8.4 Curing IR Sensor.
 Loading...