Service Menu 219
Tests, Utilities & Calibrations
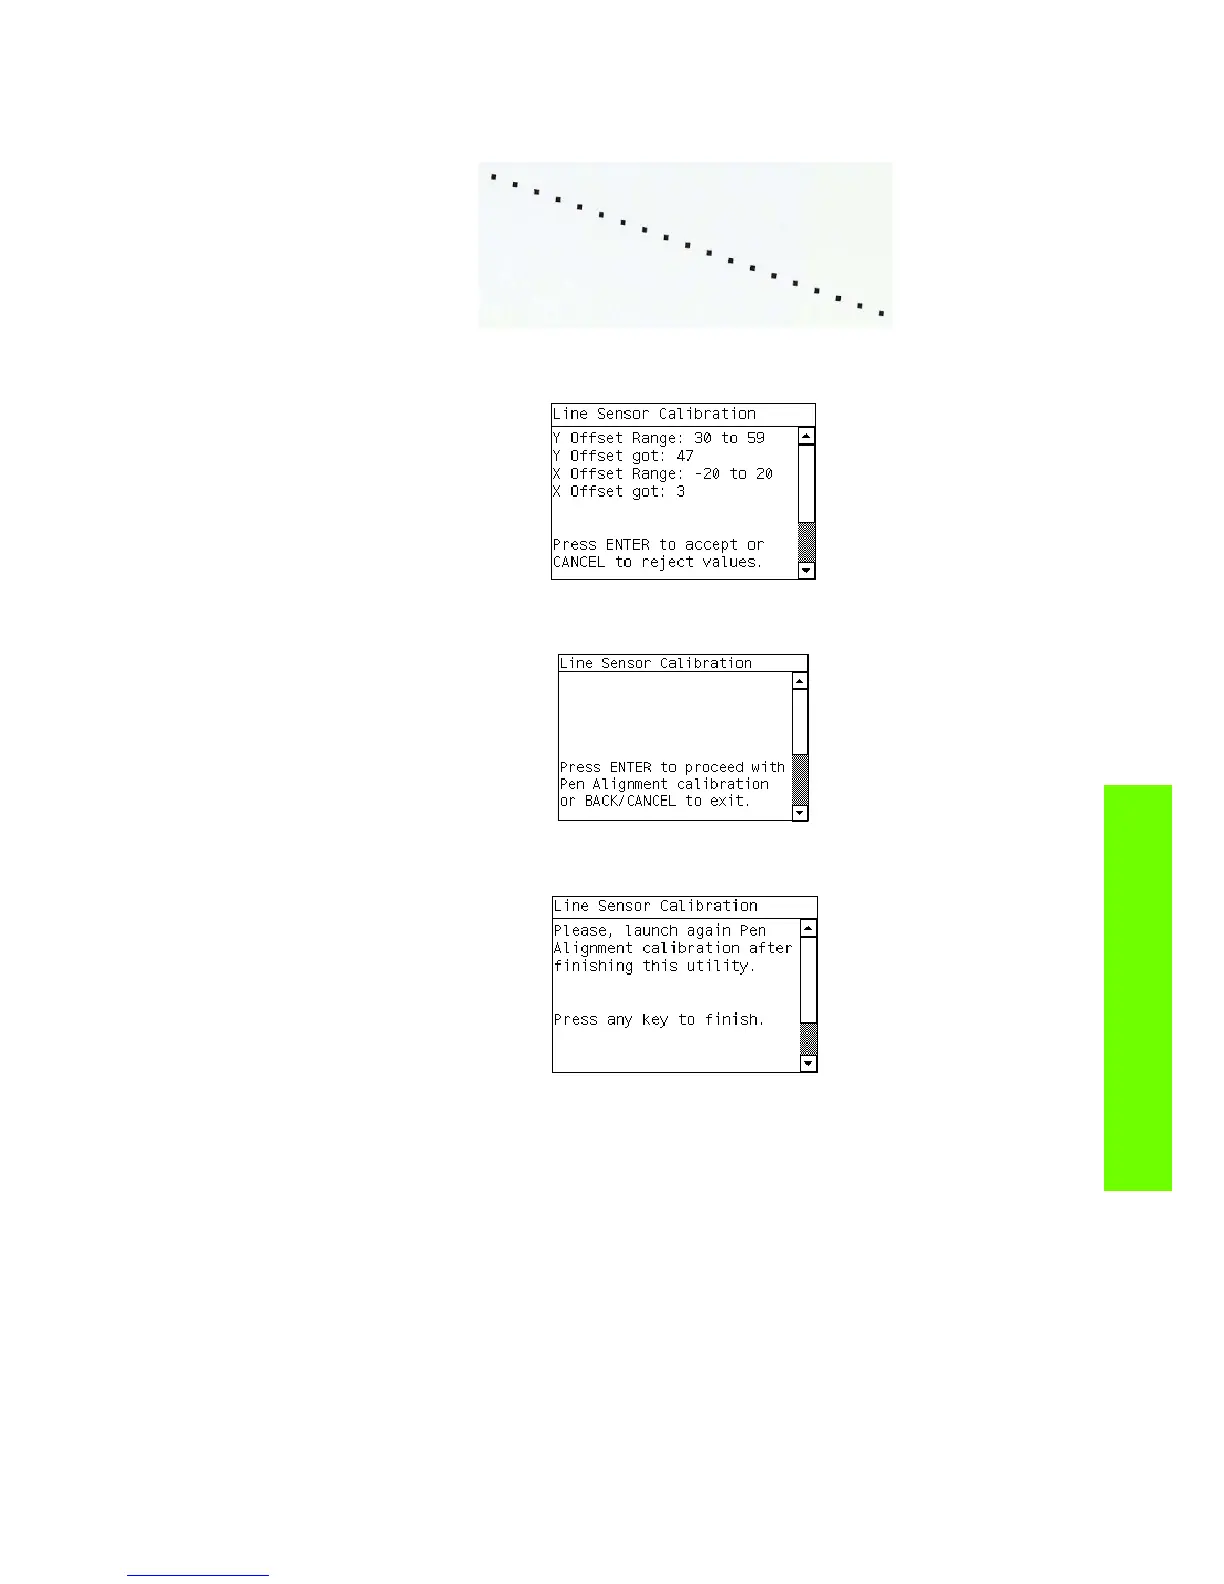
5. The Printer will start to calibrate the Line Sensor position to the Black Printhead. It will print a line of
black dots and then scan them:
6. Once the Line Sensor has been calibrated, the results will be displayed on the Front Panel. Press OK
to finish the calibration or press Back or Cancel to exit the calibration.
7. The Printer will now perform the Printhead Alignment. When the following message displays on the
front panel, select the OK key.
8. Once the Printhead Alignment is completed, the following message will be displayed on the Front
Panel. Press the OK key to continue.
• If the Printhead Alignment fails for any reason, a warning message will display on the Front
Panel. In this case, try the following:
• Enter the Front Panel menu and retry the Printhead Alignment. If the Alignment completes suc-
cessfully, then perform the Color Calibration.
• If the Alignment fails again, check the Alignment pattern to see if any of the Printheads are
printing incorrectly. If necessary, perform a Printhead Recovery through the Front Panel and
retry the Printhead Alignment.
9. Once the complete Line Sensor calibration is completed successfully, OK will be displayed on the
Front Panel.
 Loading...