Actions
1. Turn your original 90 degrees and repeat your scan.
2. If the problem persists, open the scanner lid. Clean the feed wheels (small black rubber) and the
pressure sliders (wide white plastic). If you nd dust particles or objects that obstruct the movement of
the pressure sliders, try to remove them, then close the scanner lid and repeat your scan.
3. If the problem persists, restart the scanner by turning it o and on again. If you nd an error message on
the front panel during this operation, call HP support and report the error message. If no error message
appears, try repeating your scan.
4. If the problem persists, analyze patterns D, K and L of the diagnostic plot. The plot should look like this:
If you see an image resembling the incorrect examples below, call HP support and report an “incorrect
paper advance” problem.
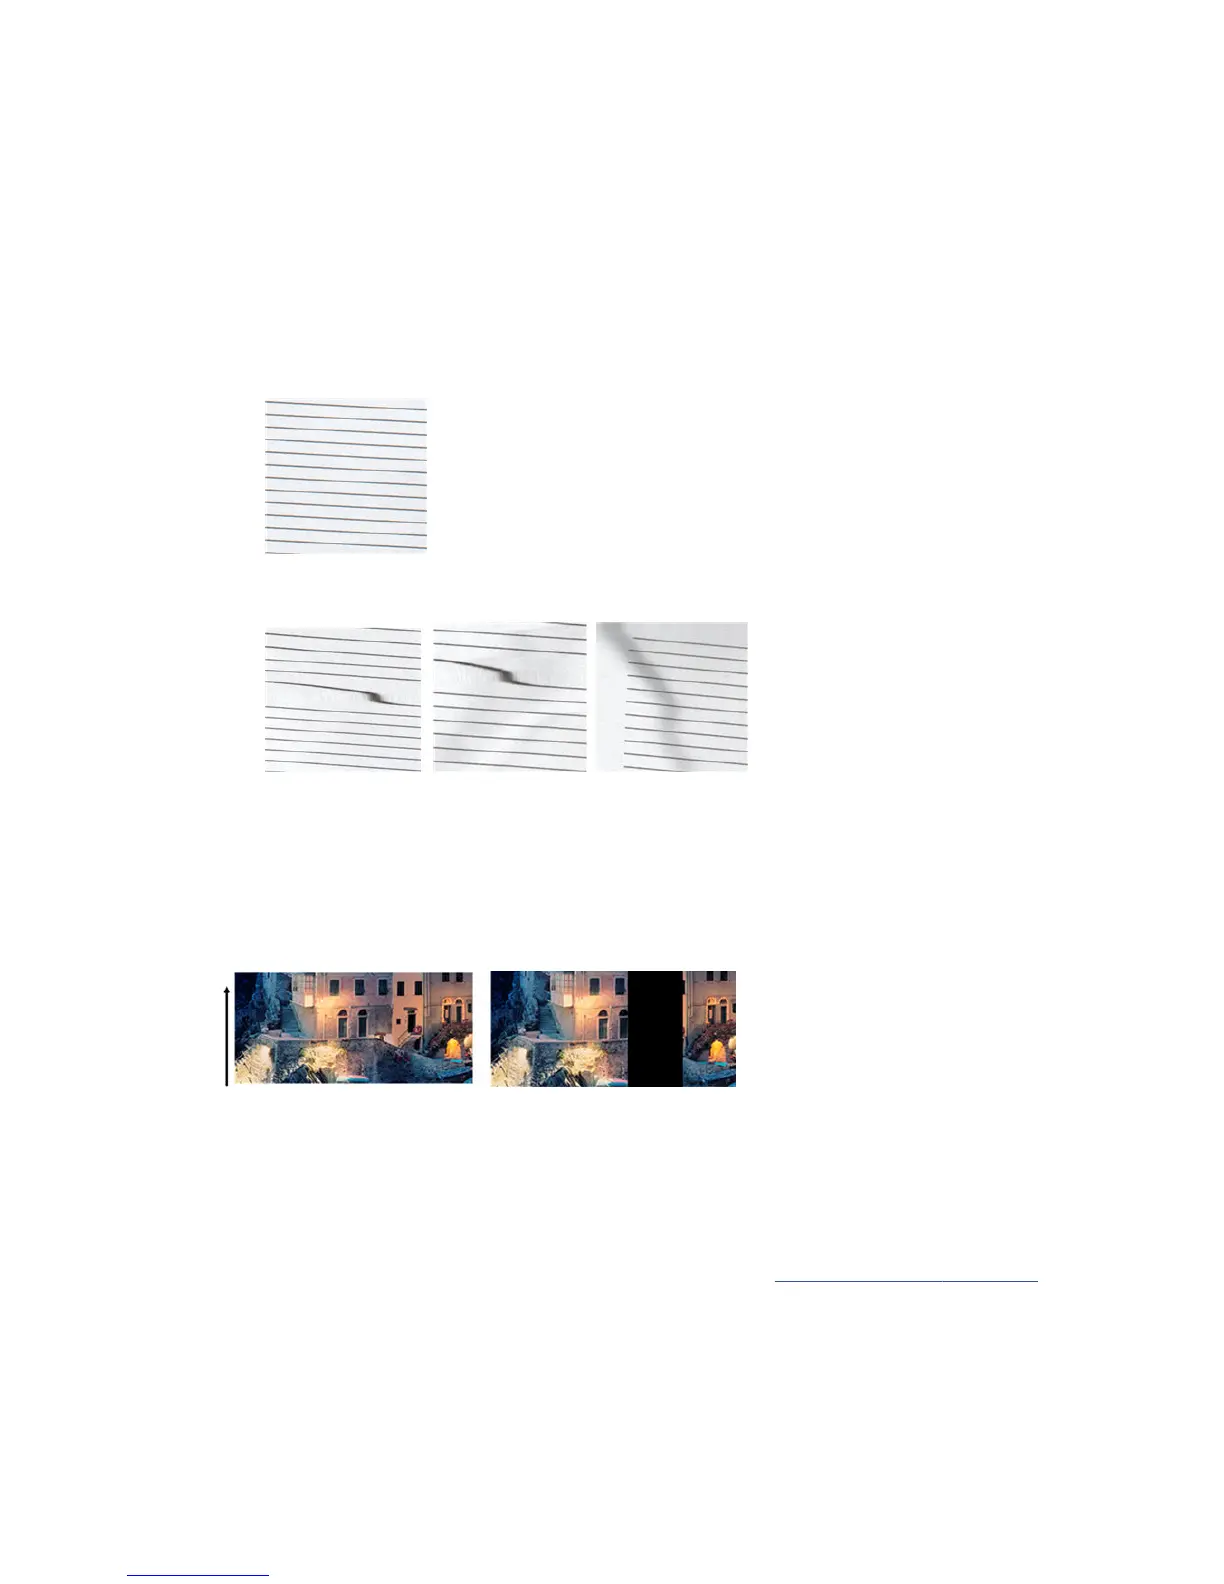
Vertical black band 30 cm wide
Your scanner contains various scanner scanbars, each of which covers an area 30 cm (12 in) wide. If one of the
modules fails, and the scanner hardware check does not detect the failure, you may see a black vertical band,
corresponding to the area covered by a single scanbar, in your scanned image or copy. Here is an example (on
the right). Please note the black arrow indicating the scanning direction in this example.
Original Scan aected by a failing scanbar
Actions
1. Restart the scanner by turning it o and on again. If you nd an error message on the front panel during
this operation, call HP support and report the error message. If no error message appears, try repeating
your scan.
2. If the problem persists, try to calibrate the scanner as indicated in Calibrate the scanner on page 112. If
this operation fails, call HP support with the error code given on the front panel. If no error code
appears, try to repeat your scan.
3. If the problem persists, call HP support and report a “vertical black band 30 cm wide”.
162 Chapter 17 Troubleshooting copy and scan quality issues ENWW
 Loading...

