16
6
EN
KO
ZHCN
ZHTW
JP
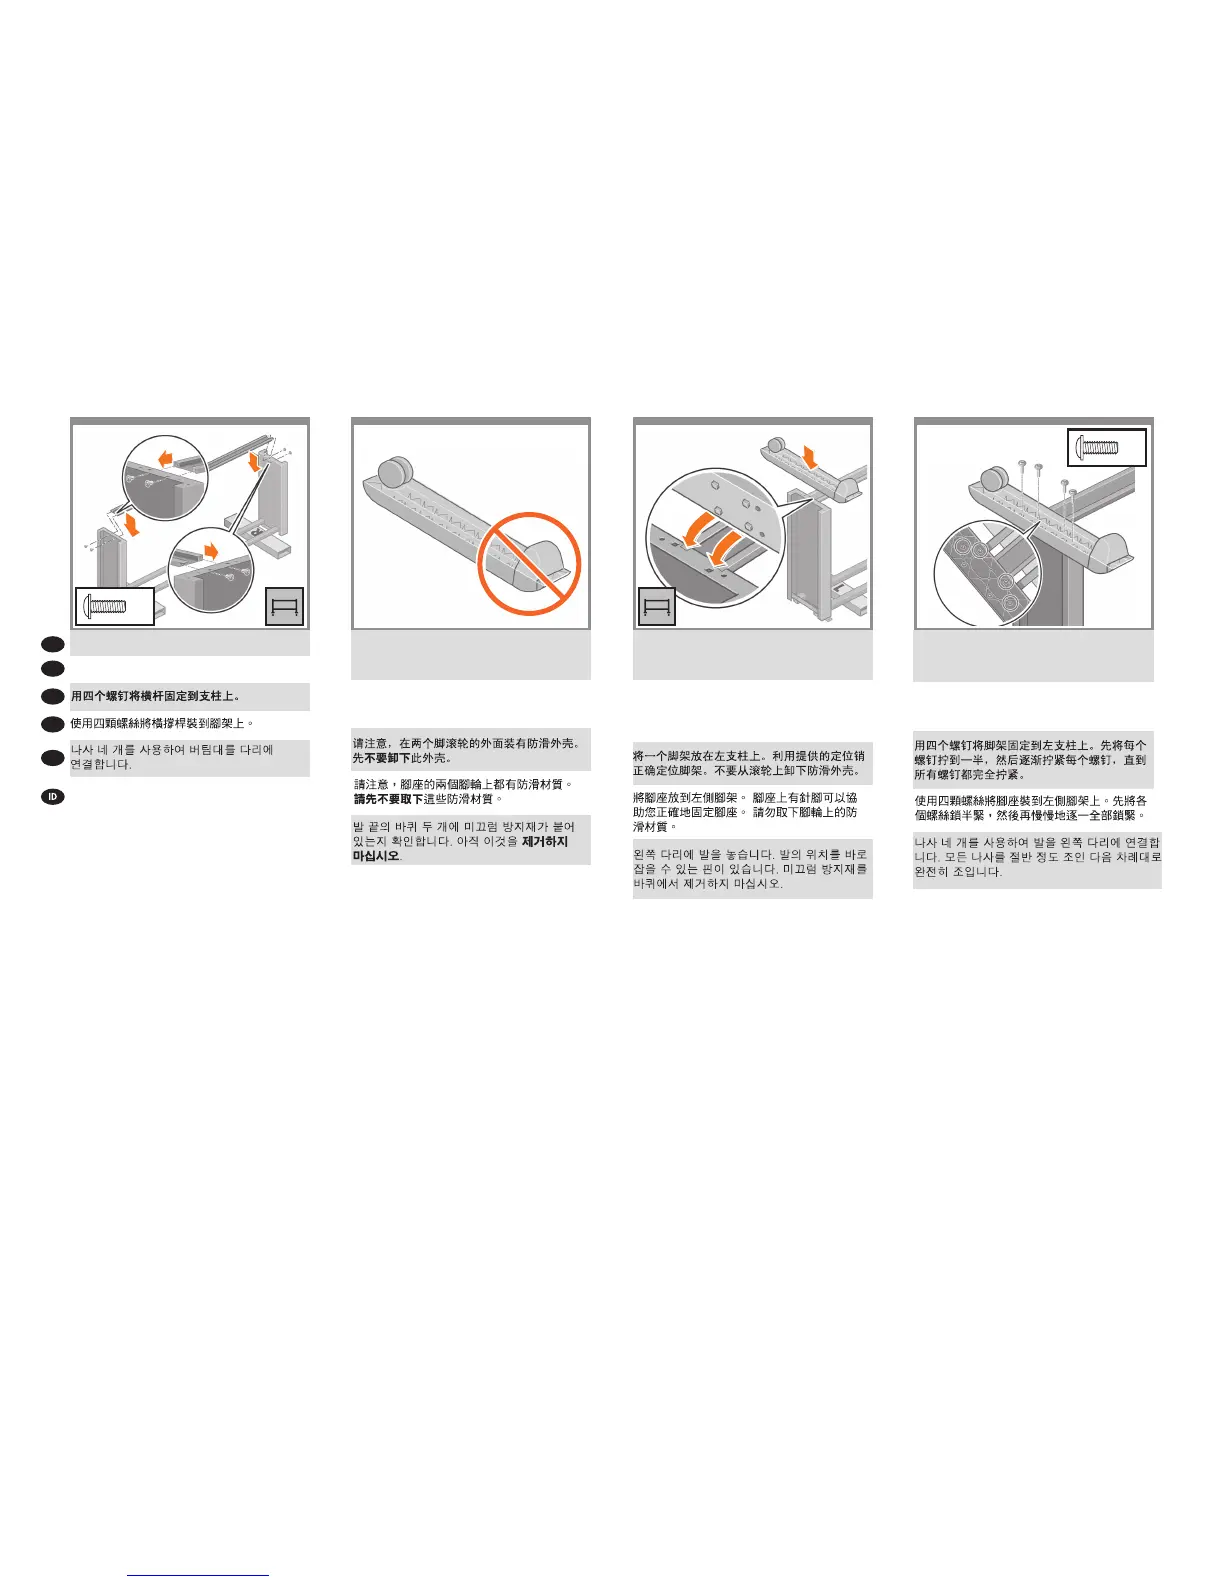
Use four screws to attach the cross-bar to the legs.
4本のネジで、クロスバーを脚部に取り付けます。
Gunakan empat sekrup untuk memasang palang
silang ke kaki-kaki.
Place a foot on the left leg. There are pins to help you
correctly position the foot. Do not remove the anti-slip
material from the wheel.
足部の一方を、左脚部の所定の位置に合わせます。
足部のピンを利用して、正しい位置に合わせてくだ
さい。 キャスターに付いている滑り止めは取り外さ
ないでください。
Pasang pijakan di kaki kiri. Tersedia pin untuk
membantu Anda memasang kaki dengan benar.
Jangan lepaskan bahan anti selip dari roda.
Notice that there is anti-slip material around two of the
wheels on the feet. DO NOT REMOVE this material
yet.
足部の一方のキャスターに滑り止めが付いているこ
とを確認してください。この滑り止めは、この時点
ではまだ取り外さないでください。
Perhatikan bahwa ada bahan anti selip di antara
kedua roda pada kaki. JANGAN LEPASKAN
bahan ini pada tahap ini.
Use four screws to attach the foot to the left leg.
Tighten each screw half-way, and then gradually
tighten each screw completely.
4本のネジで、足部を左脚部に取り付けます。各ネ
ジを 緩めに締め、次に、完全に締まるまで徐々に
締めます。
Gunakan empat sekrup untuk memasang pijakan
ke kaki kiri. Kencangkan setiap sekrup setengah
penuh, kemudian kencangkan perlahan sampai
terkunci sepenuhnya.
15 17 18
x4
x4
 Loading...