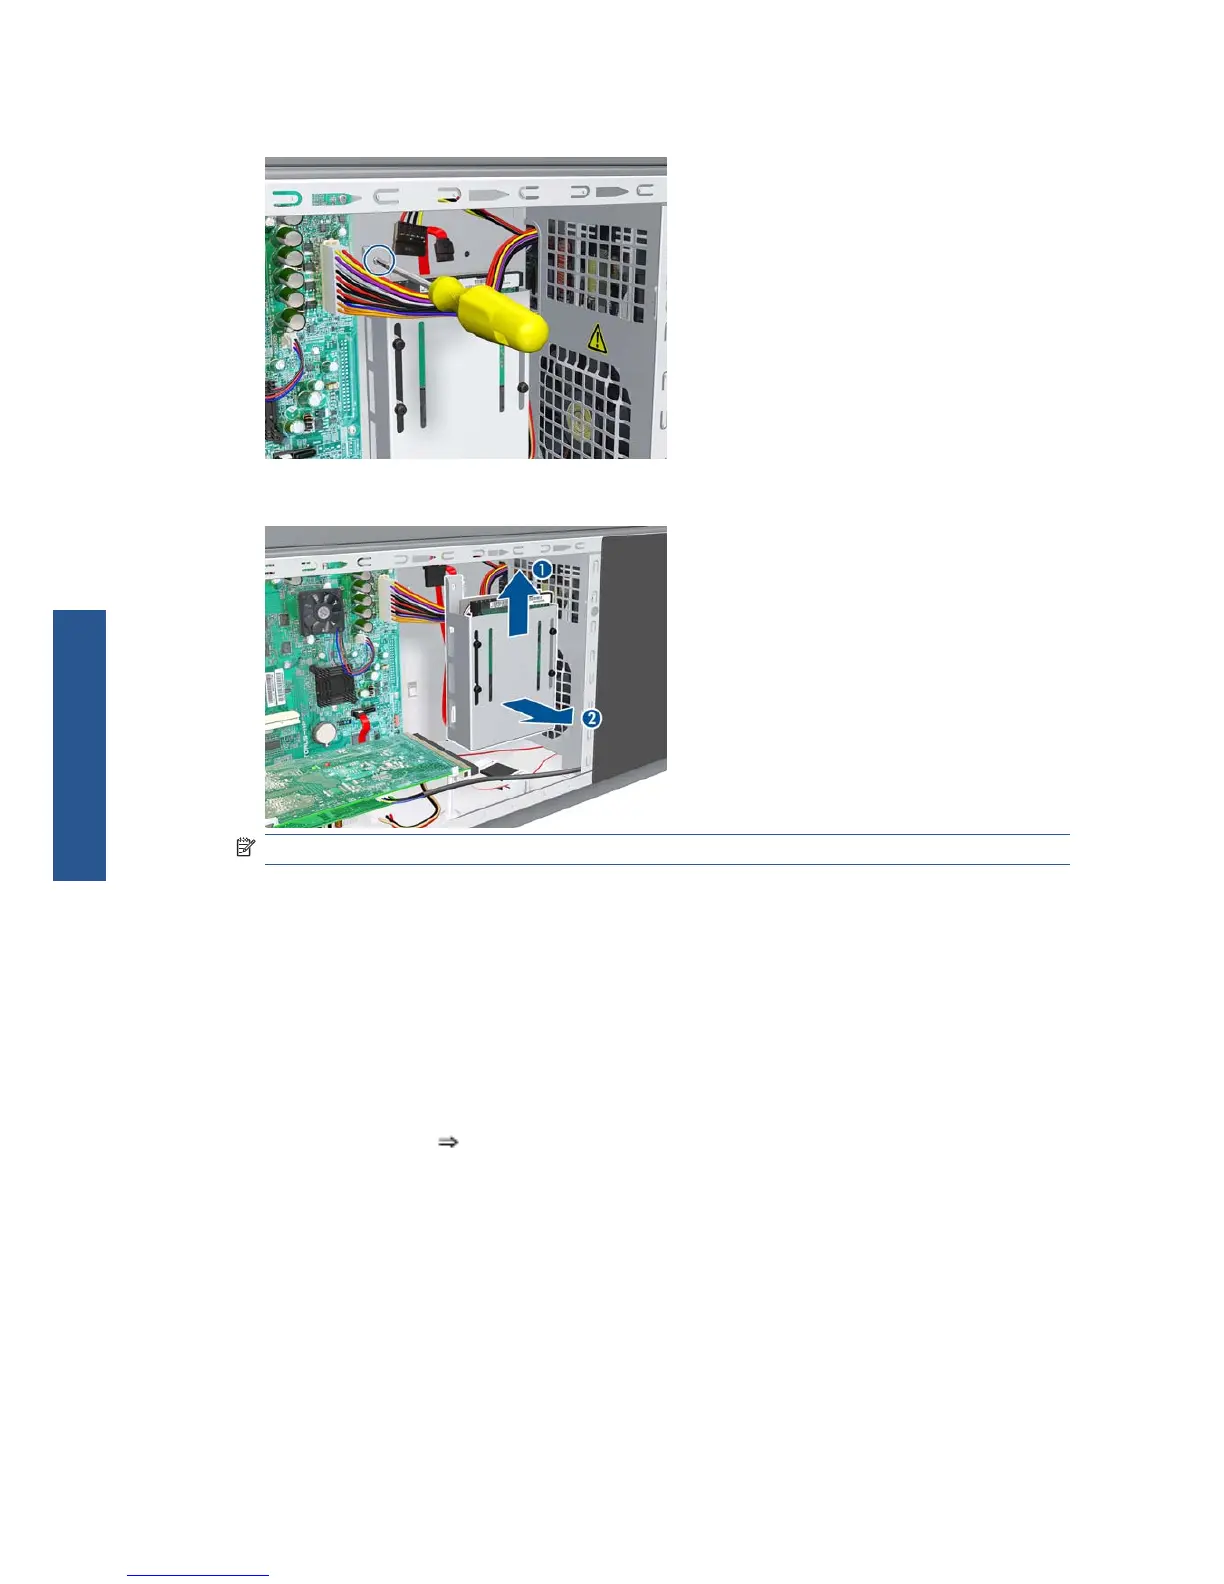
5. Remove one T-10 screw (Type I) from the HDD Holder.
6. Slide the Hard Disk Drive upwards and remove from the printer.
NOTE: It is not necessary to remove the screws securing the HDD inside the metal casing.
Installation
After installing a new HDD, make sure you perform the following User Calibrations:
●
Printhead Alignment.
●
Paper Advance Calibration.
●
Color Calibration.
And also perform the following Service Utility:
●
Carriage PCA Setup
????.
Power Supply Unit (PSU)
Removal
342 Chapter 8 Removal and installation ENWW
Removal and
installation
 Loading...
