Removing the Computer Access Panel
1. Remove/disengage any security devices that prohibit opening the computer.
2. Remove all removable media, such as diskettes or compact discs, from the computer.
3. Turn off the computer properly through the operating system, then turn off any external devices.
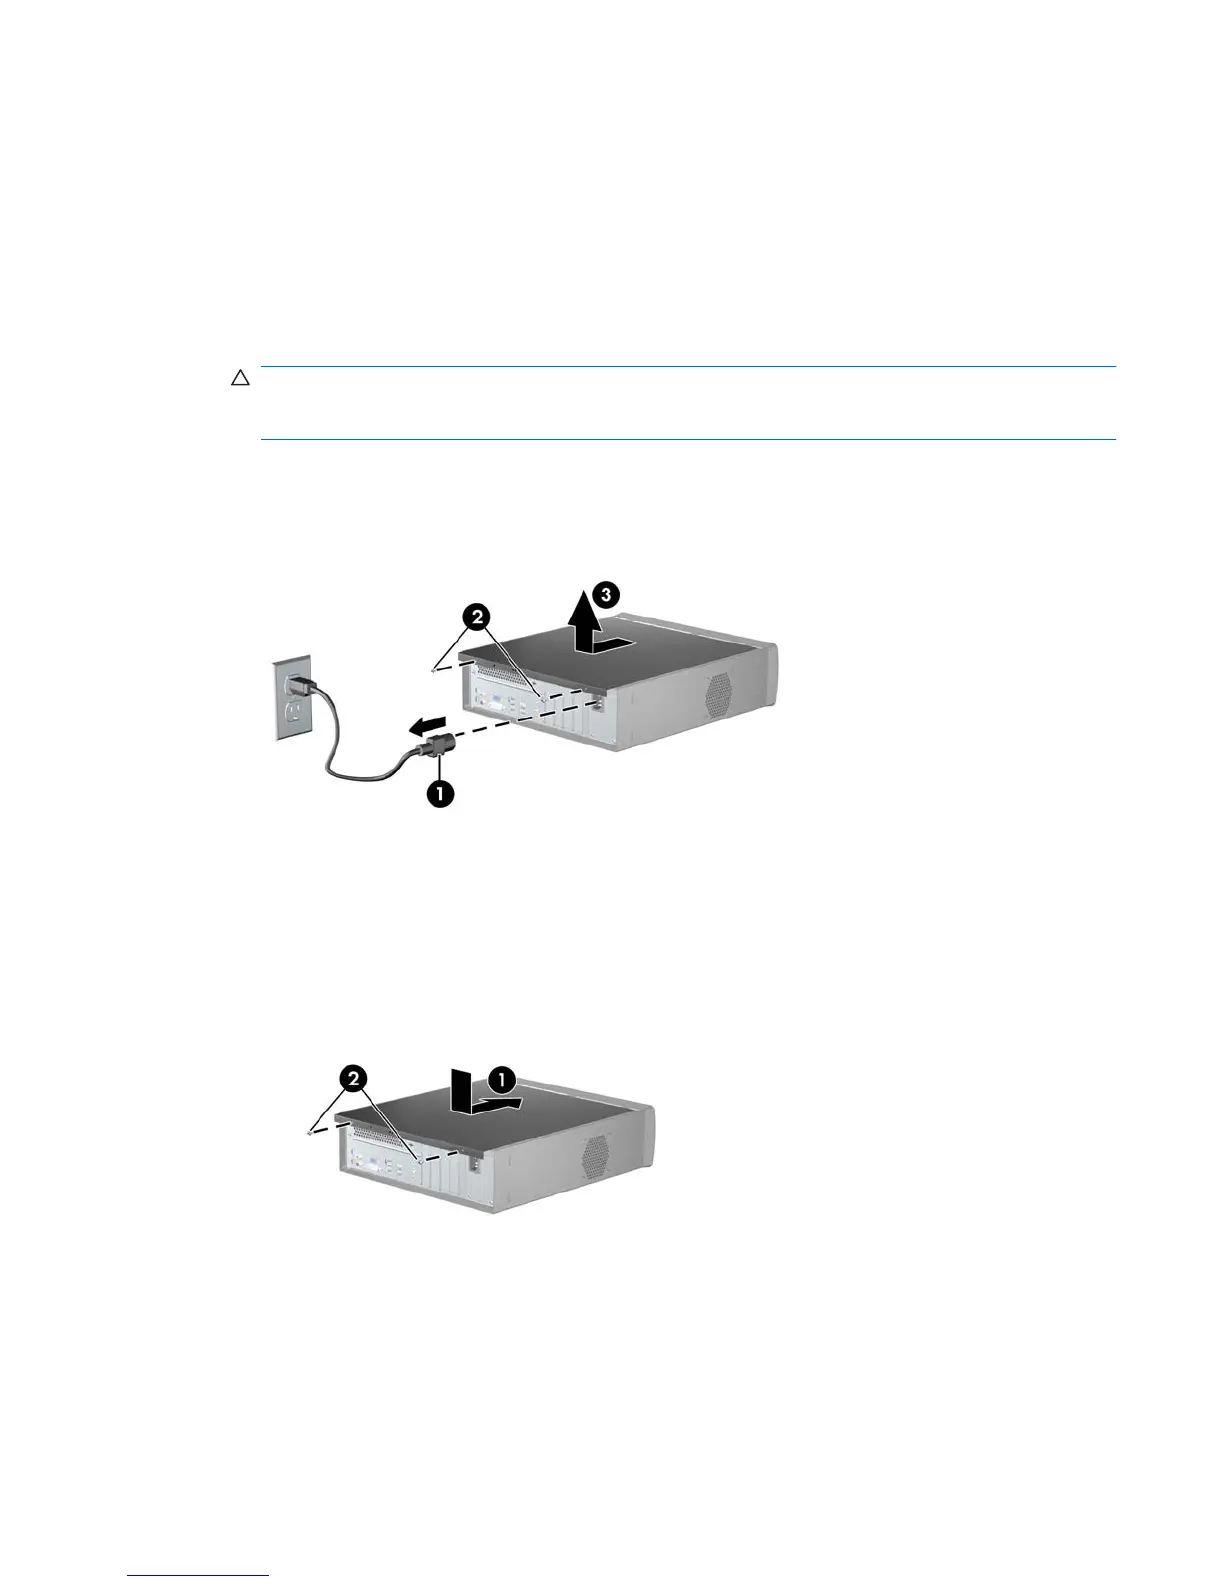
4. Disconnect the power cord from the power outlet and the computer (1), and disconnect any external
devices.
CAUTION: Regardless of the power-on state, voltage is always present on the system board as
long as the system is plugged into an active AC outlet. You must disconnect the power cord to
avoid damage to the internal components of the computer.
5. Remove the two screws that secure the access panel to the computer chassis (2).
6. Slide the access panel back about 1.3 cm (1/2 inch), then lift it away from and off the unit (3).
Figure 2-1 Removing the Power Cord and Access Panel
Replacing the Computer Access Panel
Place the access panel on the chassis with about 1.3 cm (1/2 inch) of the panel hanging off the back of
the chassis and slide it into place (1). Replace the two screws that secure the access panel to the chassis
(2).
Figure 2-2 Replacing the Access Panel
ENWW Removing the Computer Access Panel 9




 To Next Page