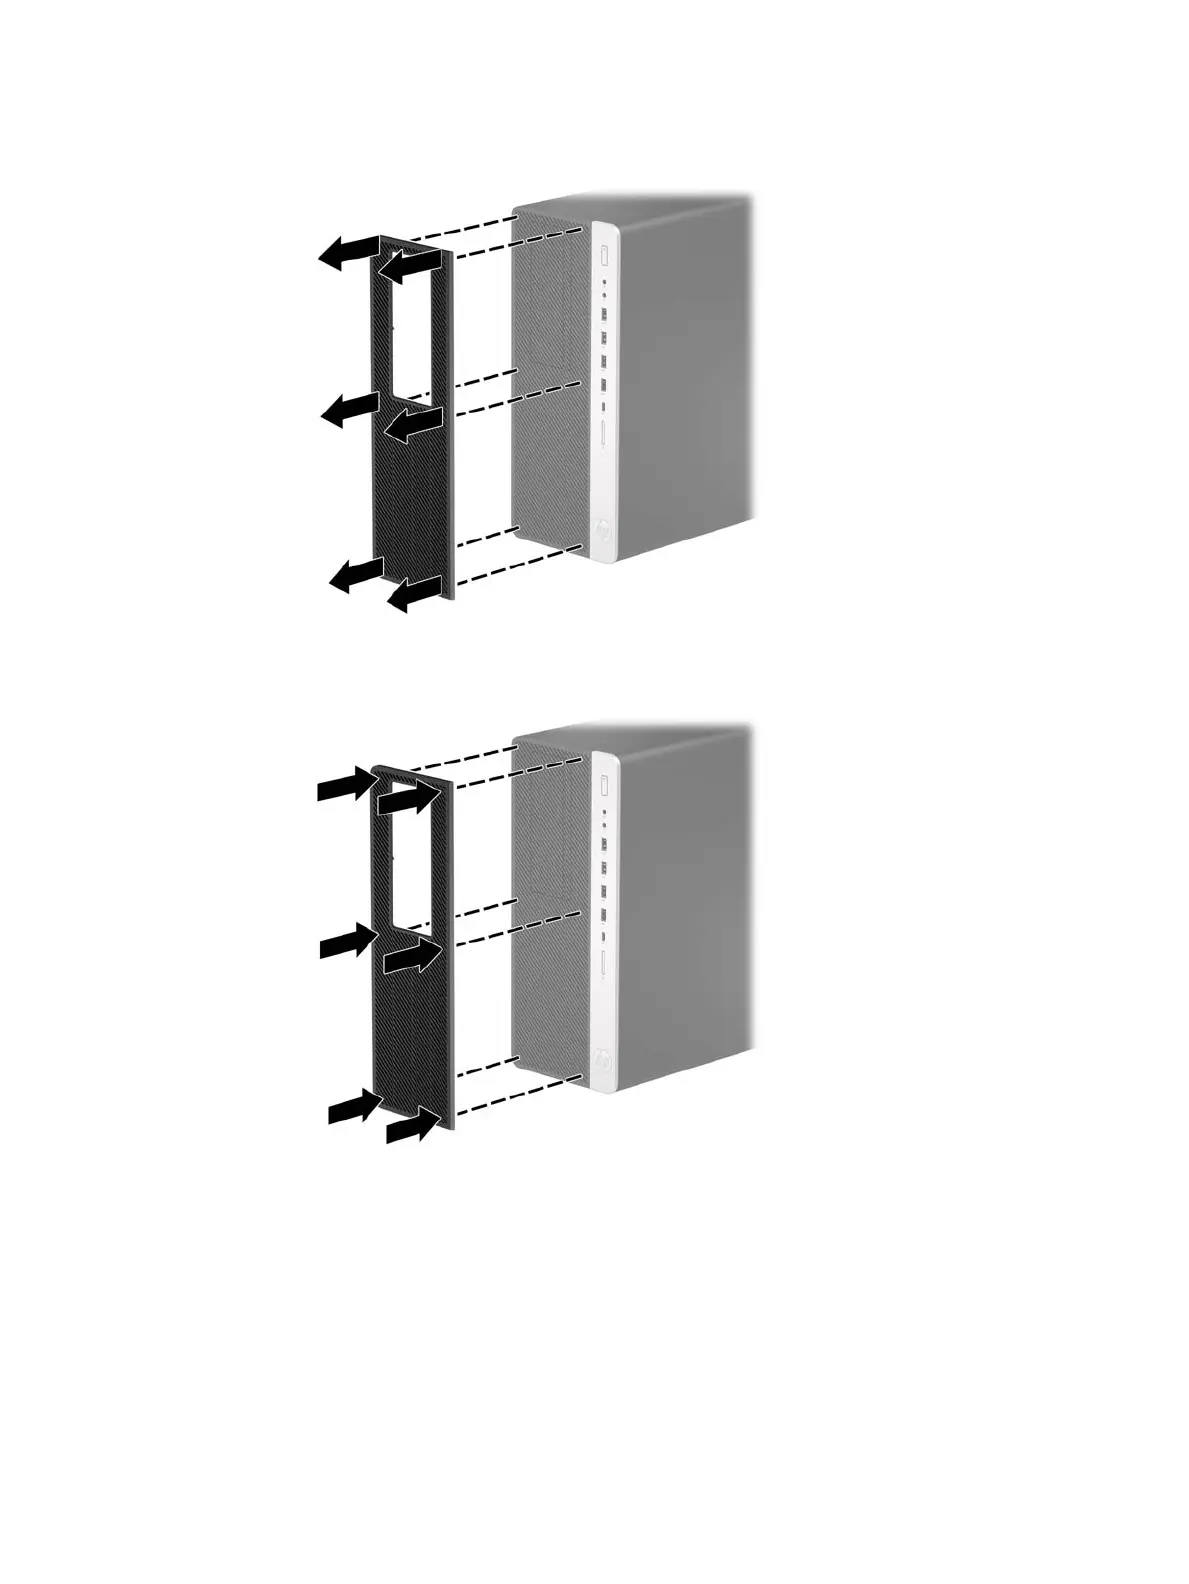
3. To remove the dust lter, use your ngers to separate the lter from the front bezel at the tab locations
shown below.
4. Use a soft brush or cloth to clean dust from the lter. If heavily soiled, rinse the lter clean with water.
5. To replace the dust lter, press the lter rmly onto the front bezel at the tab locations shown below.
6. Reconnect the power cord and any external devices, and then turn on the computer.
Removing and installing the optional front bezel dust lter 11
 Loading...