Removing and installing drives
When installing drives, follow these guidelines:
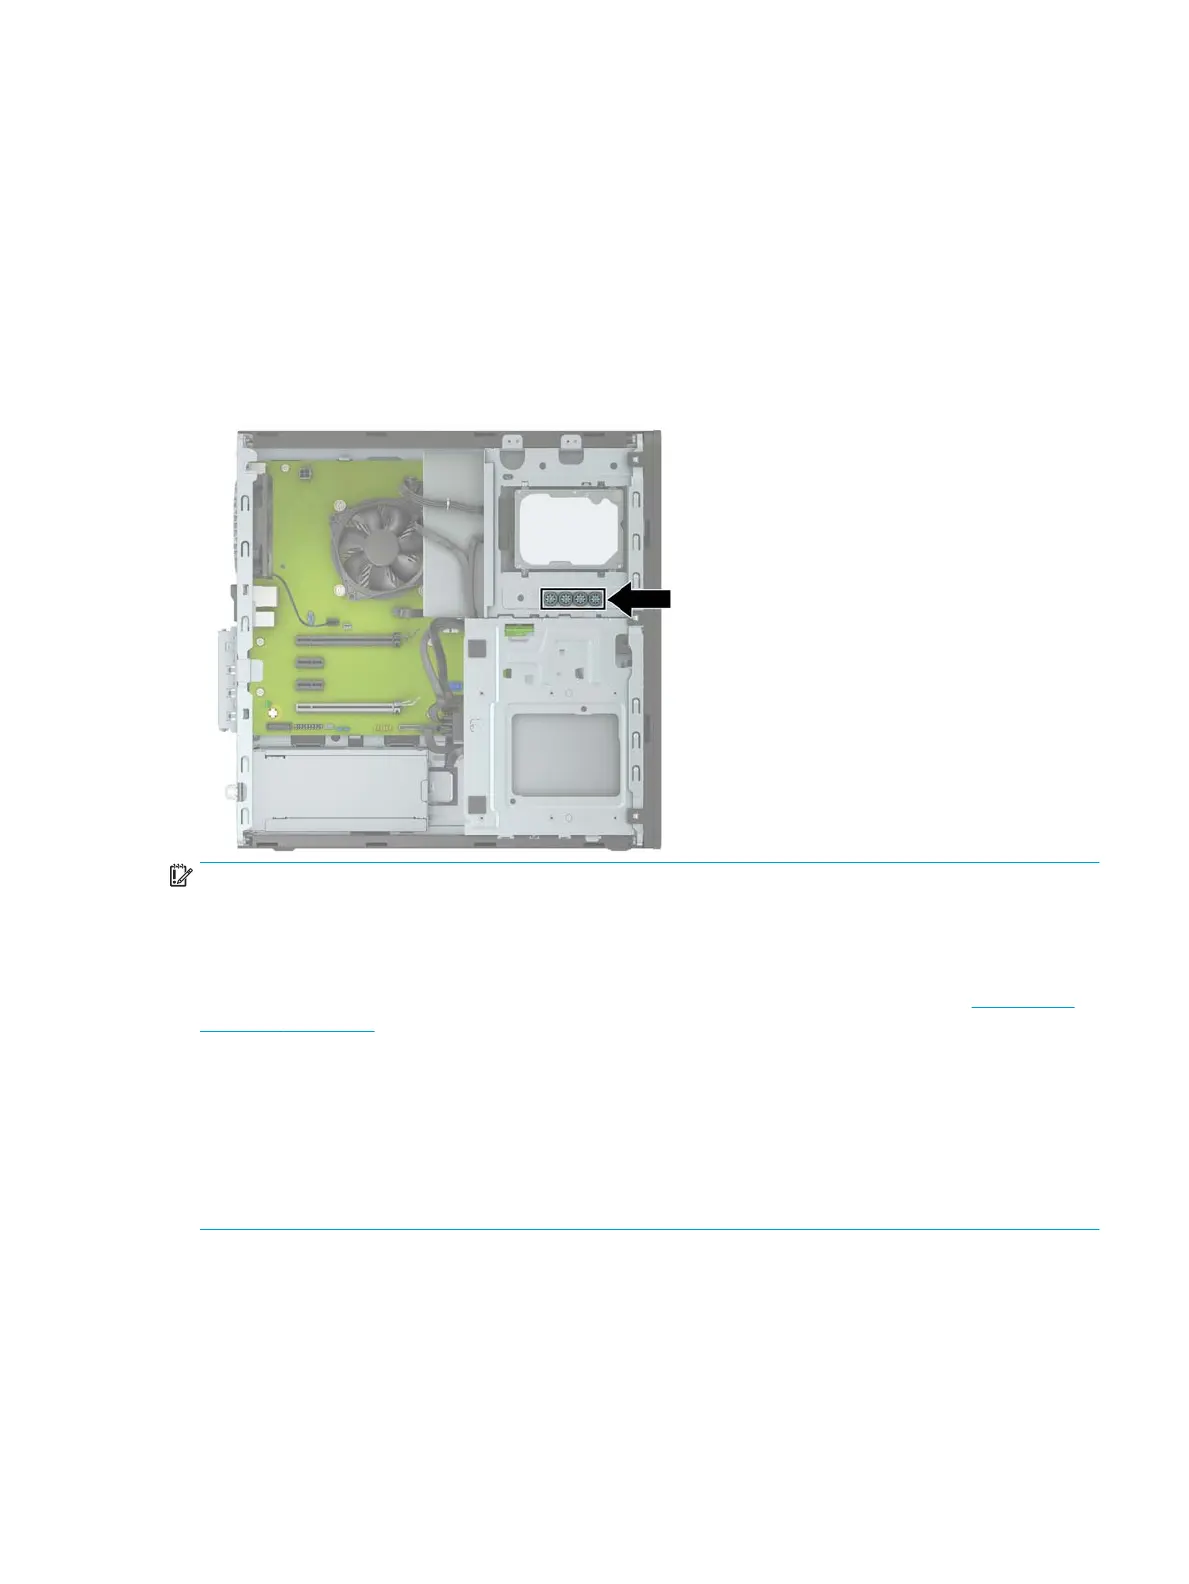
●
The primary Serial ATA (SATA) hard drive must be connected to the dark blue primary SATA connector on
the system board labeled SATA0.
●
Connect secondary hard drives and optical drives to any of the light blue SATA connectors on the system
board (labeled SATA1, SATA2, SATA3, and SATA4).
●
You must install mounting screws for hard drives and 5.25-inch optical drives to ensure the drive will
line up correctly in the drive cage and lock in place. HP has provided four extra 3.5-inch hard drive
mounting screws installed on top of the drive bay.
IMPORTANT: To prevent loss of work and damage to the computer or drive:
If you are inserting or removing a drive, shut down the operating system properly, turn o the computer, and
unplug the power cord. Do not remove a drive while the computer is on or in standby mode.
Before handling a drive, be sure that you are discharged of static electricity. While handling a drive, avoid
touching the connector. For more information about preventing electrostatic damage, refer to Electrostatic
discharge on page 55.
Handle a drive carefully; do not drop it.
Do not use excessive force when inserting a drive.
Avoid exposing a hard drive to liquids, temperature extremes, or products that have magnetic elds such as
monitors or speakers.
If a drive must be mailed, place the drive in a bubble-pack mailer or other protective packaging and label the
package “Fragile: Handle With Care.”
Removing and installing drives 23
 Loading...