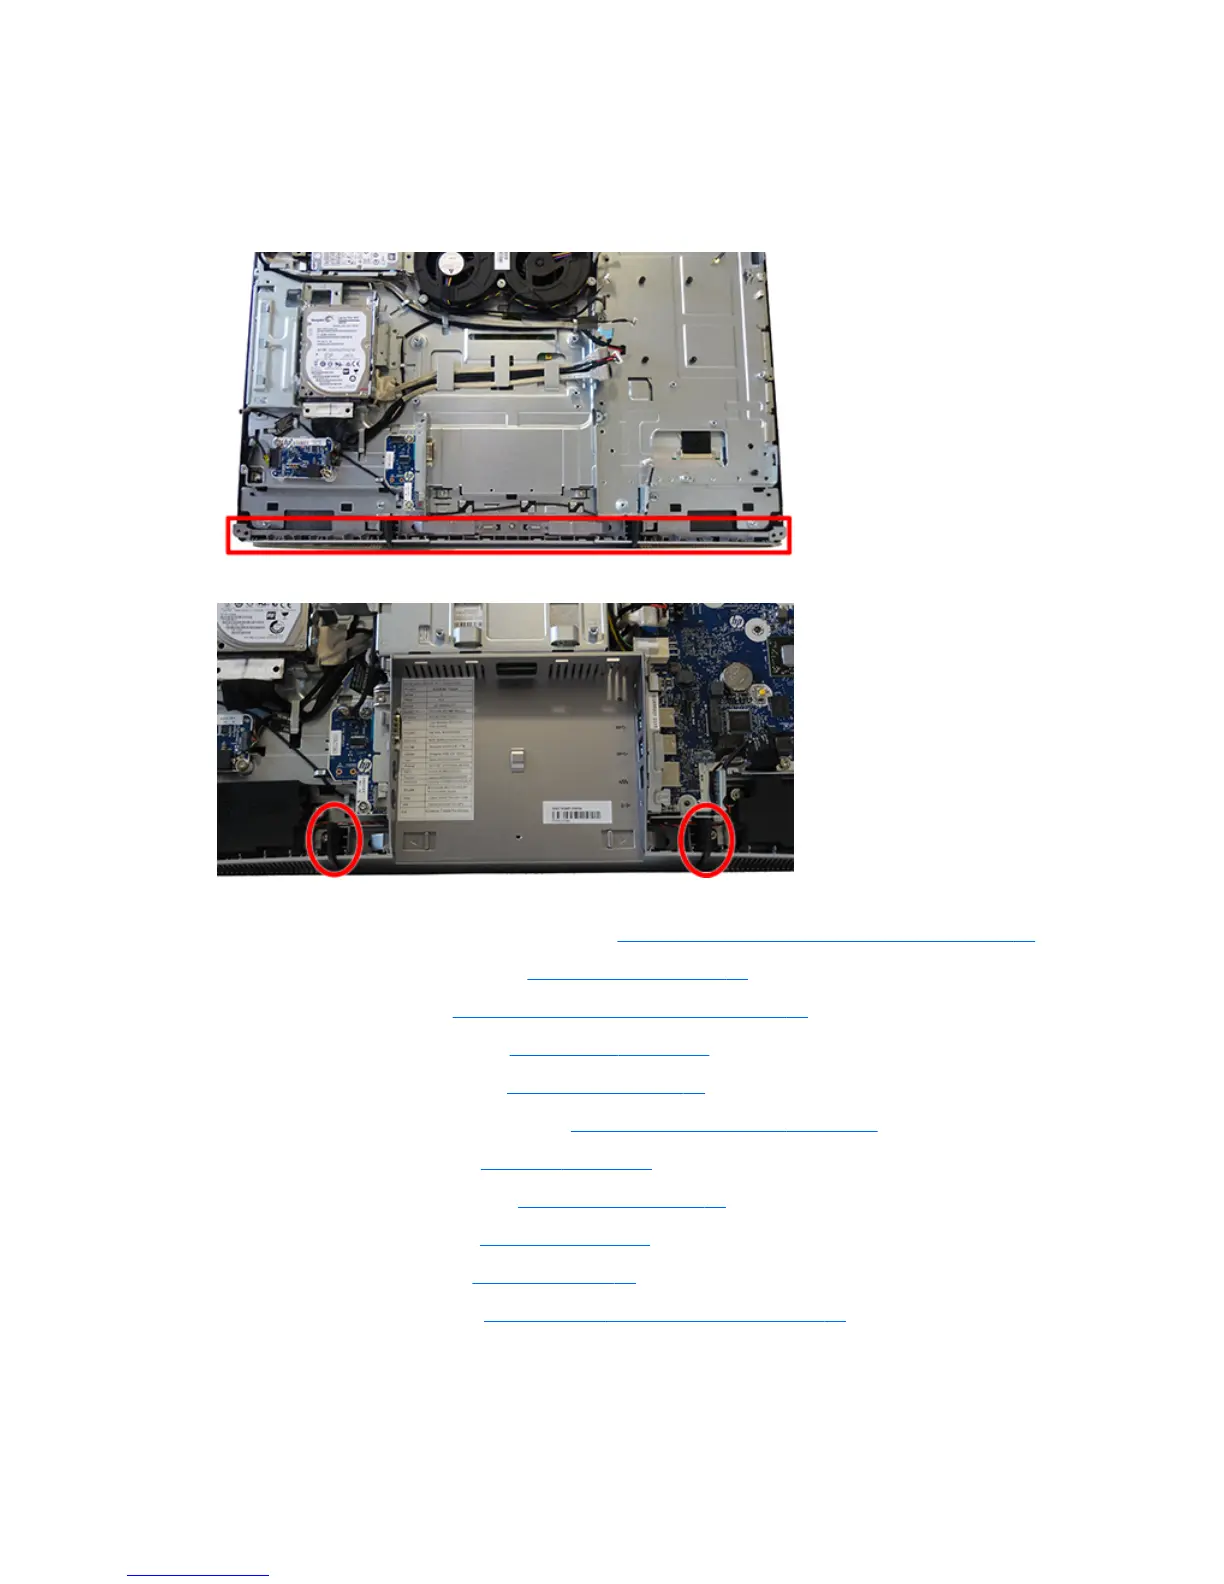
Bottom trim and feet
The bottom trim is secured with three screws. The two outer screws also secure the feet.
Bottom trim location:
Feet locations:
To remove the bottom trim and feet:
1. Prepare the computer for disassembly (see Preparing to disassemble the computer on page 31).
2. Remove the rear port cover (see Rear port cover on page 31).
3. Remove the stand (see Attaching and removing a stand on page 32).
4. Remove the access panel (see Access panel on page 37).
5. Remove the optical drive (see Optical drive on page 41).
6. Remove the system board shield (see System board (EMI) shield on page 48).
7. Remove the heat sink (see Heat sink on page 59).
8. Remove the system board (see System board on page 64).
9. Remove the speakers (see Speakers on page 74).
10. Remove the top trim (see Top trim on page 45).
11. Remove the right trim (see Right trim and ngerprint reader on page 80).
12. Remove the two Torx screws that secure the feet (1), and the Torx screw that secures the bottom trim
(2) to the computer.
Bottom trim and feet 83

 Loading...