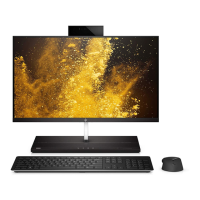
Do you have a question about the HP EliteOne 705 G1 and is the answer not in the manual?
Guides through activating and customizing software in Windows 7.
Guides through activating and customizing software in Windows 8.
Explains electrostatic discharge (ESD) and how to prevent damage.
Outlines essential steps to take before disassembling the computer.
Information on replacing optical and hard disk drives.
Detailed procedure for replacing a hard disk drive.
Instructions for removing and installing memory modules (SODIMMs).
Steps for replacing the computer's internal battery.
Steps for removing and installing the computer's processor.
Instructions for removing and replacing the computer's power supply.
Detailed procedure for removing and replacing the system board.
Steps for removing the front bezel and display panel assembly.
Overview of the Computer Setup (F10) Utility and its functions.
Details options within the 'File' menu of Computer Setup.
Details options within the 'Storage' menu of Computer Setup.
Details options within the 'Security' menu of Computer Setup.
Details options within the 'Power' menu of Computer Setup.
Details options within the 'Advanced' menu of Computer Setup.
Explains the benefits and purpose of running HP PC Hardware Diagnostics.
Provides methods to access and execute HP PC Hardware Diagnostics.
Lists steps to take before contacting technical support for problems.
Troubleshooting steps for power-related issues.
Solutions for issues related to hard drive errors or performance.
Overview of backup and recovery tools for Windows 8.
Steps to create recovery media and system restore points in Windows 8.
Overview of backup and recovery tools for Windows 7.
Procedure for performing a complete system recovery.
Lists POST errors with numeric codes and associated recommended actions.
Explains front panel LED codes and their meanings for diagnostics.
Instructions for resetting the system password using a jumper.
Steps to clear and reset the CMOS settings to factory defaults.
| Memory | Up to 16 GB DDR3 |
|---|---|
| Resolution | 1920 x 1080 |
| Network | Gigabit Ethernet |
| Processors | AMD A4, A6, A8, or A10 PRO APU |
| Graphics | Integrated AMD Radeon Graphics |
| Storage | Up to 256 GB SSD |
| Display | 23-inch diagonal |
| Audio | Integrated stereo speakers |
| Ports | USB 3.0, USB 2.0, HDMI, DisplayPort, VGA |
| Operating System | Windows 8.1 Pro |
| Wireless | Bluetooth 4.0 |
| Weight | 15.4 lbs (7 kg) |

