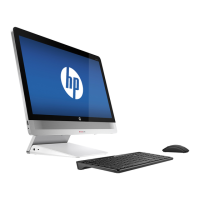
3.1 List the basic steps that should typically be followed to remove components and materials requiring selective treatment:
1. Remove the access panel.(see Figure 1 below)
2. Remove the Front panel from chassis.(see Figure 2- 3 below)
3. Disconnect ODD SATA power cable and SATA data cable from ODD.(see Figure 4- 7 below)
4. Remove the ODD from ODD cage.(see Figure 8-9 below)
5. Disconnect HDD SATA power cable and SATA data cable from HDD.(see Figure 10-11 below)
6. Remove the HDD from chassis.(see Figure 12-13 below)
7. Disconnect SATA power/data cable from MB and remove them from the chassis.(see Figure 14-17 below)
8. Disconnect PSU cable from MB.(see Figure 18-20 below)
9. Disconnect FIO cable from MB and remove FIO from chassis.(see Figure 21-24 below)
10. Remove PS2&Audio from chassis.(see Figure 25-26 below)
11. Remove the memory from the MB .(see Figure 27 below)
12. Remove speaker from chassis.(see Figure 28-29 below)
13. Remove fan duct from NB.(see Figure 30 below)
14. Remove heatsink from MB.(see Figure 31 below)
15. Remove the CPU from MB.(see Figure 32-33 below)
16. Disconnect fan cable from MB.(see Figure 34 below)
17. Remove the battery from MB.(see Figure 35 below)
18. Remove the MB from chassis.(see Figure 36-38 below)
19. Remove the fan from chassis.(see Figure 39 below)
20. Remove the PSU from chassis.(see Figure 40 below)
21. Separate the fan and fan duct.(see Figure 41-42 below)
3.2 Optional Graphic. If the disassembly process is complex, insert a graphic illustration below to identify the items
contained in the product that require selective treatment (with descriptions and arrows identifying locations).

 Loading...

