2-19
Installing the switch
Installation procedure
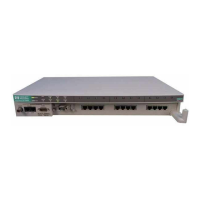
Removing the SFPs
Note You should disconnect the network cable from the SFP before removing it from
the switch.
Depending on when you purchased your HP SFP, it may have either of three different
release mechanisms: a plastic tab on the bottom of the SFP, a plastic collar around
the SFP, or a wire bail.
■ To remove the SFPs that have the plastic tab or plastic collar, push the tab or
collar toward the switch until you see the SFP release from the switch (you can
see it move outward slightly), and then pull it from the slot.
■ To remove the SFPs that have the wire bail, lower the bail until it is approximately
horizontal, and then using the bail, pull the SFP from the slot.
After removing the SFP, replace the fiber-optic protective cover.
Connections to HP ProLiant Gen8 Servers
Connect network devices, such as an HP ProLiant MicroServer Gen8 to any of the
PS1810 Switch’s RJ-45 ports using Class 5E or better Ethernet cables.
Note Any of the switch’s network ports can be used for the following connections. You do
not have to use the specific ports shown in the illustrations.
As shown in the following illustrations, for connection to an HP ProLiant
MicroServer Gen8, it is recommended that you make the following connections:
■ ➊ to ➋ – to provide internet access for the switch and server, connect any of
the switch ports(1 - 8) to your ISP connection, or to a router that is connected to
the internet.
■ ➌ to ➍ – for data communication between the switch and the server, connect
a network cable between any of the available switch ports and either one of the
server’s Ethernet ports. Connection to server ethernet port 2 is shown.
■ ➎ to ➏ – to be able to discover and monitor the health status of HP servers
from the switch, connect a network cable between any of the available switch
ports and the server’s iLO port.
Note It is also possible to use a single cable between the switch and server for data and
iLO communications, but this requires that you connect to server Ethernet port 1, and
requires changes to the server configuration to cause the server Ethernet 1 port to be
“shared” for data and iLO communications. For more information on shared iLO,
see the server documentation.