Scanner support-frame
1. Remove the following assemblies:
●
Scanner assembly. See
Scanner assembly on page 85.
●
Left cover. See
Side covers on page 110.
●
Rear cover and fuser cover. See
Rear cover and fuser cover on page 113.
●
Print-cartridge door. See
Print-cartridge door on page 112.
●
Front cover. See
Front cover on page 115.
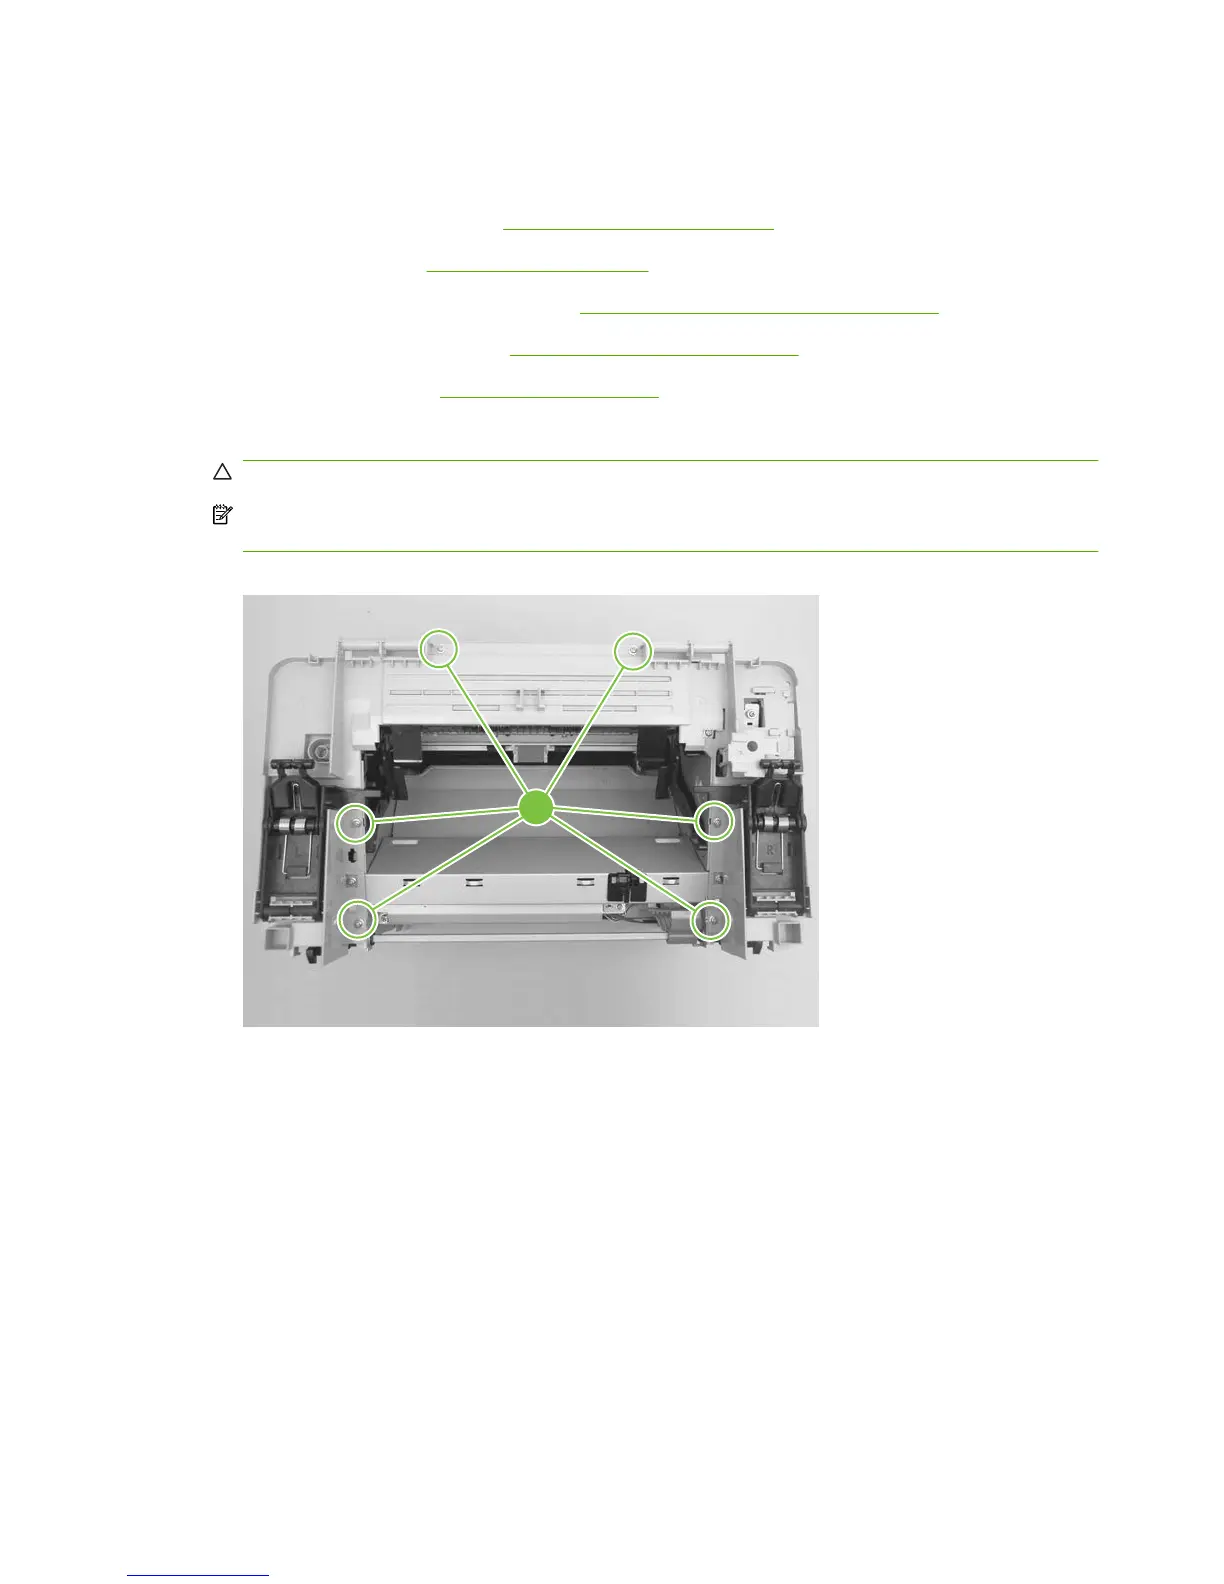
2. Remove six screws (callout 1).
CAUTION: Be careful not to drop any screws into the product.
NOTE: If you turn over the scanner support-frame after you remove it, the two scanner cushions
might fall out and be misplaced.
Figure 6-86 Removing the scanner support-frame (1 of 4)
1
124 Chapter 6 Removal and replacement ENWW