EasyManuals Logo

HP Latex R1000 User Manual

HP Latex R1000
27 pages
To Next Page IconTo Next Page
To Previous Page IconTo Previous Page
Page #17 background imageLoading...
Page #17 background image
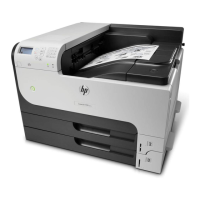
6. At the output side of the printer, install the back end at the ruler, inserting it by the edge and sliding it to the
correct position: that suggested by the Internal Print Server, or the same position that you used on the
input side of the printer.
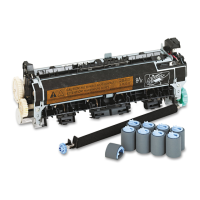
7. Pull the handle and insert it into the back end. Visually check through the print zone that the edge holders
are straight when pulling the handle.
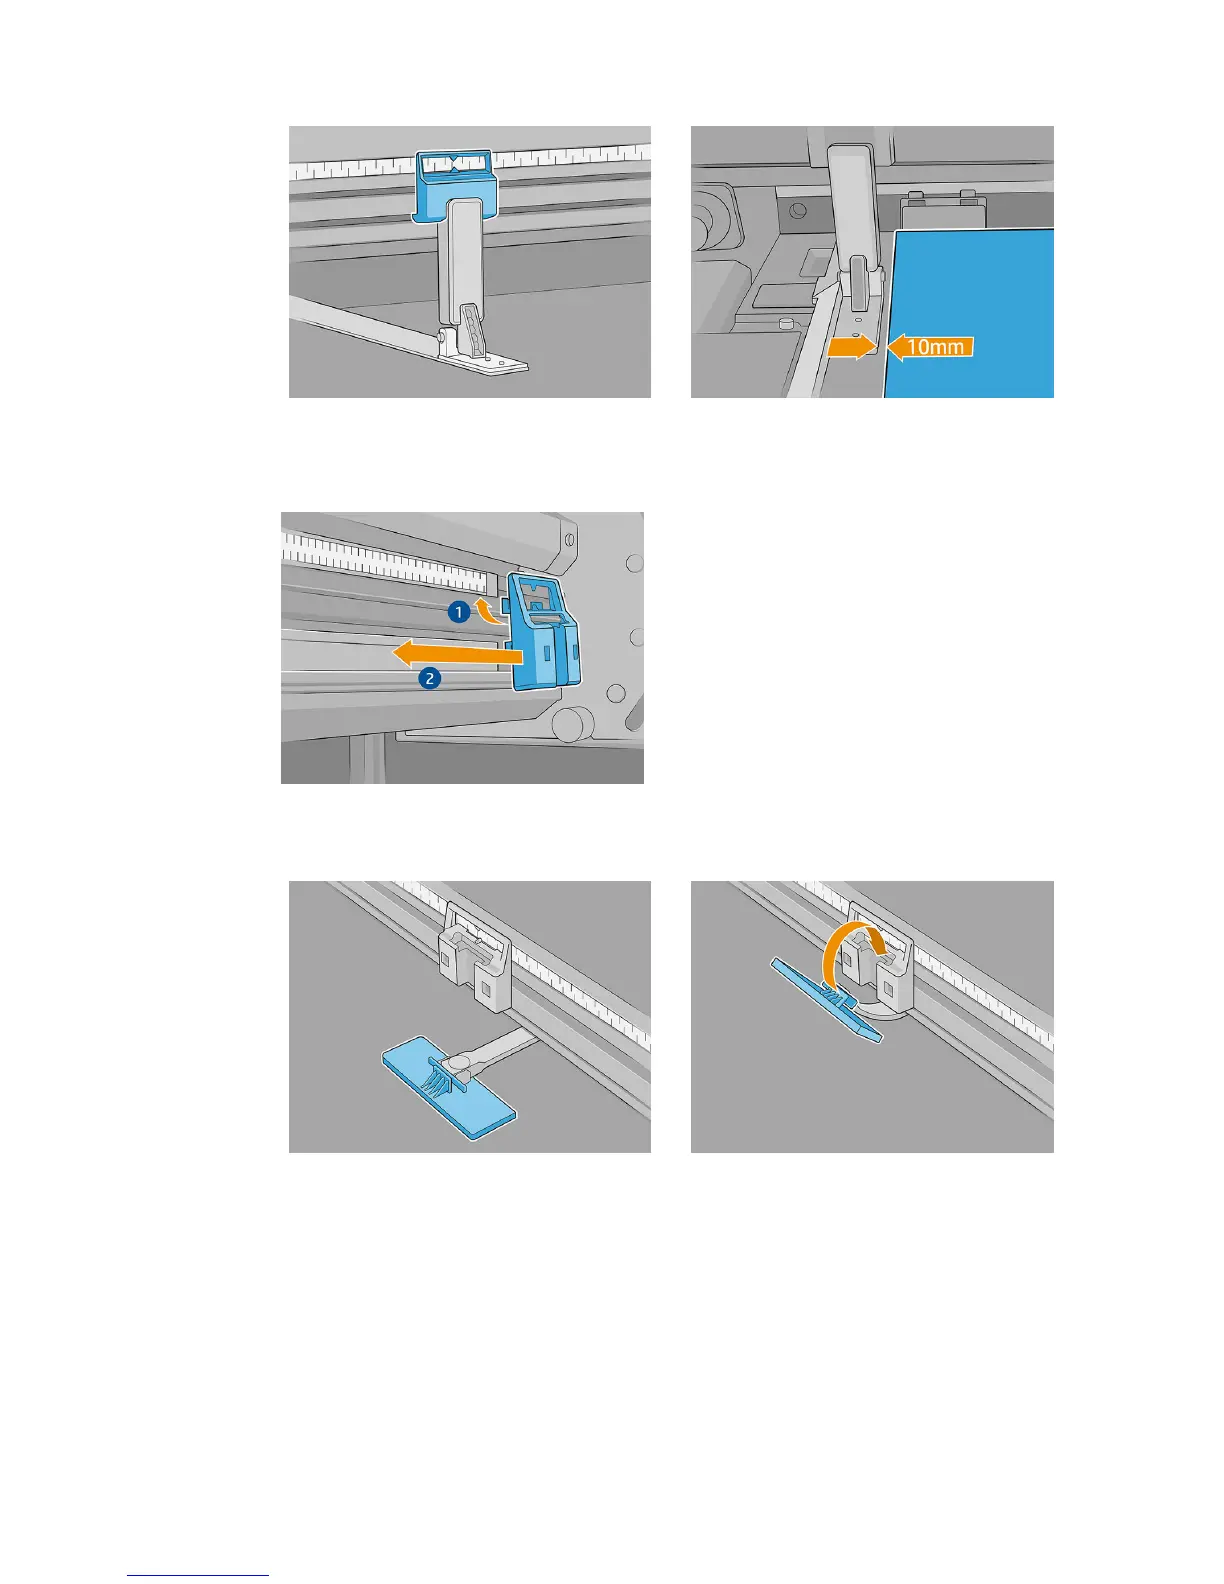
8. Take the alignment-bar extenders and install them on the alignment bar. Here is the installation process in
detail:
a. Insert the anges at the bottom edge of the alignment bar, then press at the top against the
extension bar.
ENWW Install the edge holders 13

Questions and Answers:

Question and Answer IconNeed help?

Do you have a question about the HP Latex R1000 and is the answer not in the manual?

HP Latex R1000 Specifications

General IconGeneral
Ink TypesHP Latex Inks
Print TechnologyLatex
Print Resolution1200 x 1200 dpi
Media HandlingRoll-to-roll
ApplicationsSignage, banners
Ink ColorsCyan, Magenta, Yellow, Black, Light Cyan, Light Magenta
Part NumberCZ103A (Cyan), CZ104A (Magenta), CZ105A (Yellow), CZ106A (Black), CZ107A (Light Cyan), CZ108A (Light Magenta), CZ109A (White), CZ110A (Primer)

Related product manuals