8 Upgrading and Servicing Guide
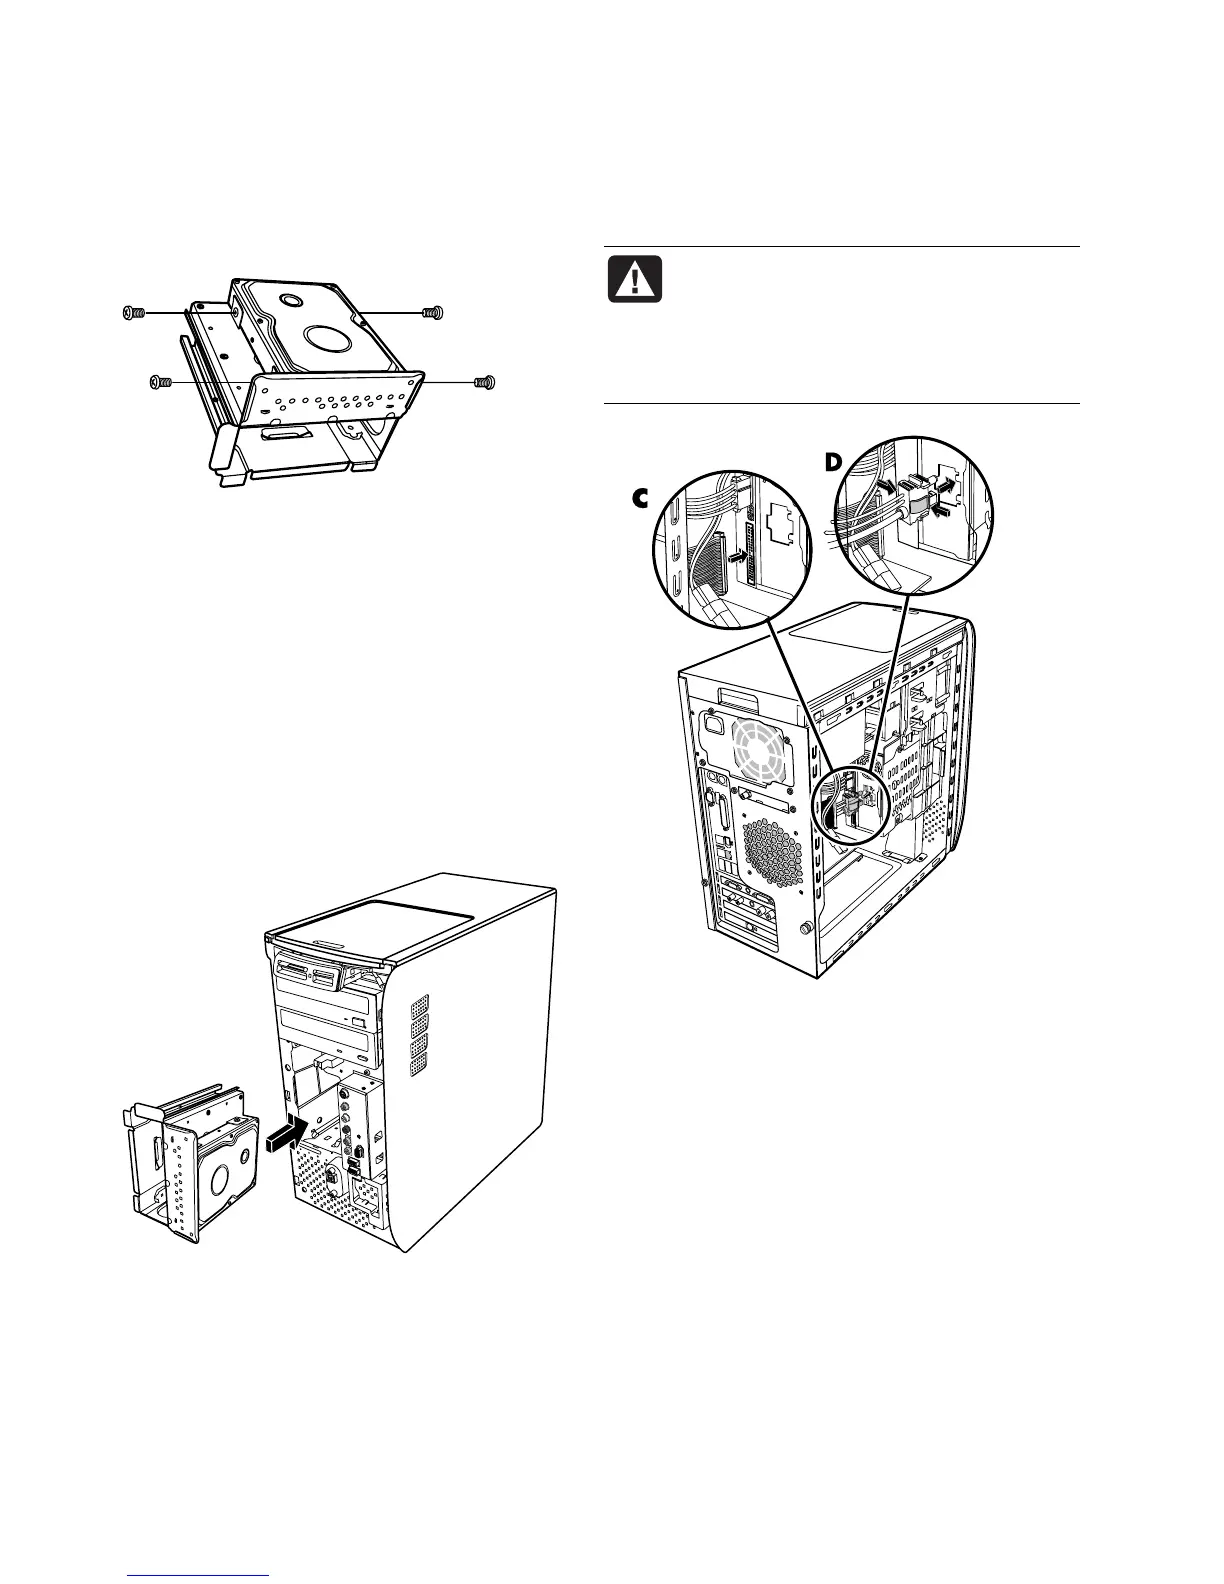
9 Remove the four screws that secure the hard disk
drive to the drive bay. Lift the hard disk drive up
from the drive bay bracket.
Replacing a Hard Disk Drive
The hard disk drive of your PC attaches to your
HP Personal Media Drive bay.
1 Follow the steps in “Removing a Hard Disk Drive”
on page 6.
2 Align the hard disk drive with the holes on the
HP Personal Media Drive bay bracket. Insert and
tighten the four screws.
3 Slide the drive bay into the PC until it snaps into
place.
4 Attach the screws to the front of the drive bay.
5 Attach the data and power supply cables to the
back of the hard disk drive.
WARNING: For Parallel ATA drives,
connect the IDE cable end (C) labeled
Master to the primary hard disk drive. If
the IDE cable is not connected correctly,
the PC will not be able to locate the hard
disk drives and data may be lost.
6 The Personal Media Drive bay connector has a
special keying feature and can only be inserted in
the correct position. Squeeze the tabs on the
connector and insert the cable into the drive bay
(D). Make sure the connector is securely inserted
into the drive bay.
7 Replace the front panel. See “Replacing the Front
Panel” on page 3.
8 Complete the procedures to replace the side panel,
and to close the PC. See “Opening and Closing the
PC” on page 1.
 Loading...


