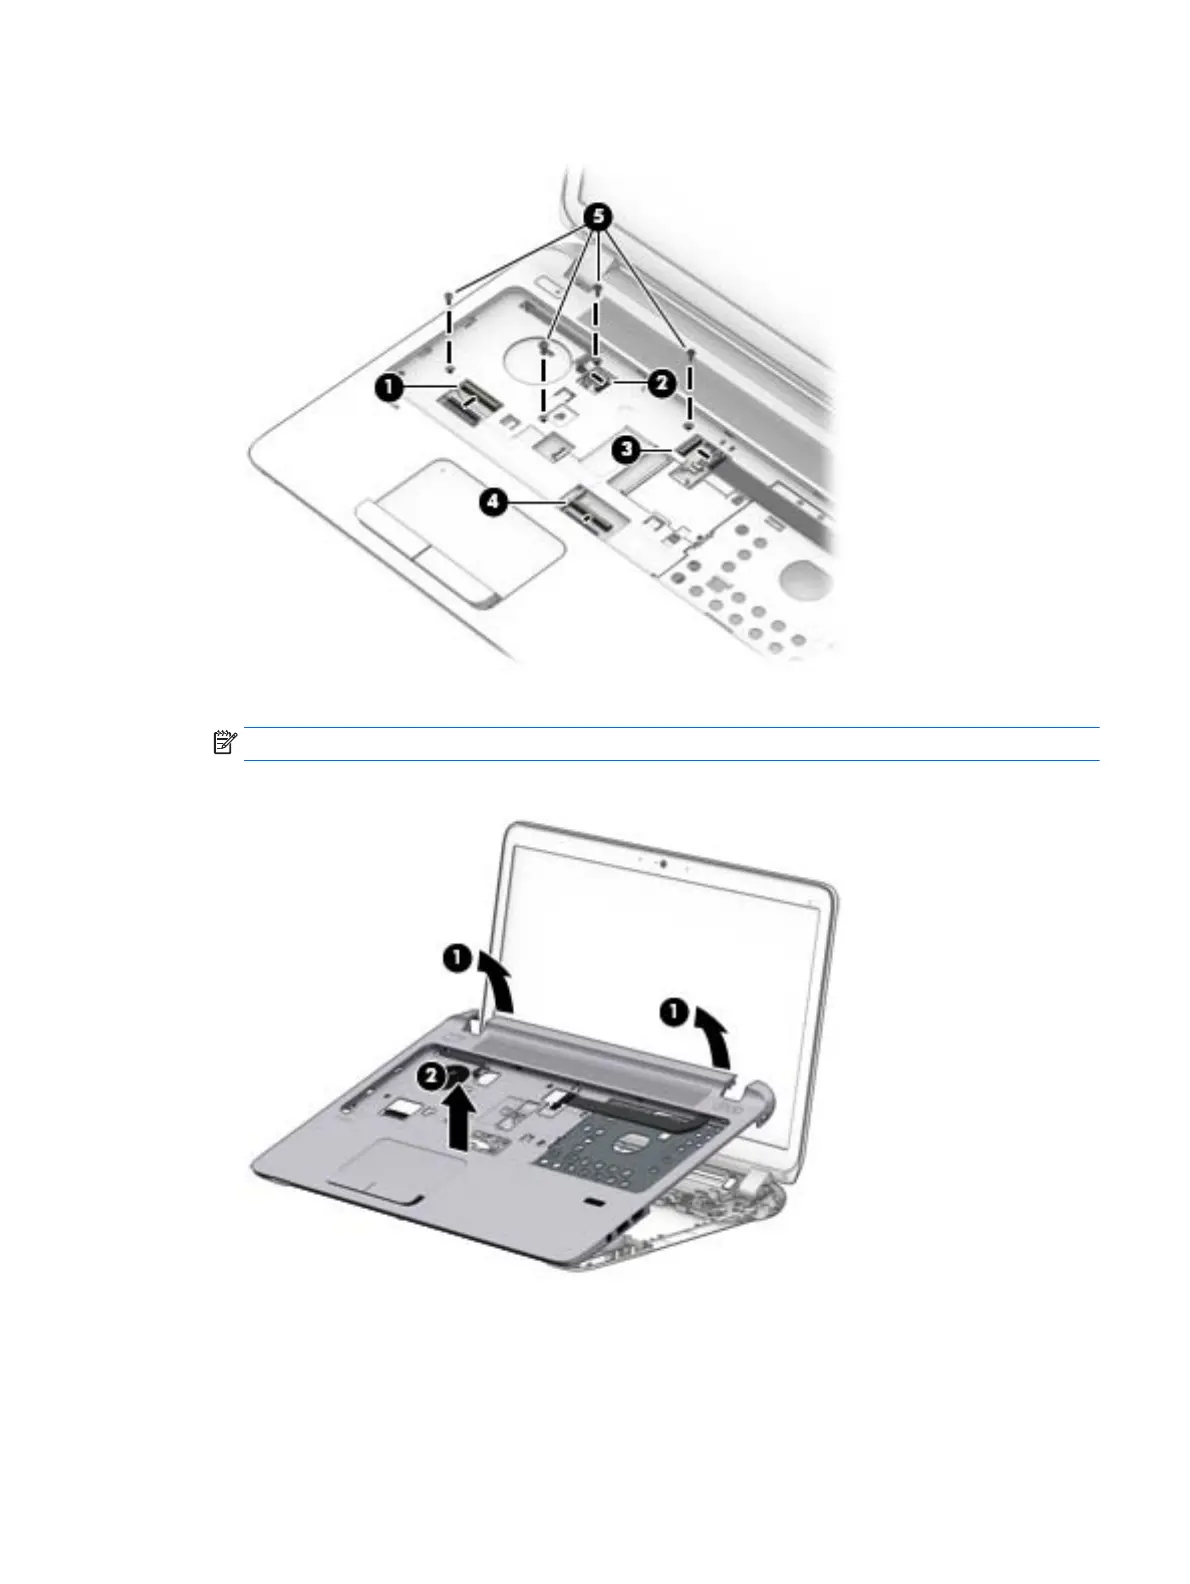
6. Remove the 4 Torx T8M2.5×6.0 screws (5) from the top of the computer.
7. Pry the top cover off the computer to disengage it.
NOTE: Begin by attempting to pry the top cover loose near the optical drive.
8. Lift the top of the top cover (1), and the lift the top cover up and remove it from the computer (2).
Reverse this procedure to install the top cover.
Component replacement procedures 51
 Loading...