19
Using the Console Setup Screen
Using the Console Setup Screen
The quickest and easiest way to minimally configure the switch for management and password
protection in your network is to use the OA.
1. Either use the OA connect command to connect to the switch’s console see “Accessing the
Blade Switch from the HP BladeSystem Onboard Administrator” on page -11. or telnet
to the IP address assigned by the enclousure bay addressing, see “Hardware setup
overview” on page -8.
The CLI prompt appears displaying the switch model number, for example:
ProCurve Switch 6120G/XG#
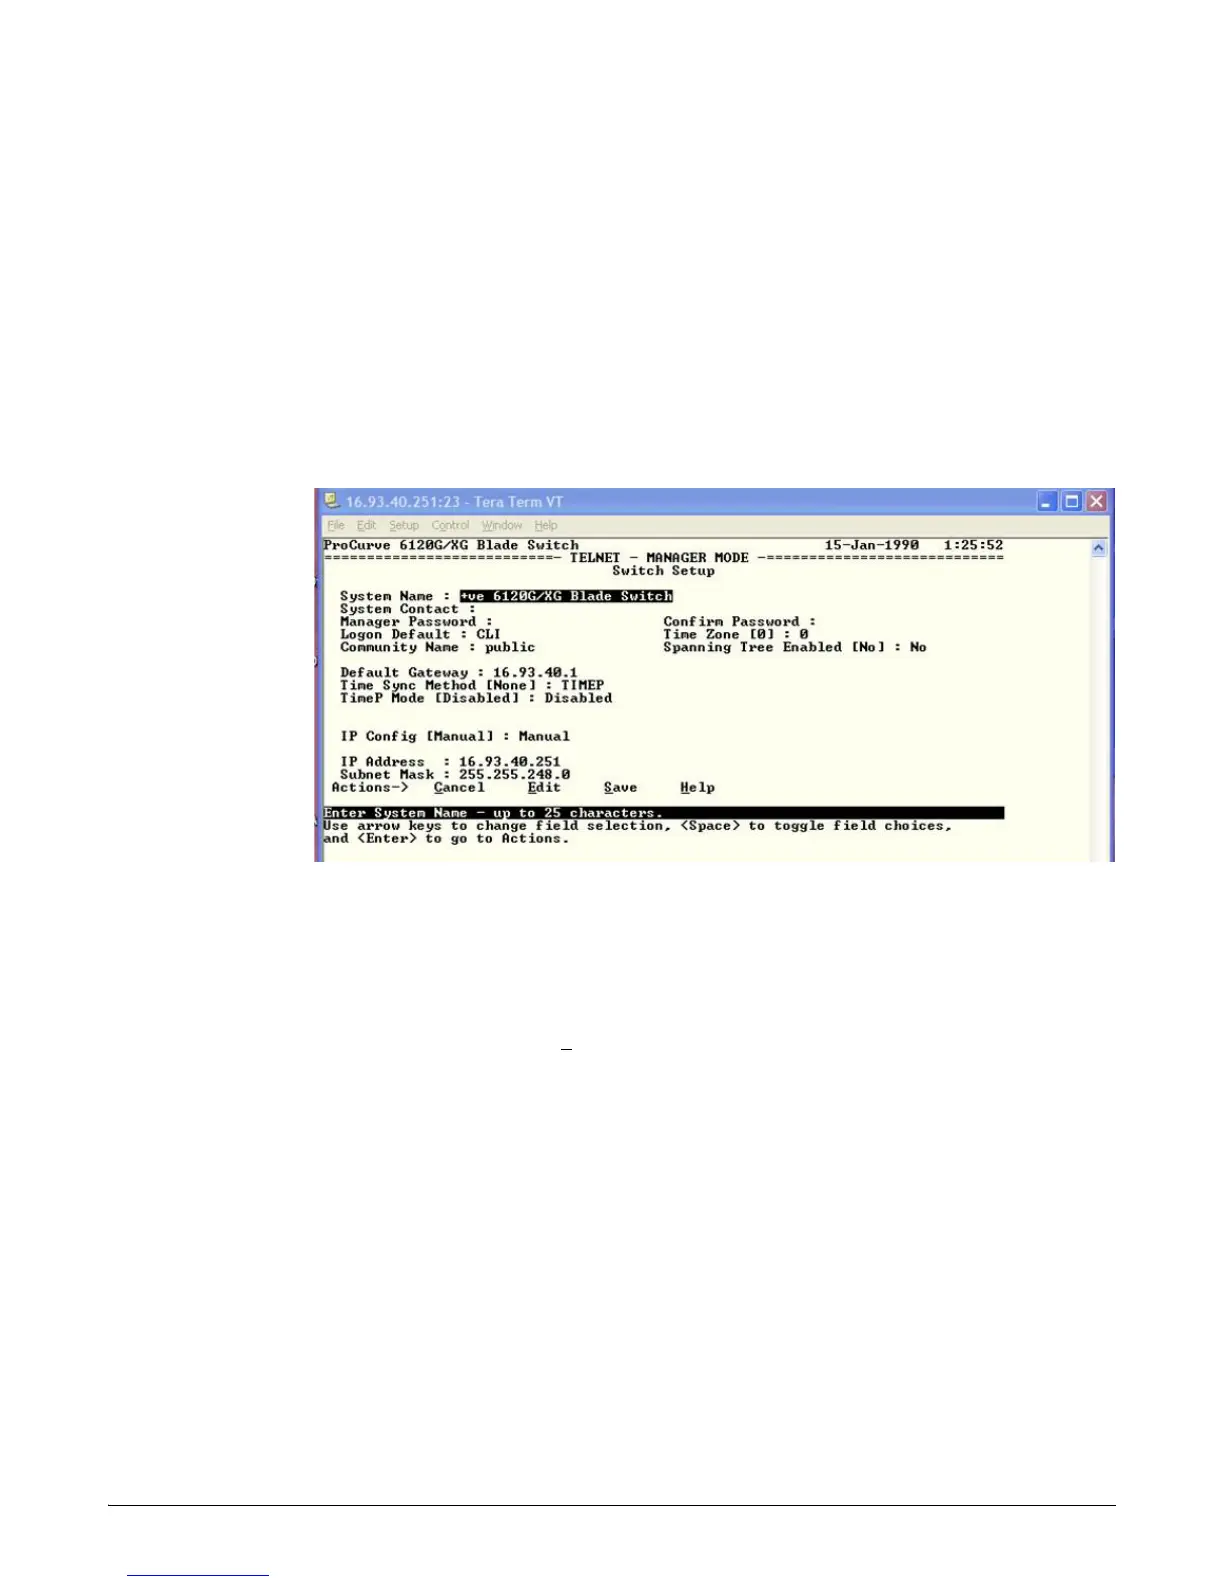
2. At the prompt, enter the setup command to display the Switch Setup screen. The
following illustration shows the Setup screen with the default settings.
3. Use the
[Tab] key to select the Manager Password field and enter a manager password of up
to 16 characters.
4.
[Tab] to the IP Config (DHCP/Bootp) field and use the Space bar to select the Manual option.
5.
[Tab] to the IP Address field and enter the IP address that is compatible with your network.
6.
[Tab] to the Subnet Mask field and enter the subnet mask used for your network.
7. Press [
Enter], then [S] (for Save).
Here is some information on the fields in the Setup screen. For more information on these
fields, see the Management and Configuration Guide for the Series 6120 Switches, which is
on the HP Web site at www.hp.com/go/bladesystem/documentation:
 Loading...