●
Memory modules (Memory on page 26)
●
Expansion cards (Expansion card on page 20)
●
Fan sink (Fan sink on page 38)
●
Processor (Processor on page 39)
4. Remove the drive cage (Drive cage on page 24).
5. Disconnect cables from the system board.
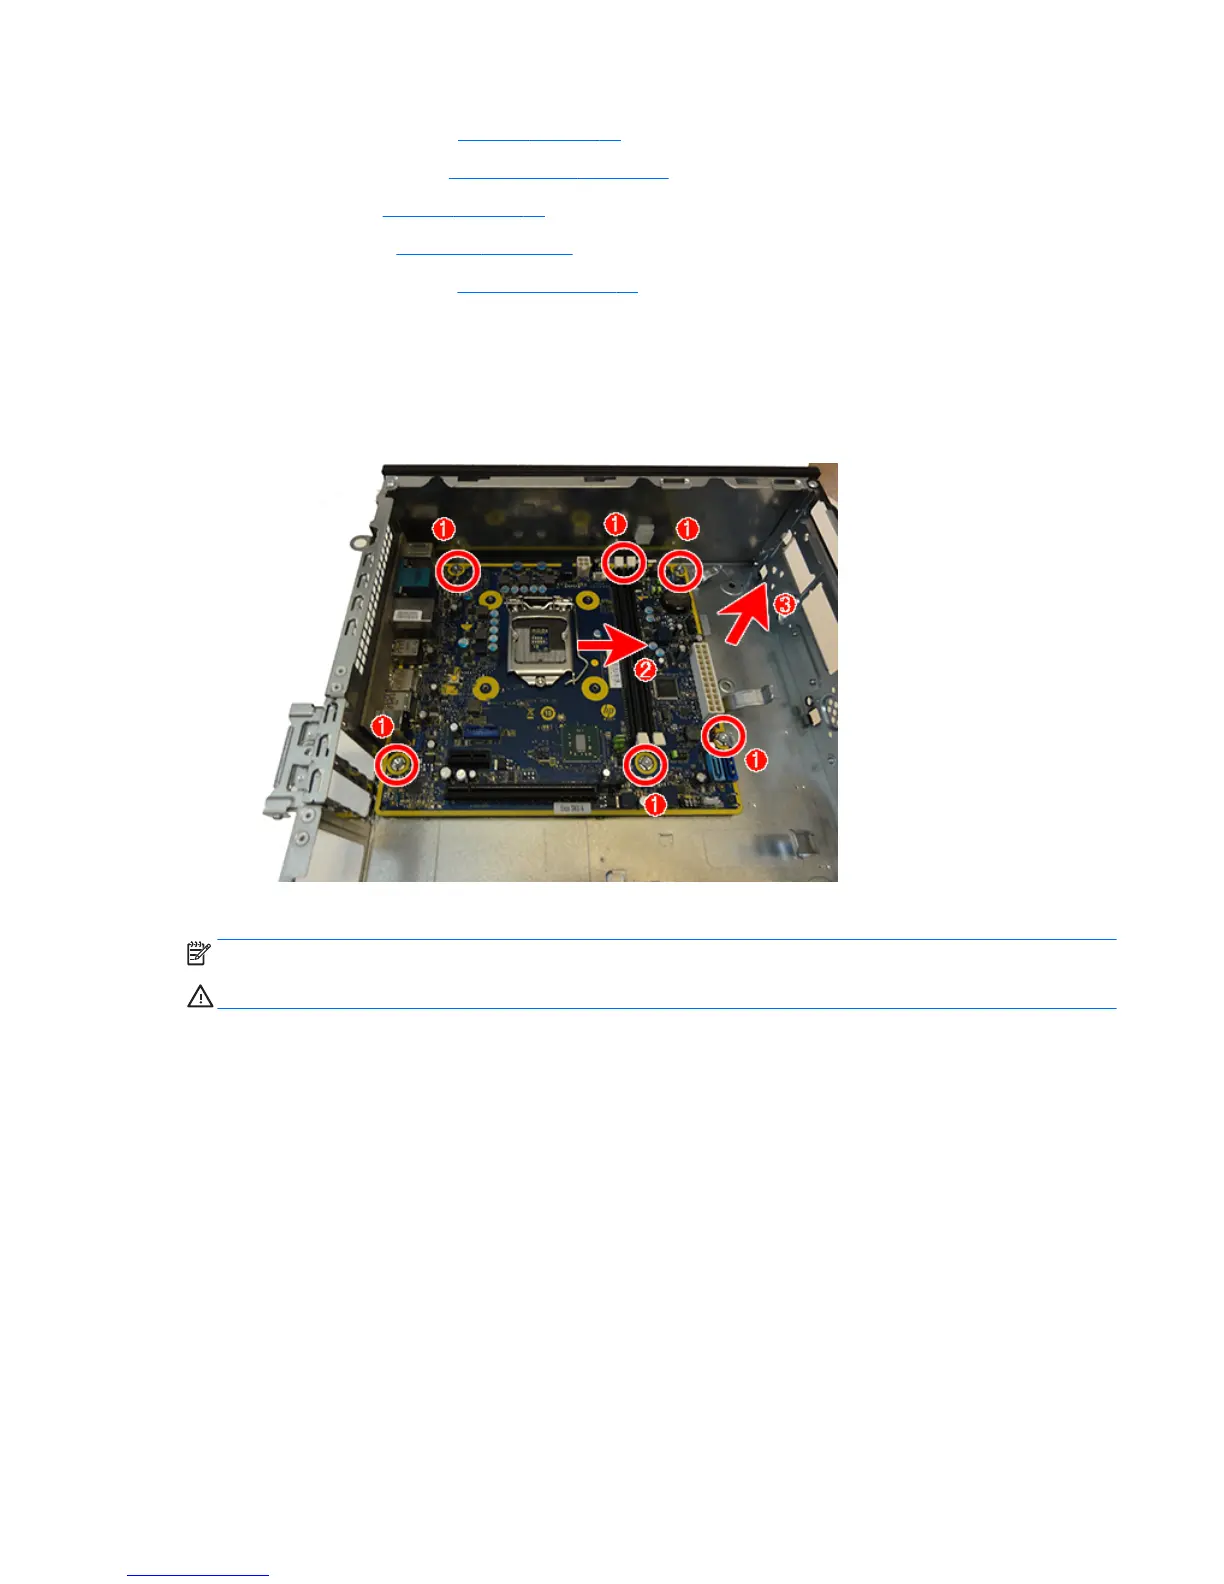
6. Remove the six Torx screws (1) that secure the system board to the chassis.
7. Slide the system board toward the front of the chassis to disengage the connectors (2).
8. Lift the system board up and out of the chassis (3).
To install the system board, reverse the removal procedure.
NOTE: When replacing the system board, you must also change the chassis serial number in the BIOS.
CAUTION: When reconnecting the cables it is important that they be positioned correctly.
System board 45
 Loading...