Advanced Topics
34
h
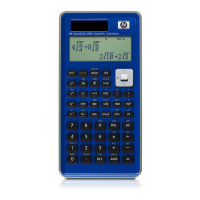
3. Figure 4-12 shows the calibration screen, with its options for 1- or 2-point
calibration. Note that the meter continues to show the live streaming of
sensor values. Press %1$ to enter the correction for the current reading. The
current reading is still 6.408, but it should read -6.433. Enter the correct
value as shown in Figure 4-13 and press $OK# to return to the calibration
screen.
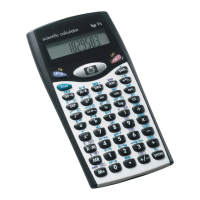
4. Note that the calibration change is not yet effective, as you have the option
of entering a second correction. The white square in the %$1!!qqq!!! key in
Figure 4-14 indicates that the first point correction has been logged.
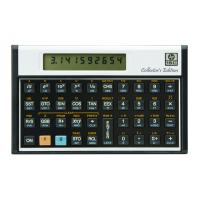
5. Press $2$ to enter a second point correction, or press $OK# to make the 1-
point calibration effective (Figure 4-15). Of course, you can press
CANCL to
abort the calibration process.
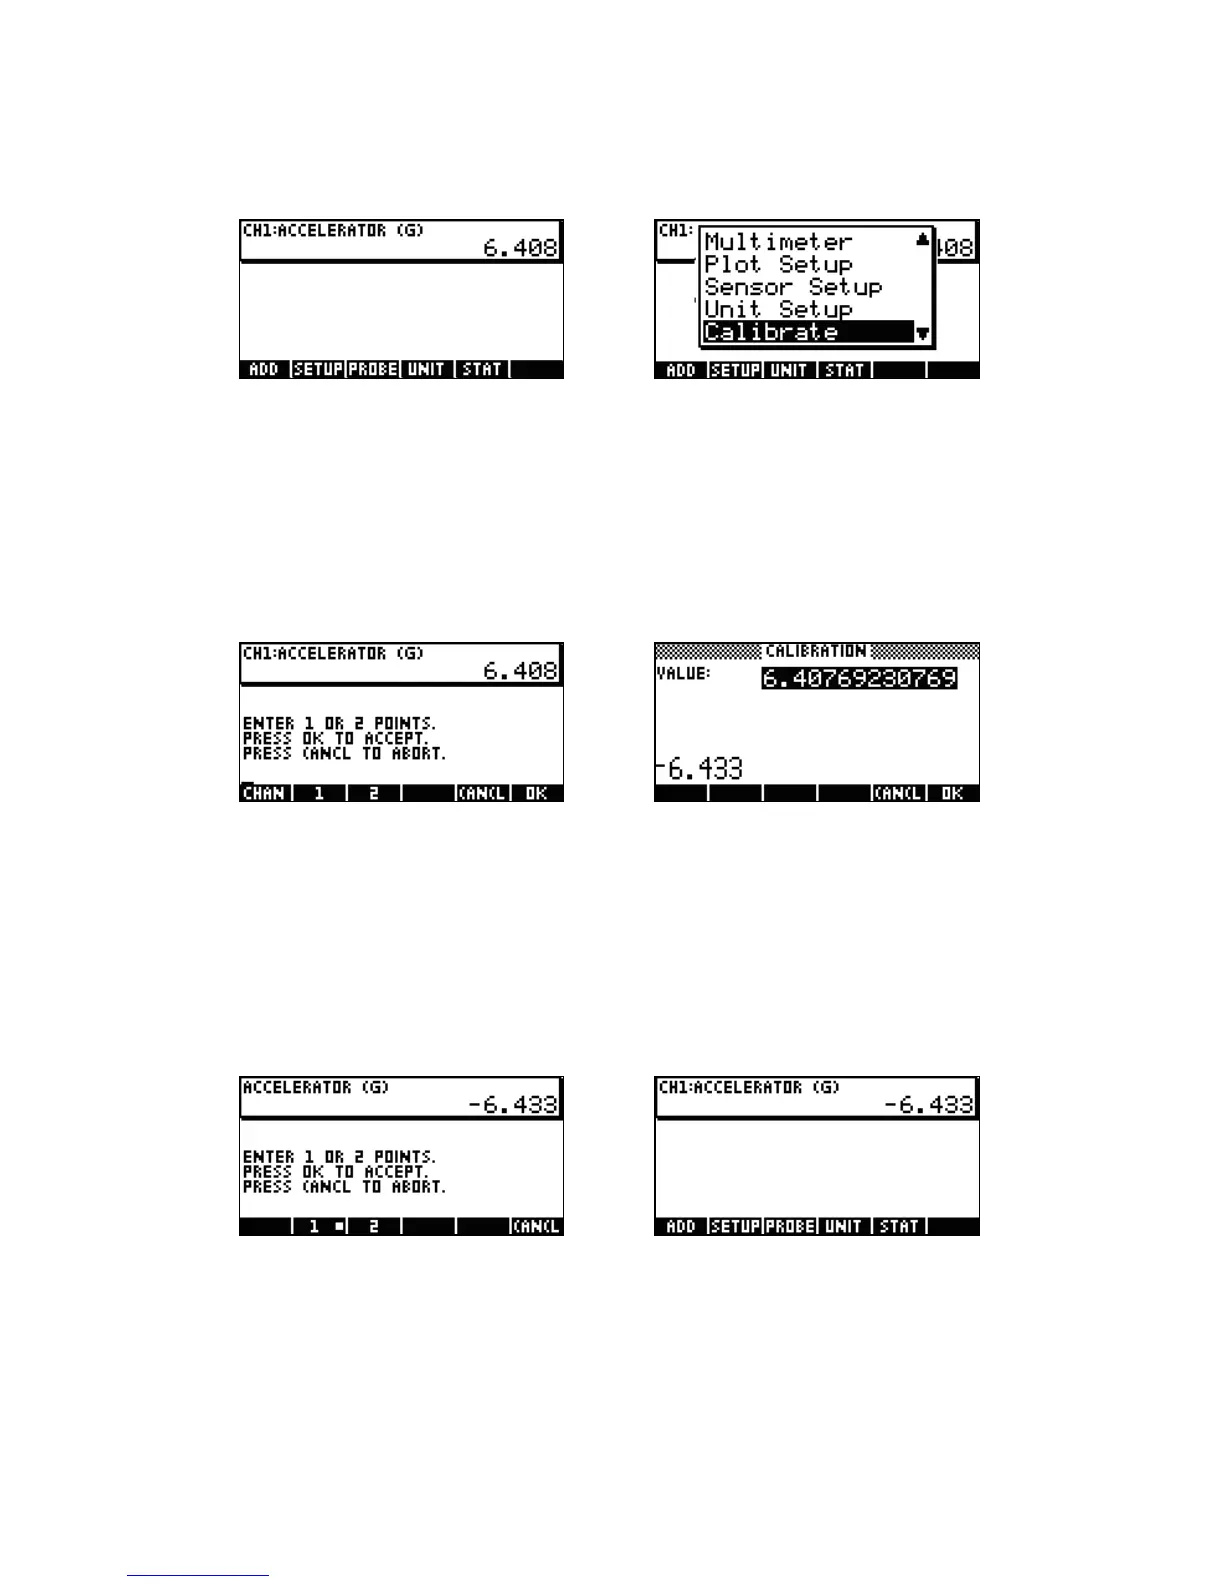
Figure 4-10 Figure 4-11
Figure 4-12 Figure 4-13
Figure 4-14 Figure 4-15