Upgrading and Replacing PC Hardware
Installing a Memory Module
WARNING For your safety, disconnect the power cord and all external cables.
1 Switch off the PC, disconnect the power cord and remove the PC’s side panel and air flow guide (refer
to
“Removing and Replacing the Side Panel & Air Flow Guide” on page 12).
2 Lay the PC on its side so you can access the system board.
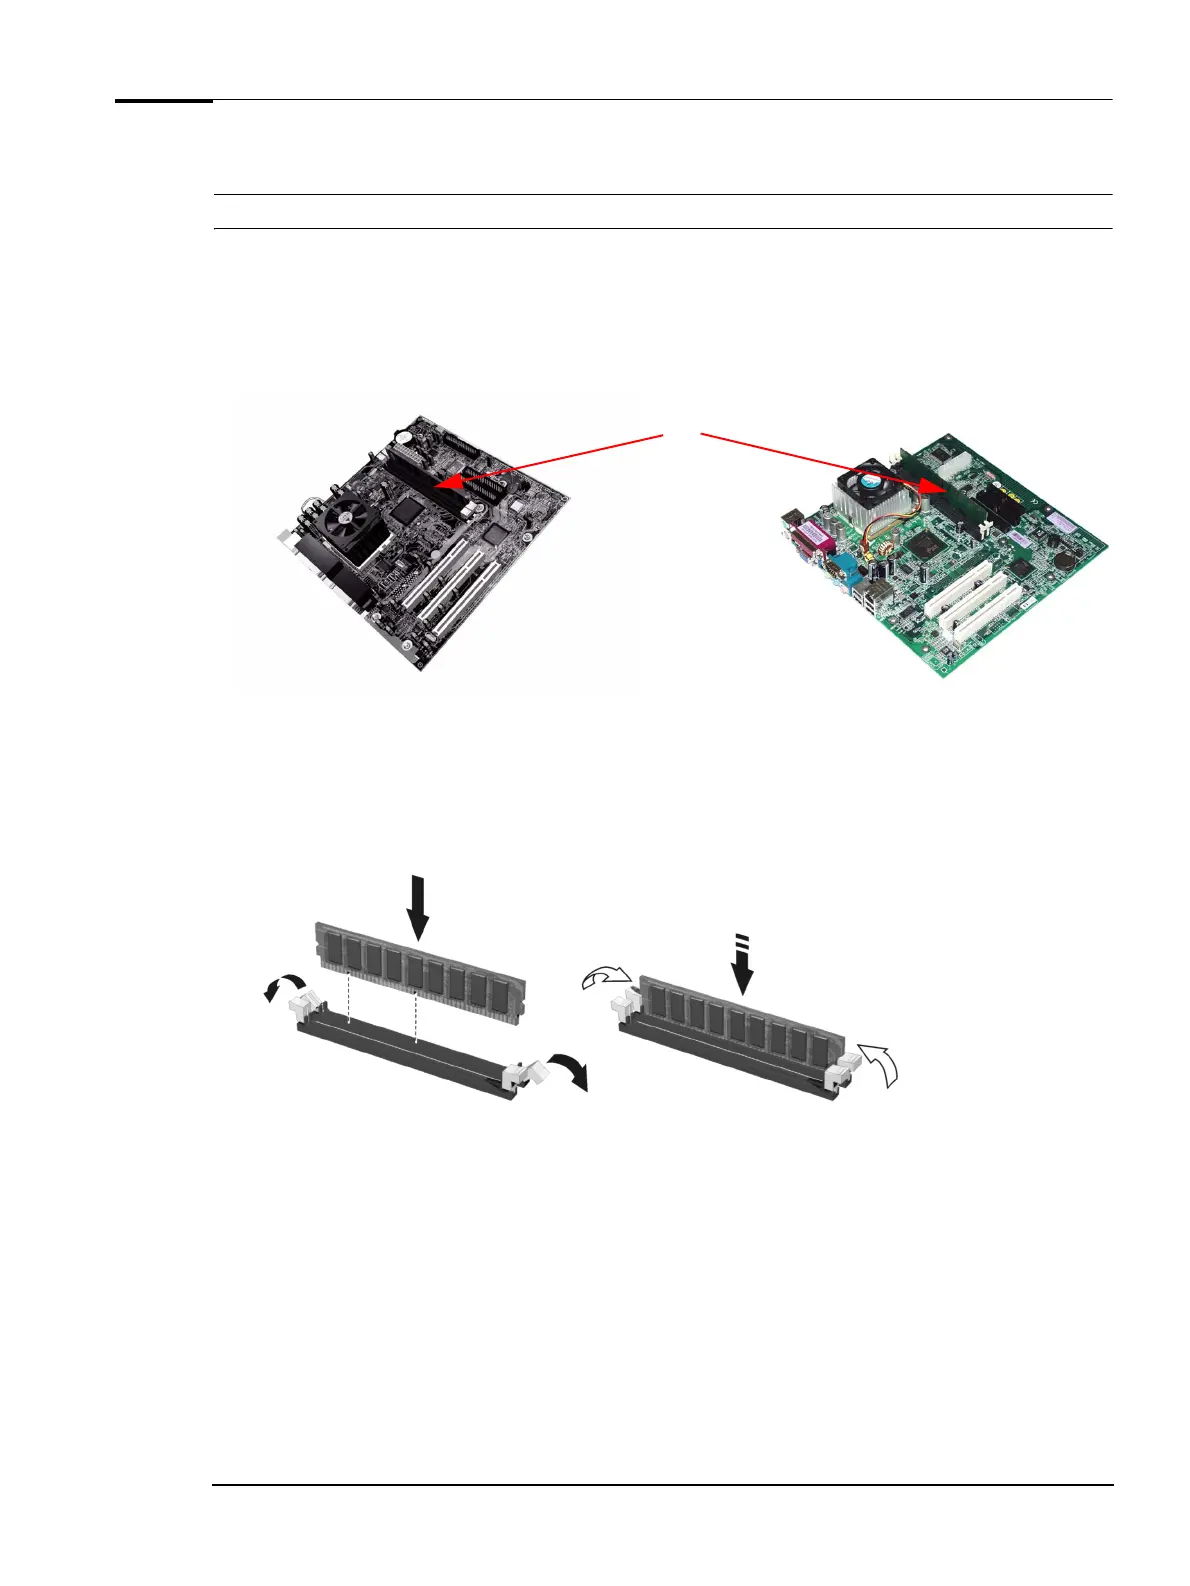
XE310 Series 1
XE310 Series 2
Position of memory modules
3 Either remove the module you want to replace or locate an empty memory module socket.
4 Make sure that the socket’s clips are open.
5 Align the grooves on the bottom of the module with the corresponding marks on the socket and push
it firmly into place. The clips close automatically.
6 Replace the PC’s air flow guide and side panel (refer to “Removing and Replacing the Side Panel & Air
Flow Guide” on page 12).
7 Reconnect the power cord.
13