Upgrading and Replacing PC Hardware
Replacing the Power Supply Unit
WARNING Hewlett-Packard does not support power supply upgrades. This information is provided to help you replace a defective
power supply unit. For your safety, only replace with a power supply provided by HP support services.
To avoid electrical shock, do not open the power supply. There are no user-serviceable parts inside.
For your safety, disconnect the power cord and all external cables.
1 Switch off the PC, disconnect the power cord and remove the PC’s side panel and air flow guide (refer
to
“Removing and Replacing the Side Panel & Air Flow Guide” on page 12).
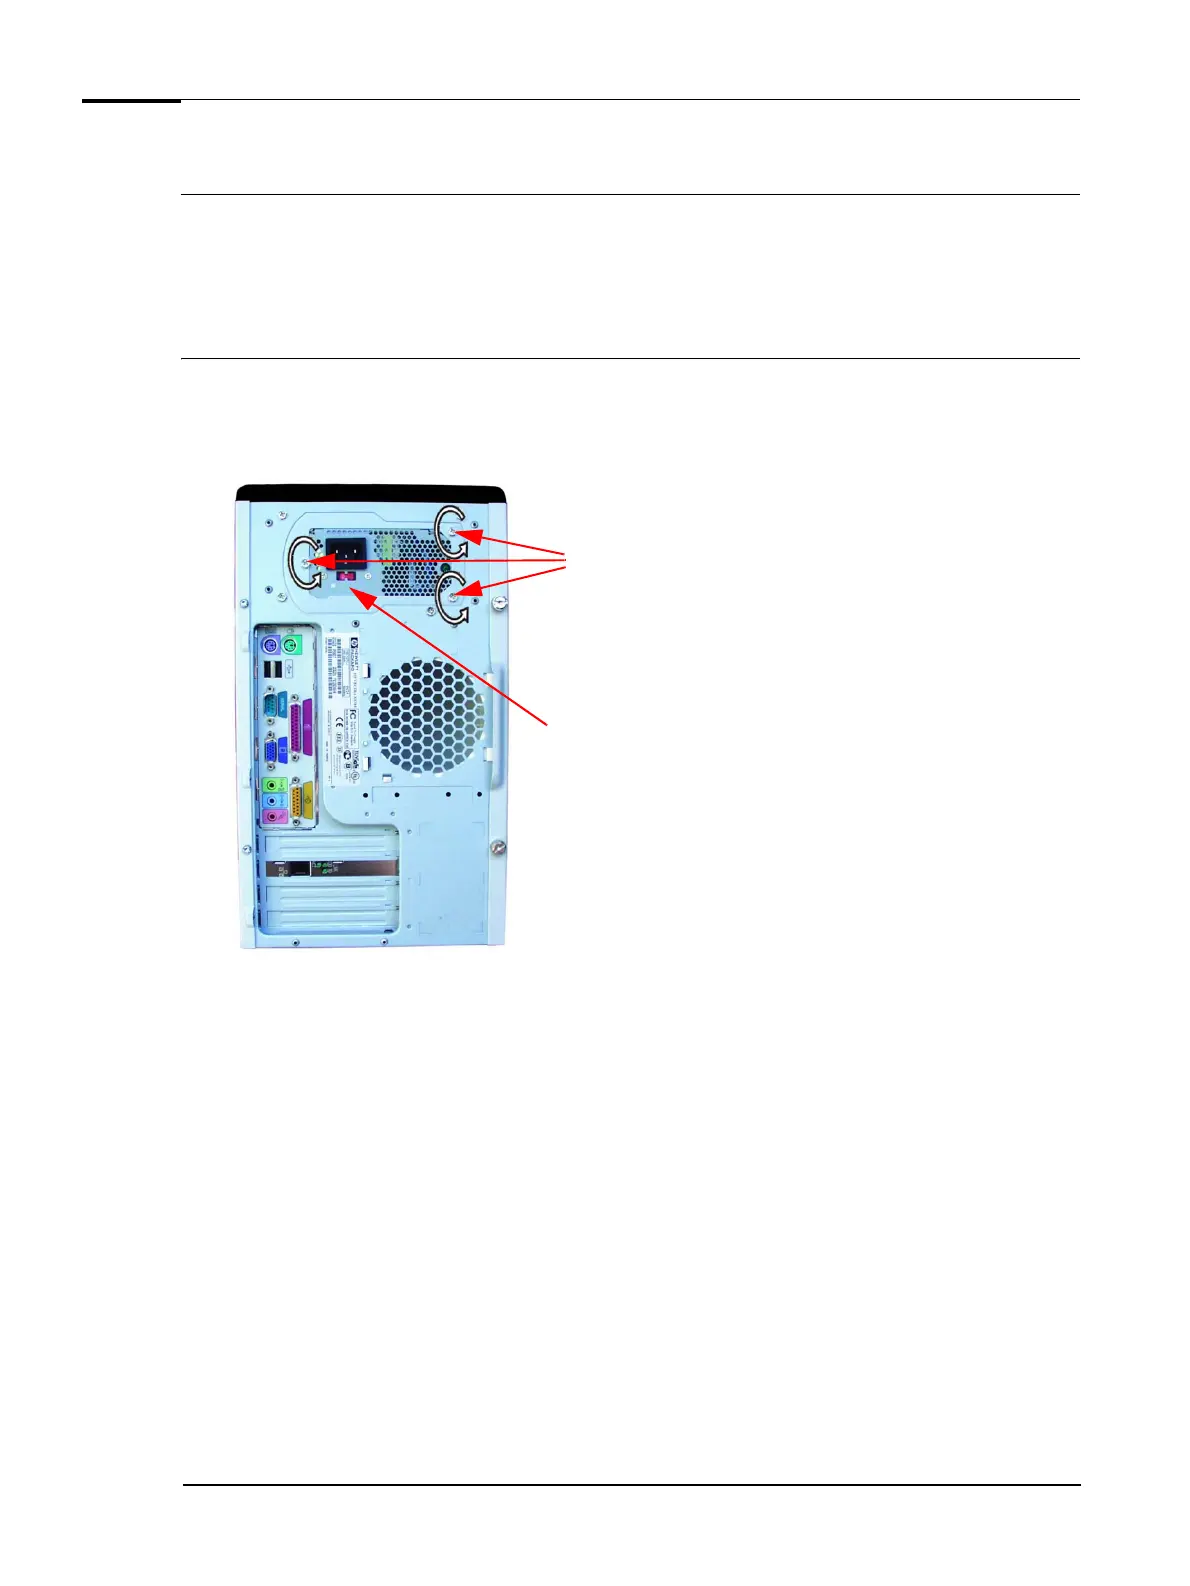
2 Remove the three screws from the rear of the PC.
Screws
Voltage switch
3 Disconnect all power cables from installed drives and from the system board.
4 Lift the power supply unit out of the PC.
5 Place the new power supply unit inside the PC and tighten the three screws on the rear of the PC.
6 Reconnect all the power cables to the drives and the system board.
7 Replace the PC’s side panel and air flow guide (refer to “Removing and Replacing the Side Panel & Air
Flow Guide” on page 12).
8 Check that the voltage switch is set correctly for your country (the voltage is set during manufacturing
and should already be correct).
9 Reconnect the power cord.
26