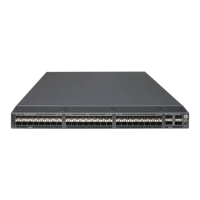
a. Remove the plastic protector caps from the FC cable ends (if there are any) and position the cable
connector so that it is oriented correctly.
b. Position a cable so that the key (the ridge on one side of the cable connector) is aligned with the
slot in the transceiver (see Figure 32: Inserting a 16 Gb/s SFP+ transceiver in an FC port on
page 48) .
c. Insert the cable into the transceiver until the latching mechanism clicks.
The Device Connection window shows missing, valid, and invalid connections as you cable the
switch. It can take up to 15 seconds for the screen to display the connection as valid.
d. Verify that the connections display green, and then click Next.
Setting switch features
See the Fabric OS 7.0.x Administrator's Guide and the Fabric OS 7.0.x Command Reference Manual for
detailed instructions on setting all supported switch features.
Switch status policy
Switch status policy is a feature that monitors different switch parameters such as power supplies and fan
units, and provides switch status based on their health.
The switch status policy configuration can be updated using the switchstatuspolicyset command.
The following example shows the default settings of 2 and 0 for DOWN and MARGINAL units for both Bad
Power Supplies and Bad Fans.
switch:admin>switchstatuspolicyset
some output skipped
The minimum number of
Bad PowerSupplies contributing to DOWN status: (0..2) [2]
Bad PowerSupplies contributing to MARGINAL status: (0..2) [0]
some output skipped
Bad Fans contributing to DOWN status: (0..2) [2]
Bad Fans contributing to MARGINAL status: (0..2) [0]
output truncated
If two power supply and fan assemblies are installed in the switch, Hewlett Packard Enterprise
recommends changing the configuration to 2 and 1 for DOWN and MARGINAL for both the Bad Power
Supplies and Bad Fans. Use the switchStatusPolicyShow command to see the results of your
changes.
Changing the switch name and chassis name
Changing the switch and chassis names is important for accurate tracking of errors in the RASlog. The
messages in the log are labeled with the switch or chassis name, so choose a meaningful name for the
switch and chassis.
Procedure
1. Using Telnet, log in to the switch as admin.
2. Use the chassisname command to change the chassis name.
The following example shows how to change the chassis name to myhpchassis.
switch:admin> chassisname myhpchassis
Setting switch features 49