Thermal Imaging Camera Instruction Manual
This document provides a comprehensive guide for the operation, maintenance, and troubleshooting of the Thermal Imaging Camera. It is designed to ensure users can operate the device safely and effectively, maximizing its performance and longevity.
Function Description
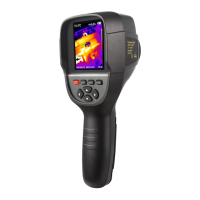
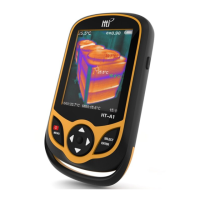
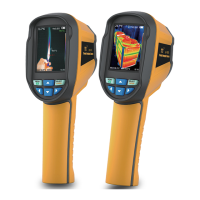
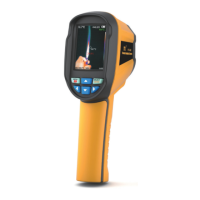
The Thermal Imaging Camera is an advanced infrared camera that integrates surface temperature measurement with real-time thermal imaging. Unlike traditional inferred thermometers that require individual component measurements, this device saves time by displaying potential problems clearly on a color screen. It utilizes a central point measurement cursor for quick and accurate temperature readings of target objects.
To enhance differentiation, the product incorporates a visible light camera, allowing for the storage of both thermal and visible images. These images can be retrieved via USB and transferred to a computer for report generation or printing. Its compact size, ease of operation, and robust functionality make it an ideal tool for various applications, including electric power, electronic manufacturing, and industrial inspection.
The device offers several key functions that enhance its accuracy and usability:
- Adjustable Radiation Coefficient: This feature allows users to adjust the radiation coefficient to improve measurement accuracy, especially for objects with half-reflection surfaces.
- Highest and Lowest Temperature Cursors: These cursors guide users to the areas of highest and lowest temperature within the thermal images, facilitating quick identification of critical points.
- Selectable Color Palettes: The camera provides various color palettes, enabling users to customize the visual representation of thermal data for better analysis.
Usage Features
The Thermal Imaging Camera is designed for intuitive operation, from initial power-up to advanced settings.
Initial Operation:
- Product Boot/Shutdown: To power on or off, press and hold the power button for more than 3 seconds.
- LCD Screen Display: After powering on and opening the lens protection cover, the screen will display the thermal imaging status. Note that time adjustment may be necessary when moving the camera between environments with significant temperature variations.
- Switching Between Infrared and Visible Images: Users can switch between inferred thermal images and visible images by pressing the designated keys. The degree of fusion between these images can be adjusted (0%, 25%, 50%, 75%, and 100%).
- Image Capture: To capture an image, press the image capture key. Upon successful capture, a "store photo?" prompt will appear. Users can select "yes" to save the image or "no" to discard it.
- Image Output and Reading: Captured images can be output and read by connecting the device to a computer via the Micro USB port. The device supports various operating systems, including Windows XP, 7, 8, 10, and Apple systems. It is recommended to use the provided USB cable or a high-quality alternative. When disconnecting, always select "pop out device safely" to prevent file system damage.
Menu Navigation:
The main menu is accessed by pressing the "MENU" key, revealing options such as "image overlapping," "image," "color palette," "emissivity," and "setting."
- Image Overlapping Submenu: This feature enhances understanding of infrared images by aligning them with visible images. It captures visible images for every infrared image, accurately displaying temperature distribution and facilitating effective sharing. To use, select "Image registration" from the main menu, then enter the image overlap adjustment mode. Navigation keys allow for visible image shift. Press "ENTER" to exit, or the mode will automatically exit after 6 seconds of inactivity.
- Image Submenu: This submenu allows users to view and manage stored images. Select "image" from the main menu to access the image list. Navigation keys allow selection, and "SELECT" views the image. Users can navigate through images and return to the menu.
- Color Palette Submenu: This function changes the pseudo-color display of the infrared image. Various palettes (rainbow, iron red, cool, white hot, black hot) are available, each suited for different applications and thermal contrasts. Rainbow, iron oxide red, and cold color palettes emphasize color display for high heat contrast, while black & white and white & black palettes provide linear color.
- Emissivity Submenu: The emissivity can be adjusted from 0.01 to 1.00 (default 0.95). Correct emissivity setting is crucial for accurate temperature measurement. The product offers four object measurement modes: coarse (0.95), semi-matte (0.85), semi-shiny (0.60), and shiny (0.30). Users can also set a custom emissivity value.
- Setting Submenu: This submenu provides various device configurations:
- Auto Shutdown: Configures automatic power-off settings (e.g., 5 minutes, 20 minutes, or off).
- Intensity Settings: Adjusts screen brightness (low, medium, bright).
- Language Settings: Selects the display language (English, Chinese, Italian, German).
- Unit Setting: Sets the temperature unit (Celsius or Fahrenheit).
- Time Format Setting: Configures the time display format (24 hours or 12 hours).
- Time Setting: Allows users to set the year, month, day, hour, minute, and second.
- Highest/Lowest Temperature Cursor: Enables or disables the display of the highest and lowest temperature cursors on the screen.
Maintenance Features
Proper maintenance ensures the longevity and optimal performance of the Thermal Imaging Camera.
Product Cleaning:
- Use a damp cloth and weak soap to clean the device's enclosure. Avoid abrasive cleaners, isopropanol, or solvents, as these can damage the product case.
- For the lens and screen, use cleaning agents specifically designed for professional optical glasses.
Lens Maintenance:
- Careful Handling: The infrared lens has a refined anti-reflection coating, so handle it with care. Avoid forceful cleaning to prevent damage to this coating.
- Cleaning Procedure:
- Use a compressed air tank or dry nitrogen ion gun to blow off loose particles from the lens surface.
- Dip a lint-free cloth in alcohol or an alcohol-containing commercial lens cleaning solution.
- Squeeze out excess alcohol or lightly apply the cloth to a dry, lint-free cloth.
- Wipe the lens surface with circular motions, then discard the cloth. Repeat with a new cloth if necessary.
Battery Charging and Description:
- Charging: The product features built-in chargeable 18650 lithium batteries. A low battery indicator will appear on the top right of the screen, prompting users to charge via the Micro USB interface. The battery icon will indicate a full charge. Disconnect the USB cable after charging is complete.
- Battery Performance:
- Avoid leaving the battery on the charger for more than 24 hours.
- Charge the thermal imaging device for at least two hours every three months to extend battery life.
- Do not attempt to charge the battery in extremely cold environments.
Safety Precautions:
- Disassembly: Do not attempt to assemble or dismantle the product without permission, as it is a super precise equipment. Repairs should only be performed by designated technical personnel.
- Probe Protection: Keep the product away from strong heat sources (e.g., electric irons) to prevent damage to the probe.
- Product Hum: A light clicking sound every few seconds during operation is normal and indicates the lens capturing images.
- Damaged Case: If the product case is damaged, discontinue use immediately and contact local distributors or agents.
- Smoke/Spark/Burnt Smell: If smoke, sparks, or a burnt smell are detected, power off the device immediately. After the issue subsides, contact Xintai Company.
- Cleaning Agents: Do not use abrasives, isopropanol, or solvents to clean the device enclosure, as this can cause damage.
- Adapter/Data Line: Do not remodel the adapter or data line to prevent short circuits or fire.
- Battery Welding: Do not weld the battery without permission, as this can lead to leakage and explosion.
- Impact: Avoid impacting the battery (e.g., collisions, falls) to prevent damage or leakage.
- Unplugging Charger: Unplug the adapter from the power socket when not charging to prevent overheating.
- Adapter Plug: Ensure the adapter plug is fully inserted into the specified power socket and matches regional electrical specifications to prevent overheating, electric shock, fire, or battery-related issues.
- Damaged Plug/Wire: Stop using the device immediately if the adapter plug or wire is damaged.
- Wet Hands: Do not touch electrical wires with wet hands. When unplugging, hold the wire head, not the wire itself, to prevent damage.
- Water Immersion: Do not immerse the product in water or expose it to rain. If it comes into contact with liquid, wipe it dry immediately. If liquid enters the device, power it off and contact support.
- Dust Cleaning: Regularly clean dust from the adapter plug and data line to prevent moisture accumulation and potential short circuits or fire.
- Original Adapter: Use only the original adapter provided by the company to charge the product to avoid overheating, electric shock, fire, or battery issues.
- Temperature Increase: The product's temperature may increase after prolonged charging, which is normal.
- Water Condensation: Avoid rapid temperature changes that can cause water condensation inside the instrument. If condensation occurs, power off the device and allow it to return to ambient temperature before use.
- Long-term Storage: Store the product in a cool, dry environment. If stored for a long time with the battery installed, charge it regularly to prevent battery depletion and extend its service life.