11
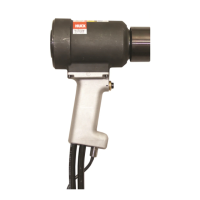
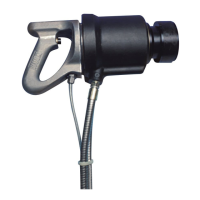
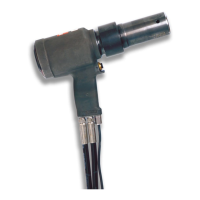
3585 Series Hydraulic Installation Tools (HK1080) Howmet Fastening Systems
DISASSEMBLY
This procedure is for complete disassembly of the tool.
only those components necessary in order
worn or damaged components. Always use a soft-jaw
vise to avoid damage to tool.
To disassemble the tool:
NOTE: “P/N” indicates a part that is available from HUCK.
1.
Powerig
®
; then uncouple the hydraulic hoses.
2. Remove the sleeve and split ring. Remove the nose
assembly.
3.
the hydraulic hoses into a clean container.
4.
drained into the container.
5. Model 3585: Remove the retaining ring and cover
plate.
Model 3585PT: Remove the screws and the retainer.
6. Model 3585: Use the
126981) to remove the end cap.
Model 3585PT: Use the
126981) to remove the end cap assembly.
7. Push rearward on the adapter assembly. The piston
and adapter will slide from the cylinder.
8. Pull the piston out of the adapter, and remove the
dump valve from the piston.
NOTE: Ejector gland assembly can be removed
to inspect and/or replace components without
disassembling tool. Use ejector gland wrench P/N
122048 to unscrew the assembly; then remove it
and the pintail ejector from the piston.
9. Use a small-diameter, dull-pointed “pick” to remove
10. Remove the socket head cap screw from the handle
assembly.
11. Remove two button-head cap screws from one-half of
the handle and cylinder.
12. Separate the handle halves and lift out the trigger
switch assembly, strain relief, and control cord
(including cord connector).
13. Remove the remaining button-head cap screws and
handle half. Remove both hydraulic hoses from the
cylinder.
14. Loosen two screws at the rear of the switch to
remove the switch from the electrical cord. Remove
two #6-32 socket setscrews to disassemble the
switch. Pull the strain relief grommet from the cord.
The tool has been properly disassembled. Store all
re-usable parts (screws and disassembled components)
in a clean, dry area.
WARNING: Do NOT re-use seals, wipers, or
rings; irreparable tool damage could occur.
Discard these parts and use replacements
(see KITS & ACCESSORIES).
NOTE: Disassemble the cord connector to rewire or
replace it.
WARNING: Disconnect the tool control cord
from the Powerig before disconnecting the
hydraulic hoses from it. If not disconnected in
this order, serious personal injury may occur.