12
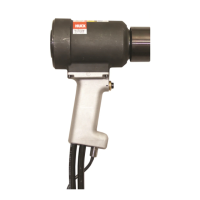
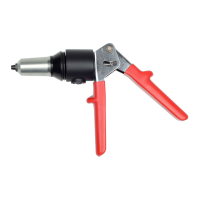
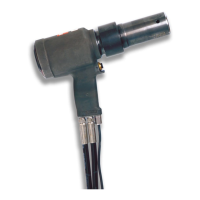
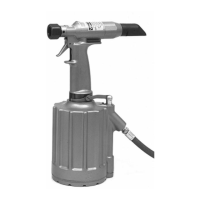
3585 Series Hydraulic Installation Tools (HK1080) Howmet Fastening Systems
ASSEMBLY
This section details the re-assembly of the tool. For
having the following items accessible.
NOTE: “P/N” indicates a part that is available from HUCK.
•
3585KIT 3585PTKIT)
NOTE: When re-assembling the tool, always replace
damaged and defective parts, and all seals, wipers,
O-rings, and Back-up rings of sub-assemblies.
• LUBRIPLATE
®
502723) or
®
505476)
Before re-assembling the tool:
•
•
• Inspect components for scoring, excessive wear, and
damage; replace as necessary.
•
Back-up rings.
rings.
• Smear LUBRIPLATE
®
®
mating parts to ease assembly.
To re-assemble the tool:
1. Assemble the electrical control cord to the plug of the
electrical connector.
2. Push the cord thru the strain relief and attach it to the
switch.
3. Screw both hoses into the cylinder.
4. Loosely attach the handle-half by turning two button-
head cap screws into the cylinder.
5. Place the assembled switch, electrical cord, strain
relief, and electrical connector into the handle
holding the assembled components in position.
6. Assemble the ejector gland assembly and pintail
ejector to the piston as follows.
a. Insert the pintail ejector into the piston.
b.
c.
d. Make sure all ejector gland assembly parts
(rings and wiper) are in place, then screw in the
122048) to tighten the assembly.
7. Push the nose adapter into the cylinder.
8. Install the retaining ring into the groove in the
adapter.
9. Push the assembled piston and the assembled front
wiper, and wiper housing in place) into the assembled
cylinder and adapter.
10. Slide the dump valve into the hole through the piston.
to the rear.
11. 126981) to
tighten the end cap, then back it off until the locator
can be placed in closest matching grooves.
12. Model 3585: After the end cap is locked in place,
install the cover plate and retaining ring.
Model 3585PT: After the end cap is locked in place,
install the retainer and cap screws.
13. Screw the coupler nipple onto the hose in port P;
screw the coupler body onto the hose in port R.
14.
tool and check for leaks.
15. Attach the nose assembly to the tool following the
ring set and retaining sleeve furnished with tool.
LUBRIPLATE is a registered trademark of .
SUPER-O-LUBE
TEFLON is a registered trademark of E. I. du Pont de Nemours and
Company.
Threadmate is a registered trademark of Parker Intangibles, LLC.
WARNING: Do not omit any seals during
servicing; leaks will result and serious
personal injury can occur.
CAUTION: Do not use TEFLON
®
tape on
pipe threads. Tape can shred, resulting in
malfunctions. Threadmate™ is available in a
4oz. tube from HUCK (P/N 508517).
WARNING: Make sure the tool has been
properly re-assembled prior to use. Failure to
do so could result in serious personal injury.