5
42700-01•01/15/08•HunterFanCompany
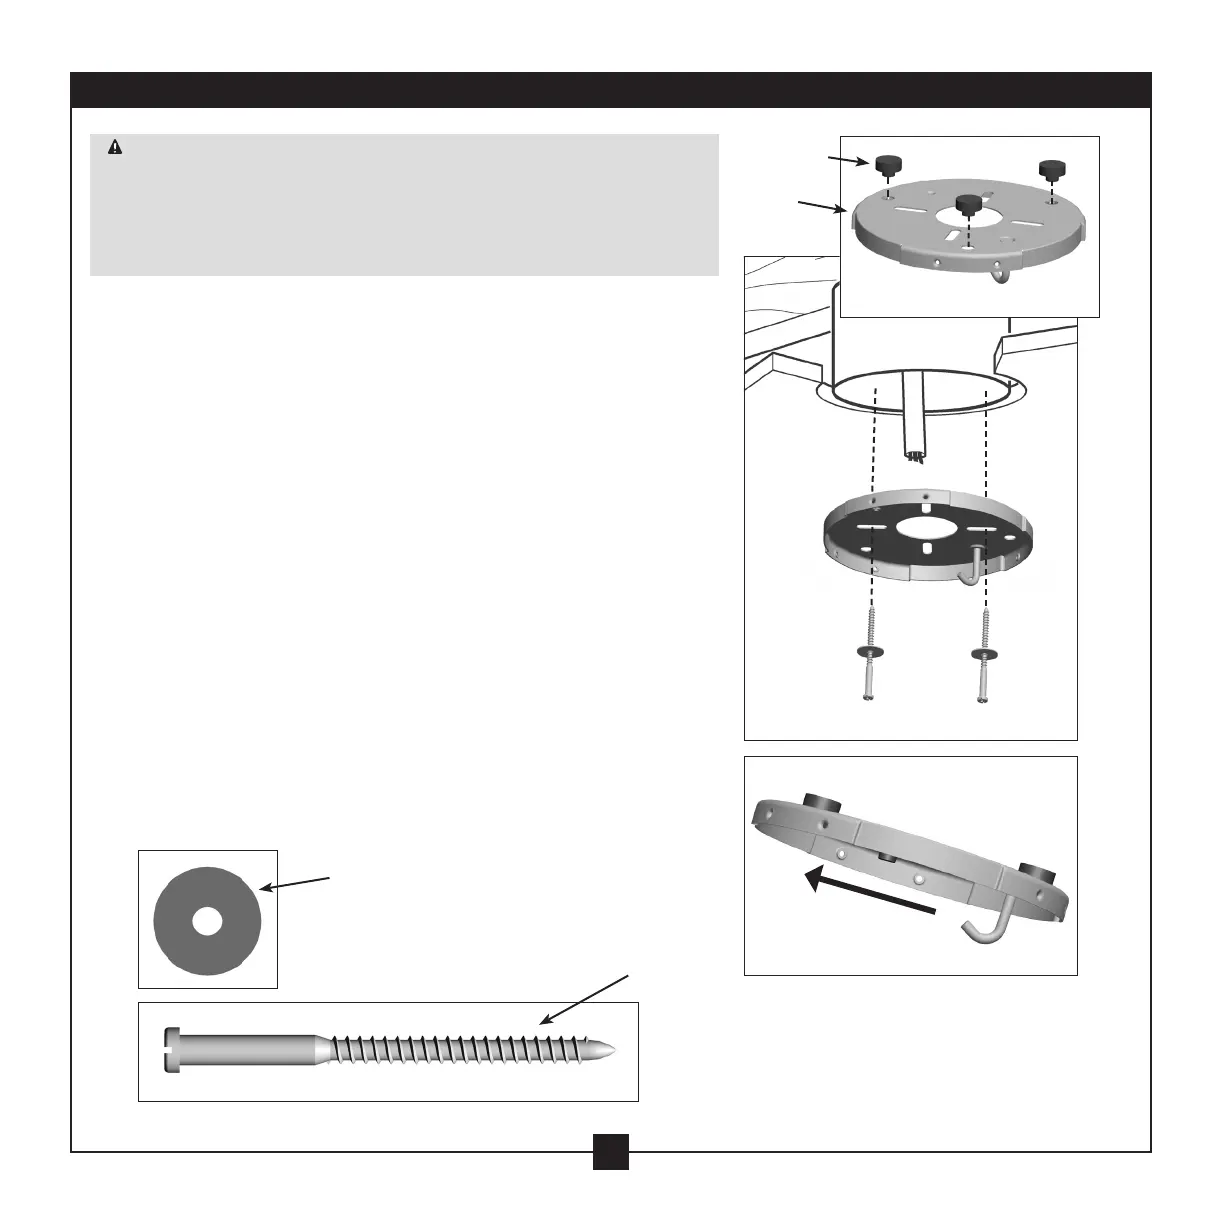
2 • Installing the Ceiling Plate
CAUTION: Toavoidpossibleelectricalshock,beforeinstallingyourfan,
disconnectthepowerbyturningothecircuitbreakerstotheoutletbox
andassociatedwallswitchlocation.Ifyoucannotlockthecircuitbreakers
intheoposition,securelyfastenaprominentwarningdevice,suchasa
tag,totheservicepanel.
2-1. Drill two pilot holes into the wood support structure through the
outermostholesintheoutletbox.epilotholesshouldhavea
diameter of 9/64 in.
2-2.Yourfancomeswiththreeneoprenenoiseisolators(“Isolators”).
Positiontheisolatorsbetweentheceilingplateandceilingby
inserting the raised areas on each isolator into the holes in the
ceiling plate.
2-3. readtheleadwiresfromtheoutletboxdownthroughthehole
in the middle of the ceiling plate.
2-4. Aligntheslottedholesintheceilingplatewiththepilotholesyou
drilled in the wood support structure. For proper alignment use
slotted holes directly across from each other.
Note:eisolatorsshouldbeushagainsttheceiling.
2-5. Placeaatwasheroneachofthetwo3in.woodscrewsandpass
the screws through the slotted holes in the ceiling plate into the
pilot holes you drilled.
Tighten the screws into the 9/64 in. pilot holes; do not use
lubricantsonthescrews.Donotovertighten.
Step 2-2
Flat Washer
3 in. Wood Screw
Steps 2-3 – 2-5
For Angled Ceilings:Besuretoorient
the ceiling plate so that the hook and
one of the threaded screw holes in the
ceiling plate are on the lower side.
Ceiling
Plate
Isolator