5
contatobrasil@hunterfan.com
MD511-01 • 05/20/14 • © Hunter Fan Company
Ceiling Bracket
OFF
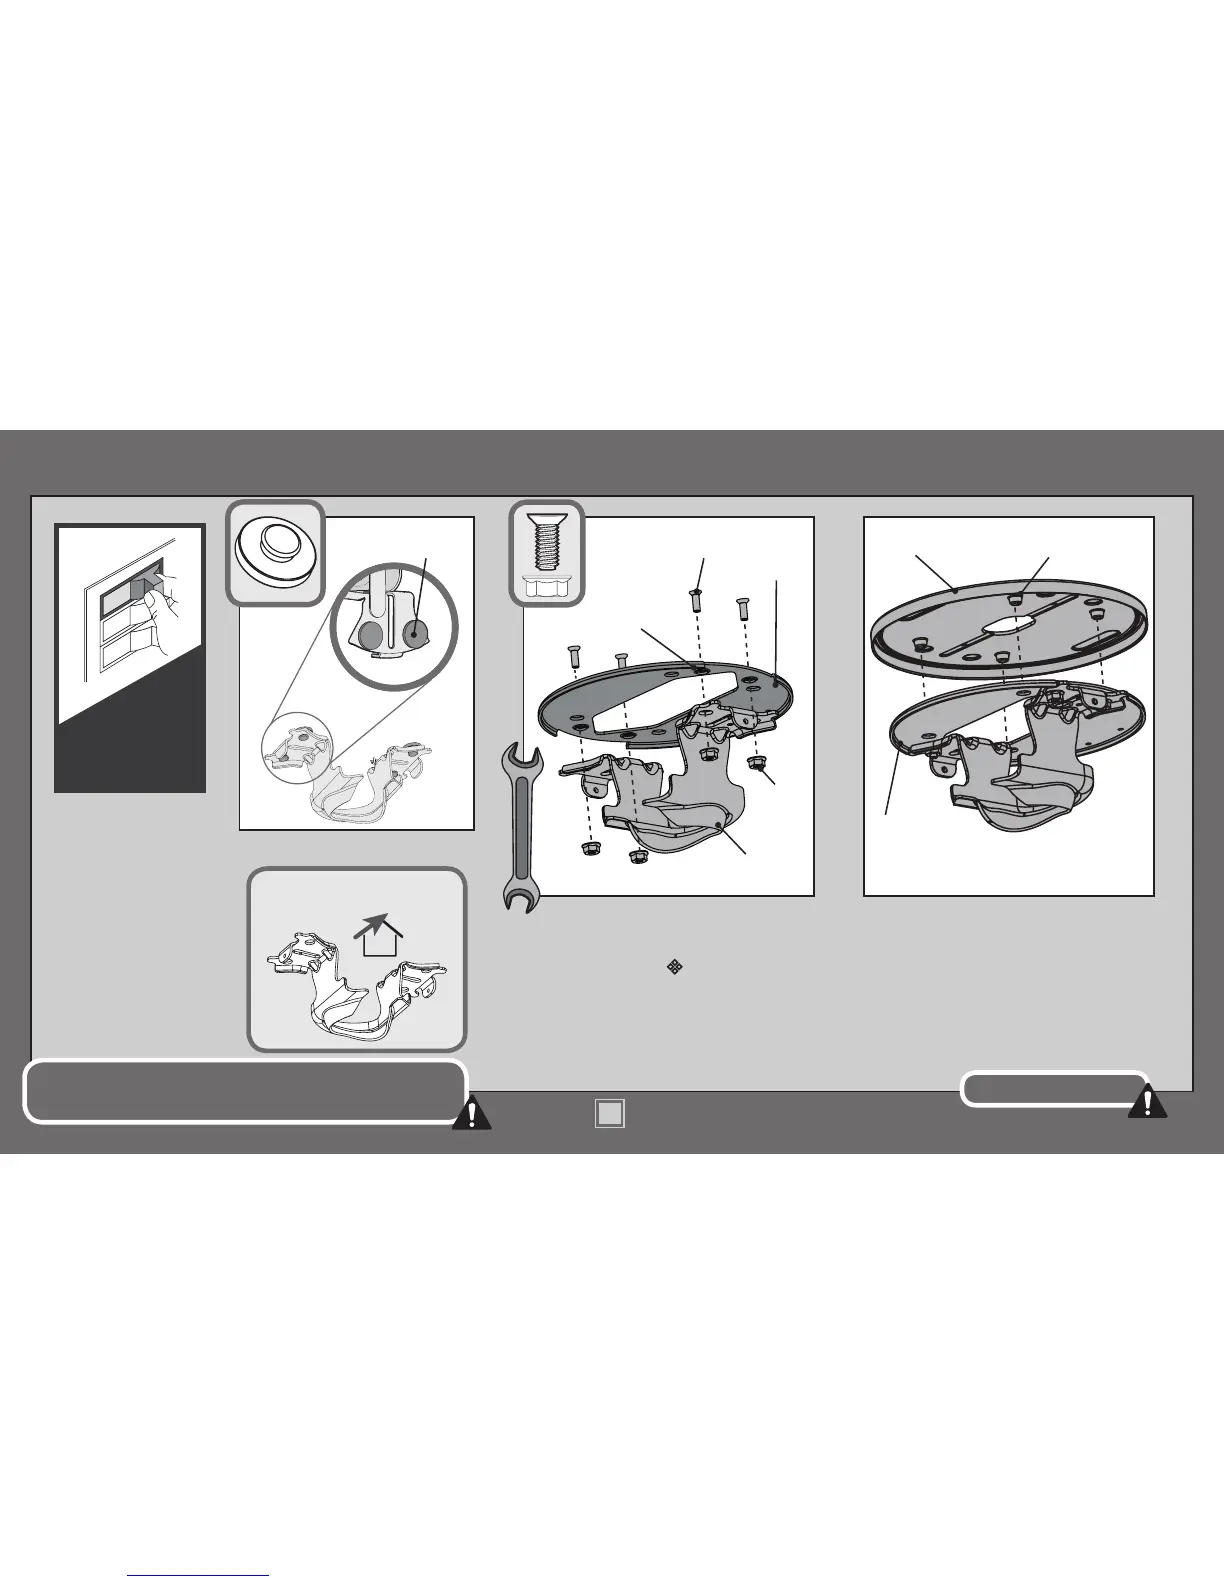
Refer to warning w.1 on pg. 2
To avoid possible electrical shock, before installing your fan, disconnect the
power by turning off the circuit breakers to the outlet box associated with the
wall switch location.
Turn Power
Remove all four mounting isolators.
Align the tapered mounting holes in the
ceiling plate with the holes in the ceiling
bracket. Install the four ceiling plate
screws found in the hardware bag and
secure with the ange nuts using an 9 mm
wrench. Hold the ceiling bracket assembly
up to the outlet box and mark the screw
locations. To mount to support structure,
also mark the ceiling for drilling pilot holes.
Install the ceiling plate gasket onto the
ceiling plate. The four holes in the ceiling
plate should lineup with the four posts in
the gasket.
Tapered
Mounting
Holes
Ceiling
Plate
Gasket
Post
Ceiling
Plate
Ceiling
Plate
Flange
Nuts
Mounting
Isolator
Ceiling
Bracket
Ceiling Plate
Screws
For angled ceilings, point
opening toward peak.