Both sensors programmed for Station 1
Sensor 1 only programmed for Station 1
Sensor 2 only programmed for Station 1
No sensor programmed for Station 1
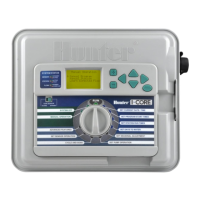
Rotate the dial to the SET SENSOR OPERATION position.
1. Use the ◄ and ► buttons to select the station that you would like to
program a sensor response.
2. The default is to have the sensor input active for each station,
therefore indicating a . The ► cursor will be ashing on SEN1.
Use the + button to enable sensor operation or the – button to
disable the sensor.
3. Once SEN1 has been programmed the ► cursor will move to SEN2.
Use the + / – button to enable or disable SEN2 for the station.
4. Rotate the dial to the RUN position when nished programming
sensor operation for the desired stations.
If one Clik sensor and one Flow sensor are installed, the screen in Set
Sensor Operation will show only one option of selecting a sensor response
for the one Clik Sensor. The Clik sensor will either appear as SEN1 or SEN2,
depending on which sensor terminals that Clik sensor was connected. You
will give the sensor a if you want the sensor to shut down irrigation, or
a _ if you do not want the irrigation to shut down in the case of a sensor
state change. The ow sensor conguration will not appear as an option to
change in the Set Sensor Operation screen. The programming of the Flow
sensor will be done in the ADVANCED FEATURES dial position and will be
discussed further in that section.
SEN 2 is congured for a Flow Sensor
SEN 1 is congured for a Flow Sensor
Rotate the dial to the SET SENSOR OPERATION position.
1. Use the ◄ and ► buttons to select the station that you would like to
program a sensor response.
2. The default is to have the sensor input active for each station,
therefore indicating a . The cursor will be ashing on either SEN1 or
SEN 2. Use the + button to enable sensor operation or the – button to
disable the sensor.
3. Rotate the dial to the RUN position when nished programming
sensor operation for the desired stations.
If you have two ow sensors congured to each one of the sensor
terminals, you will not be given the option to select a response for a
weather sensor. When you turn the dial to SET SENSOR OPERATION, the
screen will display No Clik or WRC. The conguration of the Flow sensors
will be discussed in the ADVANCED FEATURES dial position.
SEN 1 and SEN 2 are congured for Flow Sensors
Once you have installed and programmed a sensor and set a response
to your desired stations, the controller will acknowledge the state of the
sensor. When the sensor is Inactive or in a closed state, the System Status
Dashboard will have a green light next to Sensor, indicating that irrigation
will occur as normal. If the sensor is in the Active mode or open state, the
controller will display a red light in the System Status Dashboard next to
Sensor. This indicates that the sensor is active and certain automatic irriga-
tion will not occur. When a sensor becomes active the controller will also
indicate the status of the sensor on the display in the RUN position.
Once a sensor becomes active, the controller will put irrigation in a
suspend mode. The controller will acknowledge a program’s start time and
the display will indicate where the program would be watering. However,
whether or not the station is set to respond to the sensor will determine if
the station turns on or not. If the station is set to respond to the sensor, the
display will count down the stations run time and indicate that the station is
Suspended. If the sensor state changes and becomes inactivate, the station
will resume watering at the given run time on the screen. If a station is not
set to respond to a sensor, the station will water as normal and ignore the
state of the sensor.
A remote single station command will override the sensor state, whether
the station is set to respond or not, and that station will water for the
desired run time. When you activate a manual program command by
CONTROLLER PROGRAMMING (CONTINUED)
19