© 2007 Hunter Fan Company 41865-01 01/15/2007
9
2. Place the lower switch housing assembly over the upper switch
housing. Align the side screw holes in the upper and lower
switch housings. Attach the lower switch housing to the up-
per switch housing with three #6-32 x 3/8” housing assembly
screws. See Figure 28.
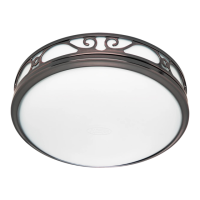
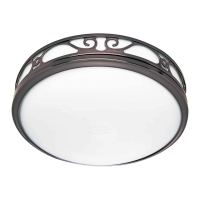
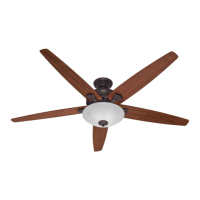
installing the glass bowl
Refer to Figure 29.
1. Install two Type B10 max 60 Watt candelabra base incandescent
bulbs.
2. Attach the extra pull chain (included in the sack parts) to the
fan pull chain using the plastic breakaway connector.
3. read the fan pull chain through the hole in the metal disk.
en, thread the fan pull chain through the small hole beside
the hole in the center of the glass bowl.
4. read the light pull chain through the hole in the center of
the glass bowl.
5. Place the cover plate up against the glass bowl. Align the holes
in the cover plate and glass bowl.
6. read the fan pull chain and light pull chain through the ap-
propriate holes.
7. read the light pull chain through the finial and screw the
finial onto the threaded rod end until tight.
Figure 29 - Installing the glass bowl
installing without the light xture
Your Hunter fan comes with an integrated light fixture assembly
and an optional switch housing. is feature gives you the option
of installing the fan with or without the included light fixture.
If you decide to install the fan without the integrated light fixture
please complete the following instructions to install the optional
switch housing.
attaching the upper switch housing
1. Partially install two #6-32 x 3/8” housing assembly screws into
the switch housing mounting plate as shown in Figure 26.
2. Feed the upper plug connector through the center opening of
the upper switch housing. See Figure 26.
3. Align the keyhole slots in the upper switch housing with the
housing assembly screws installed previously.
4. Turn the upper switch housing counterclockwise until the hous-
ing assembly screws are firmly situated in the narrow end of the
keyhole slots as shown in Figure 27. Install the one remaining
#6-32 x 3/8” housing assembly screw into the third hole in the
upper switch housing. Tighten all three screws firmly.
CAUTION: Make sure the upper switch housing is
securely attached to the switch housing mounting plate.
Failure to properly attach and tighten all three housing
assembly screws could result in the switch housing and
light fixture falling.
attaching the lower switch housing
removing the wiring harness
Before you can install the optional switch housing, you must remove
the wiring harness and its components from the integrated light
fixture. You must then install the wiring harness into the optional
switch housing.
Refer to Figure 30.
1. Locate the reversing switch and carefully remove the two screws
holding the reversing switch to the light fixture housing. e
reversing switch can now be removed from the light fixture
housing.
2. Remove the patented breakaway connector from the fan pull
chain.
3. Carefully loosen the bellmouth nut from the fan pull chain
and remove the fan pull chain switch from the light fixture
housing.
4. Locate and carefully remove the two capacitors from the light
fixture assembly.
5. In the light fixture assembly you will find two different plug
connectors: One multi-wire connector and two two-wire con-
nectors. Unplug the two-wire connectors; one connector will
have a black with white stripes wire and a white wire coming
from the multi-wire connector.
6. You have now disconnected the wiring harness and its com-
ponents from the light fixture housing and are ready to install
them into the optional switch housing.
Lower Switch
Housing
Glass Bowl
Fan Pull Chain
Light Pull Chain
readed Rod
Cover Plate
Finial
Metal Disk