Do you have a question about the Hunter Sunnyvale and is the answer not in the manual?
Ensures adequate clearance for fan blades from walls and floor.
Verifies the outlet box is securely mounted and suitable for fan support.
Assesses ceiling slope to determine mounting requirements.
Guidance for installing fans on sloped or vaulted ceilings, including kit recommendations.
Details methods for securing the ceiling bracket using machine or wood screws.
Connects fan wiring to a single-wall switch for power control.
Connects fan wiring to separate wall switches for fan and light control.
Diagnoses common issues when the fan fails to operate.
Addresses causes and solutions for fan instability and wobbling.
Provides steps to identify and resolve fan noise issues.
Guides on how to contact Hunter for warranty claims and service.
Outlines what the motor and other parts are covered for.
Lists conditions and factors not covered by the fan warranty.
Explains how state laws affect warranty rights and coverage.
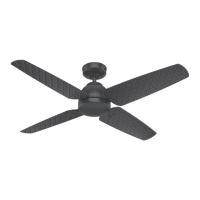
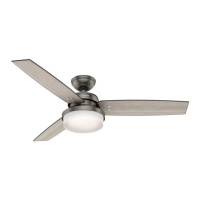
This document describes the installation and operation of the Sunnyvale ceiling fan, designed to provide comfort and performance in your home or office. The manual aims to make the installation process as straightforward as possible, offering support through video links for technical sections and direct assistance from Hunter Fan Company if needed.
The fan is designed for both standard and angled mounting, with specific instructions provided for each scenario. For angled ceilings, a longer downrod may be required, and for angles greater than 34°, an Angled Mounting Kit is necessary, both sold separately. The manual includes a helpful guide to determine if an Angled Mounting Kit is needed by using a simple wall-to-ceiling measurement.
Safety is a primary concern, and the manual begins with a "WARNING" section highlighting crucial precautions. Users are advised to mount the fan directly to a building structure or an outlet box rated for fan support of up to 70 lbs (31.8 kg). Before any installation or servicing, it is essential to disconnect power by turning off circuit breakers to the outlet box and associated wall switch. If circuit breakers cannot be locked in the off position, a prominent warning device should be securely fastened to the service panel. To reduce the risk of electric shock, the fan must be installed with an isolating wall control/switch. Furthermore, users are warned not to bend blade brackets during installation, balancing, or cleaning, and to avoid inserting foreign objects between rotating fan blades to prevent personal injury. All wiring must comply with national and local electrical codes ANSI/NFPA 70, and if unfamiliar with wiring, a qualified electrician should be consulted. Only Hunter replacement parts are recommended for use.
The installation process is broken down into several key stages, starting with checking the room dimensions to ensure proper clearance. The fan requires at least 30 inches from the blade tip to the nearest wall or obstruction and 7 feet from the bottom edge of the blade to the floor. The outlet box must be secured to a building structure or be a fan-rated outlet box.
The first step in installation involves securing the ceiling bracket. Two options are provided: using machine screws (supplied with the outlet box) for existing ceiling fan-rated outlet boxes, or using wood screws and washers (included with the fan) for securing to a support structure with an approved electrical outlet box. For the latter, drilling 9/64" pilot holes is recommended. For angled ceilings, the opening of the ceiling bracket should point towards the peak.
Next, the downrod is installed. The manual provides instructions for using the pre-assembled downrod and also includes a separate guide at the end for installing a longer or shorter downrod if needed. Key steps include passing all wires to one side of the horizontal bar in the downrod assembly, hand-tightening the downrod until it stops (at least 4-5 full turns), and trimming the wires so that 8 inches remain from the top of the downrod. A critical safety warning emphasizes the importance of tightening the setscrew with pliers, not just hand-tightening, to prevent fan fall hazards. This setscrew should be checked for tightness every time the fan direction is changed.
Hanging the fan involves carefully lifting the fan assembly, holding either the fan housing or the downrod to prevent damage, and placing the downrod ball into the slot in the ceiling bracket.
Wiring the fan is detailed with clear instructions for both single and dual switch setups. The manual simplifies the process by illustrating how to connect wires: pushing bare metal ends together and sliding a wire nut over them, then twisting clockwise until tight. For single switch setups, the white (grounded) wire from the ceiling connects to the white wire from the fan. The black (ungrounded) wire from the ceiling connects to both the black and blue wires from the fan. For dual switch setups, the white (grounded) wire from the ceiling connects to the white wire from the fan. The black (ungrounded) wire from the ceiling connects to the black wire from the fan, and the second ungrounded (light) wire from the ceiling connects to the blue wire from the fan. In both scenarios, the three grounding wires (green, green/yellow stripe, or bare copper) from the ceiling, downrod, and hanging bracket must be connected. A "WARNING" reiterates that the ceiling fan must be grounded, and if a ground wire is not present, installation should stop, and a qualified electrician consulted. All wiring must conform to national and local electrical codes. After connections are made, any extra wiring should be pushed carefully back through the hanger bracket into the outlet box, ensuring wires remain attached to the wire nuts.
Installing the blades is the next step. Each blade is secured to a blade iron using blade nuts and blade assembly screws, with instructions to repeat this process for all four blades. An "IMPORTANT" note advises following the blade instructions precisely, as incorrect installation could impair fan function.
Finally, the pull chain is installed by attaching the pendant to the short chain extending from the switch housing.
The manual also covers the fan's usage features, including reversing the fan direction. Ceiling fans can operate in two directions: downdraft (counterclockwise rotation) for a direct breeze and maximum cooling effect, and updraft (clockwise rotation) for a more indirect airflow, suitable for moving warm air downward. To change direction, the fan must be turned off and allowed to come to a complete stop before sliding the reversing switch to the opposite position and restarting the fan.
Troubleshooting tips are provided for common issues. If the fan doesn't work, users should check that the power switch is on, the pull chain is pulled to the "on" position, the motor reversing switch is firmly engaged, the circuit breaker is on, and the blades spin freely. If these checks don't resolve the issue, power should be turned off, the canopy loosened, and wiring connections checked. The plug connection in the switch housing should also be inspected. For excessive wobbling, ensure blades are properly installed, the hanger ball is seated correctly, and use the provided balancing kit. For noisy operation, check that blades are installed correctly and are not cracked; if cracked, they should be replaced.
Maintenance features include a "Hunter Pro Tip" for cleaning the fan, recommending soft brushes or cloths to prevent scratching, and warning that cleaning products may damage the finishes.
The product is backed by a Limited Lifetime Warranty. The motor has a limited lifetime warranty covering defects in material or workmanship, with Hunter providing a free replacement fan if the motor fails. Other parts are covered by a one-year limited warranty for defects in material or workmanship, with Hunter providing free replacement parts. The warranty requires proof of purchase (sales receipt or other document) and can be obtained by contacting Hunter Fan Company online or by phone. The warranty explicitly excludes labor costs, light bulbs (except where noted), remote control batteries, fans purchased or installed outside the United States, fans without proof of purchase, fans from unauthorized dealers, ordinary wear and tear, minor cosmetic blemishes, refurbished fans, and damage due to improper installation, misuse, abuse, improper care, failure to follow instructions, accidental damage, modifications, improper maintenance or repair, improper voltage supply or power surge, use of improper parts or accessories, or acts of God. Hunter Fan Company is not responsible for consequential or incidental damages. The warranty also clarifies that implied warranties of merchantability or fitness for a particular purpose are limited in duration to the applicable limited warranty periods. The document notes that state laws may affect warranty coverage.
| Type | Ceiling Fan |
|---|---|
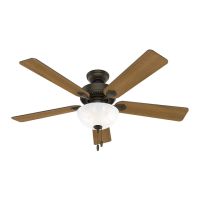
| Blade Span | 52 inches |
| Motor Type | AC |
| Number of Blades | 5 |
| Control Type | Pull Chain |
| Material | Metal and Wood |
| Reversible | Yes |
| Finish | Brushed Nickel |
| Room Size | Large Room |
| Motor Speed | 3-speed |
| Mounting Type | Downrod Mount |