18
45066-01 • 03/03/10 • Hunter Fan Company
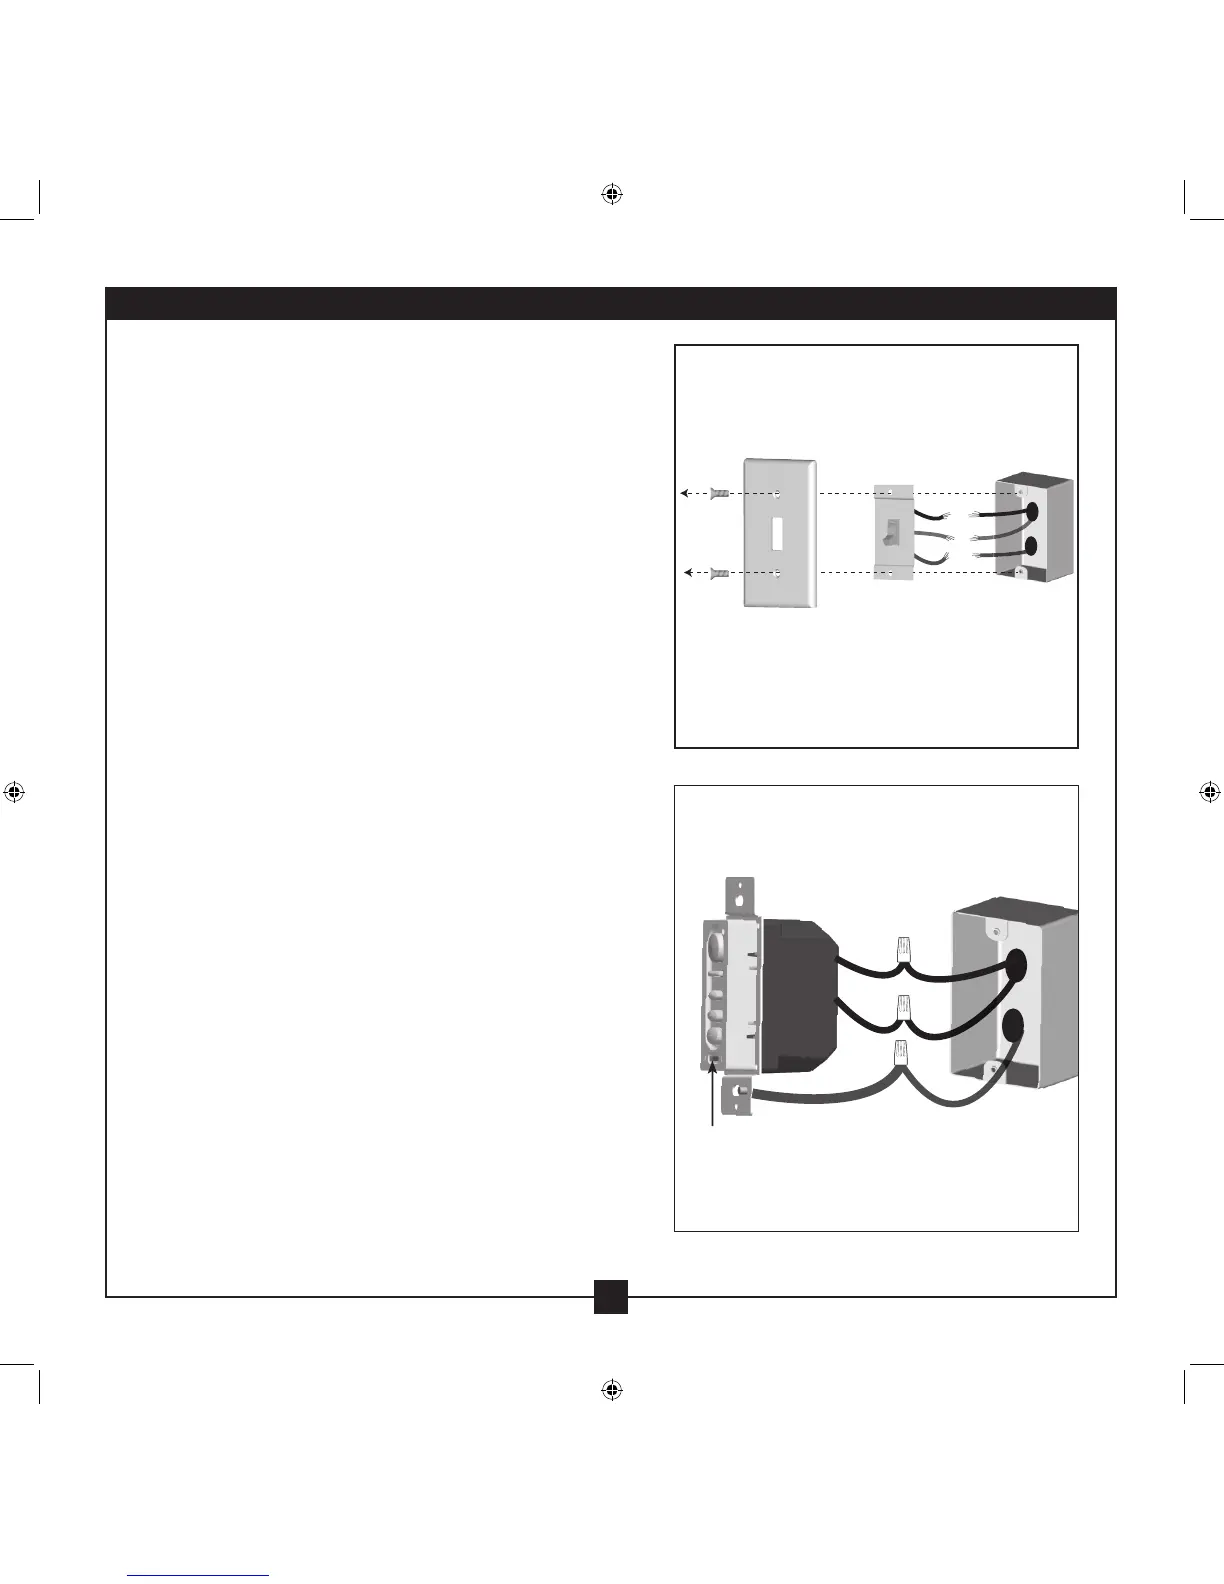
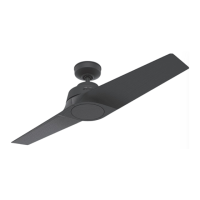
10-1. Disconnect the existing switch and remove it
from the electrical box. Set the screws aside for
reuse.
10-2. Connect each wire from the wall to a lead from
the control. Use 2 of the wire connectors supplied
to make the connections. Refer to Figure 1.
10-3. Connect the ground wire from the control to the
earth/ground wire from the wall. Refer to Figure 1.
10-4. Gently push the wires and wall control into the
electrical box. Attach the control to the switch
box with the two screws provided.
10-5. Install a rocker-style faceplate (not included) with
the screws removed in Step 1.
10-6. Restore power at main electrical panel.
Step 10-1
Figure 1
ON/OFF
10 • Installing the Wall Control