7
Status Check
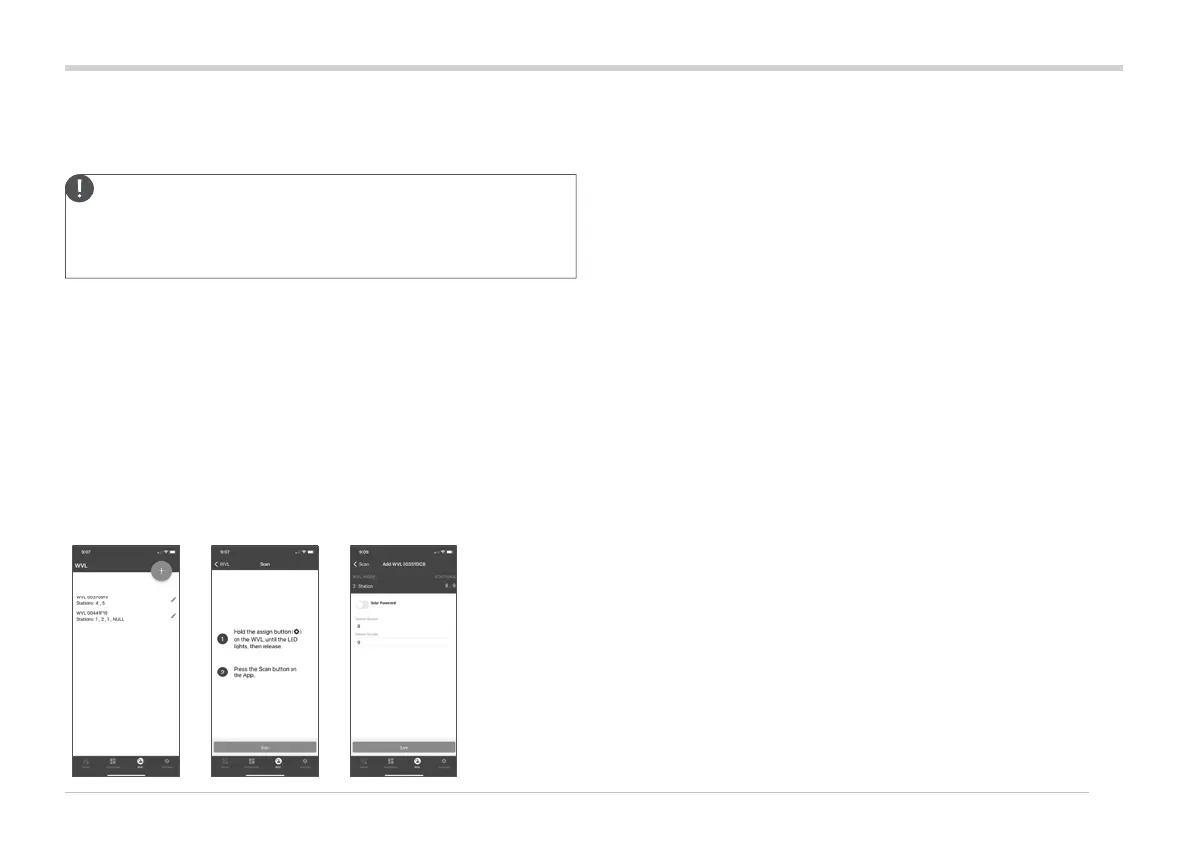
Within 5 minutes, use the Hunter WVL App to add a
new station, and allow it to scan for stations while in
Assignment Mode.
Note: Address one module at a time to avoid duplicate
addresses or confusion. Aer 5 minutes, the WVL will exit
the Assignment Mode.
*Duplicate addresses should not be used in the WVL System!
Procedure
1. To place the WVL in Assignment Mode, press and hold
right gear button for 2 seconds until right LED is yellow.
2. Open app, scan, and connect to the controller. When
connected, the screen will show a list of any WVLs
already connected.
3. Press (+) to add a WVL, then press the Scan button.
The controller will scan for a WVL that is currently in
Assignment Mode and display the station numbering
options in the app.
4. Use the app to select the controller station numbers
to assign to the WVL. Click Done for each station aer
it's assigned.
5. Once the WVL stations are assigned, press the Save button.
The controller (via the WVOM-E) will transmit to the WVL
to complete the assignment. The app shows if the save
was successful. The Assignment (right) light in the WVL
will also ash yellow several times when the assignment is
successful.
6. Aer a successful save, install the second 9 V DC battery to
improve seasonal battery life (recommended).
7. Take the WVL to the eld location.
8. Install and connect the WVL outputs to Hunter DC-Latching
Solenoids. Observe red/black wire polarity.
Status Check
Check the status of any WVL with at least one battery installed.
Press and release the Assignment button once. Do not hold the
button down.
The Assignment light will show green if stations have been
assigned and red if not. The le (Manual) light will show battery
status: green if battery is good and red if it needs replacement.