6
Functions and Features | Station Assignment
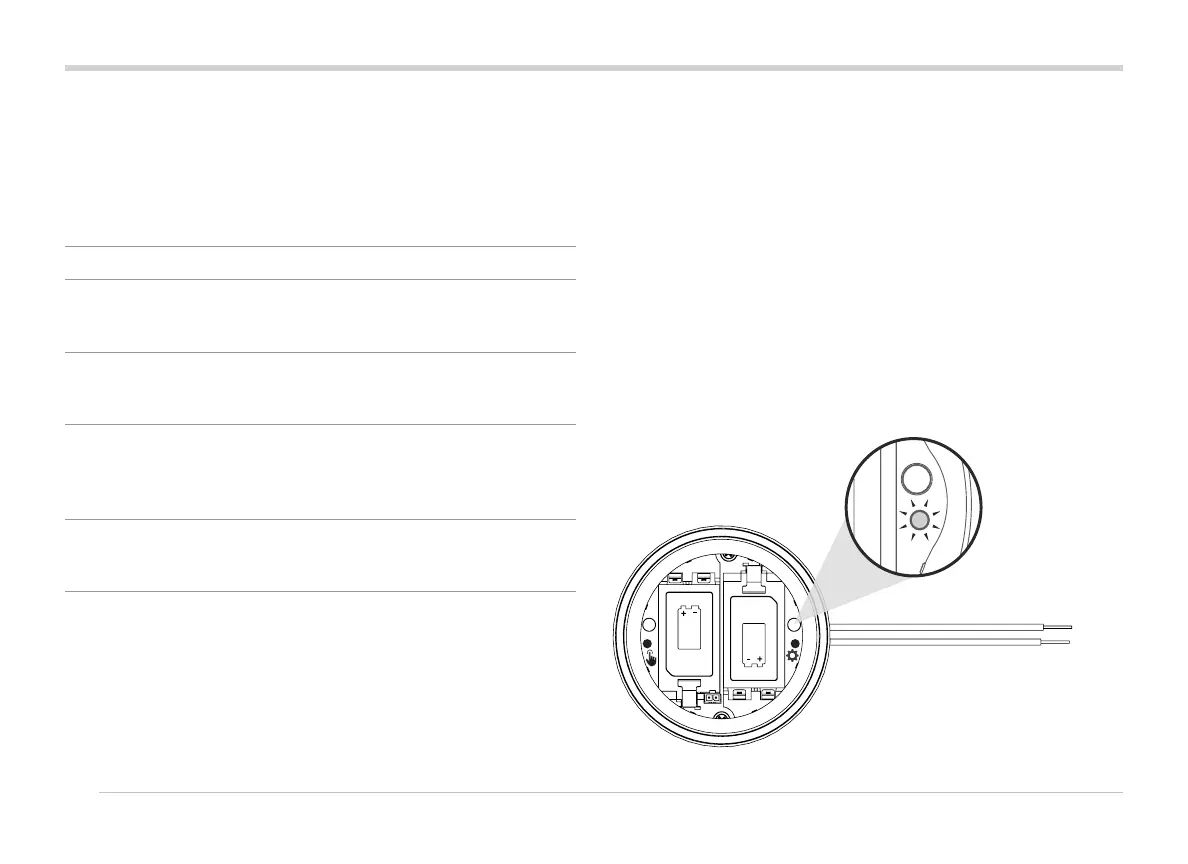
The WVL has two buttons and two LED lights in the battery
compartment. These can perform the following functions, in
order of importance. Station Assignment and Comm Check
require the installation of a WVOM-E in the controller.
Feature Function Button/Process
1 Station
Assignment
(REQUIRED)
Assigns controller
station numbers to
individual output links
Press and hold right
button for 2 seconds.
2 Site Survey/
Comm Check
Checks radio coverage
at proposed installation
location
Press le button 3
times.
3 Manual
Solenoid Test
Tests solenoid
connections and
operation directly from
the WVL
Press and hold
Manual start button.
Press to advance.
4 Factory
Reset
Erases all programming
and assignments
Press right button.
Insert battery. Hold
button 5 seconds.
Station Assignment
Bring the WVL to be programmed near the controller
location (before installing in the valve box). This insures solid
communications before moving to the eld location.
1. Unscrew the battery cover retaining ring. Remove the
waterproof cap to reveal the battery compartment.
2. Install the rst battery. You will need to access the right
button for station assignment, so installing the rst battery
on the le is recommended to allow easier access to the
button.
3. Press and hold the right button for approximately 2
seconds. The right LED should turn yellow/green, indicating
that the WVL is in Assignment Mode.