Side
Mount
Top
Mount
2
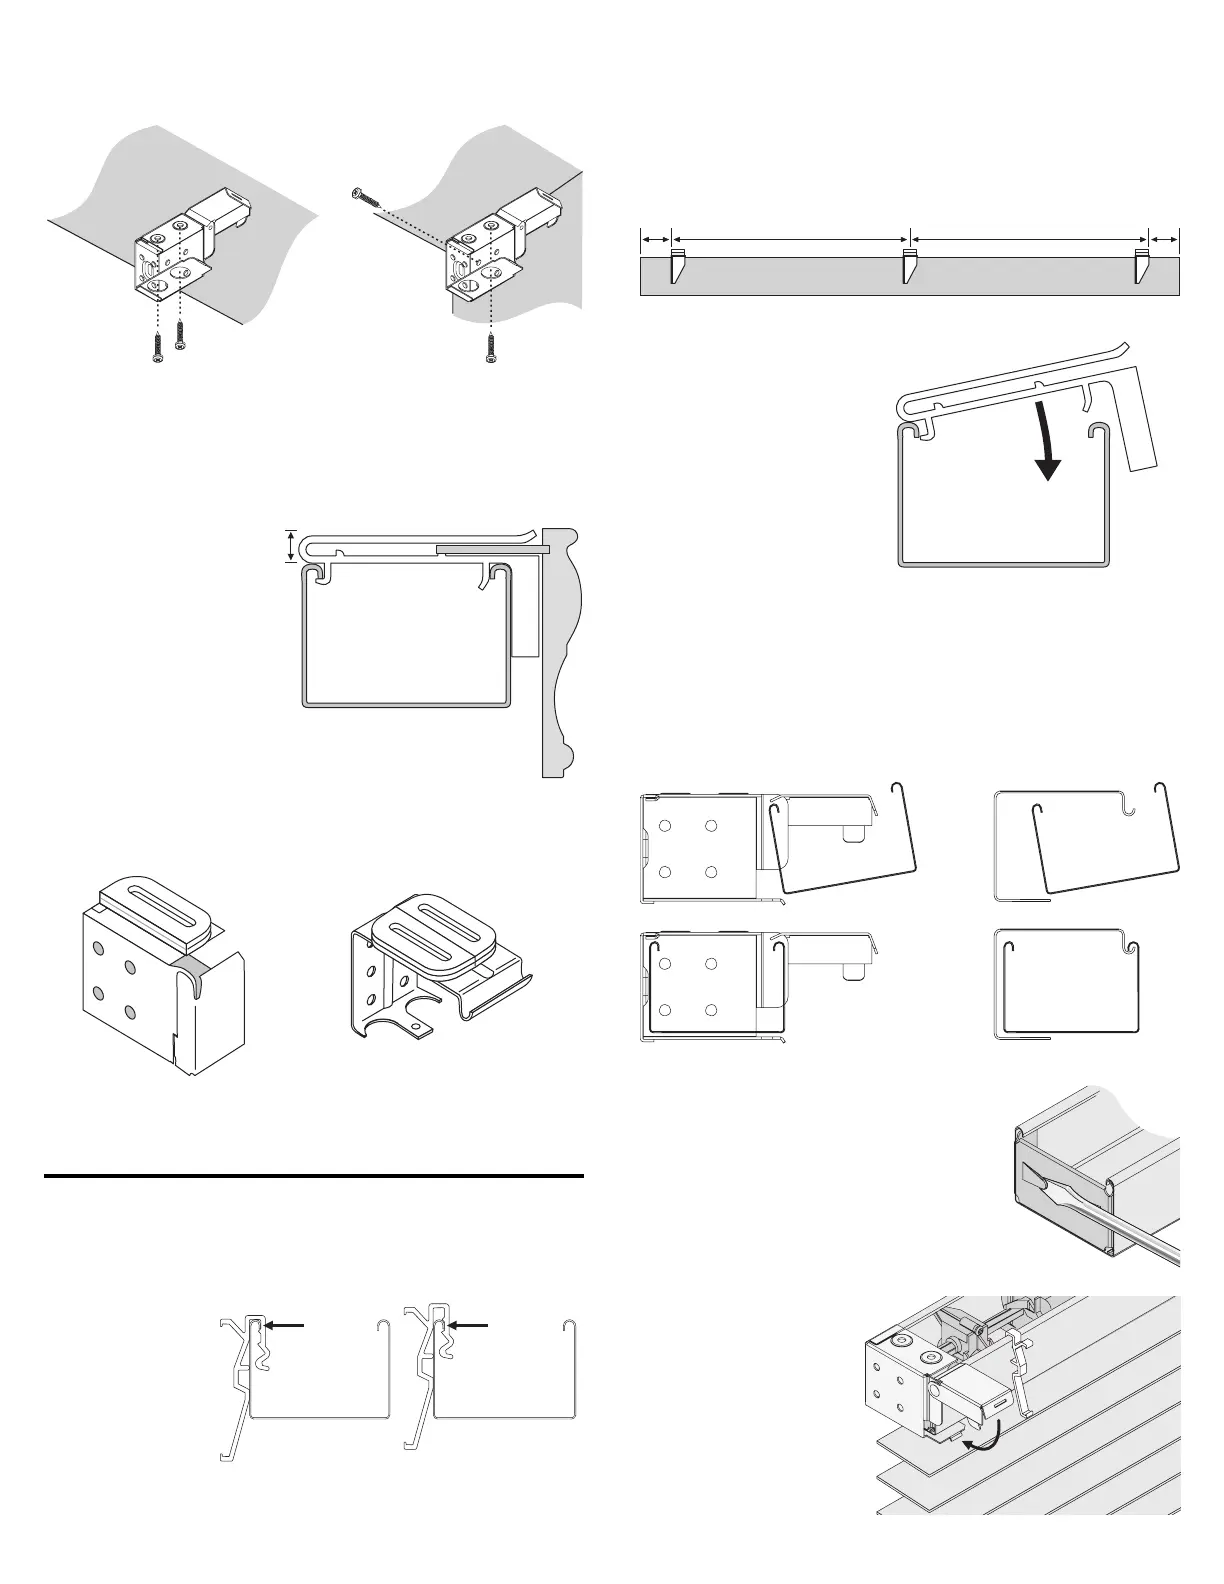
Mount the Headrail
• Tilt headrail so that its back lip slides under the front lip of the end
brackets and intermediate bracket(s).
• Push headrail against the back of the end brackets.
• Check that the front lip of the intermediate bracket(s) is under the front
lip of the headrail.
• If the brackets are fl ush with the back wall, attach them with one screw
through a top hole and one through a rear hole.
• Space intermediate bracket(s) evenly between the end brackets.
Adjust Headrail Tightness
• If the headrail is loose in the end brackets,
bend the tabs on the end plates outward.
• Note: The tabs may also be bent inward if
the headrail was diffi cult to install into the
end brackets.
Close End Brackets
• Push the cover down
until it snaps over the
locking tab on the
bottom of the bracket.
Bracket Shims
Shims to add top clearance are required for installation brackets and
support brackets only when a valance with optional dust cover is used and
the blind is inside mounted, but the headrail is not fully recessed. (If the
headrail is fully recessed or ceiling mounted, the optional dust cover would
not be ordered.)
Cornice Clips
Wood Blinds Only
Cornice clips are used instead of valance clips when the valance has
a dust cover.
• Attach a cornice clip 2" from each end of the headrail.
• Space additional clip(s) evenly between the two end clips so that the
cornice clips are no more than 36" apart.
• To attach the cornice clips,
hook the back of the clip to
the rear lip of the headrail.
• Push the clip down until it
snaps securely in place.
Cornice Clip
Front of
Headrail
Fr
nt
f H
r
il
2
2
o
ore
an 36
o
ore
an 36
3/8" Clearance
An additional
3
/8" of clearance
is needed to accommodate the
height of the cornice clips, as
shown in the illustration.
To gain this clearance, use the
bracket shims included with
your order (one for each
installation bracket and two
for each support bracket).
One Shim
Folded Over
Installation
Bracket
Support
Bracket
Two Shims
Stacked
End Bracket Intermediate Bracket
Install the Blind
Valance Clips
• Attach valance clips 2" from each end of the headrail.
• Space additional clip(s) evenly between the two end clips so that
the valance clips are no more than 36" apart.
• Wood blinds only:
If desired, the
valance may be
positioned
1
/4"
higher by pushing
the clips only one
notch down, as
shown in the far
right illustration.
• Note: The actual valance clips included with your order may
differ in appearance from those shown. However, attachment to the
headrail is the same for all valance clips.
Standard
Position
Raised Clip =
Higher Valance
Wood Blinds Only
• With each installation bracket, fi rst fold the shim and then position it on
top of the bracket to gain the required clearance.
• With each support bracket, stack two unfolded shims.



 To Next Page