Operator’s Manual 23
Hurricane Power Service
Changing Engine Oil and Filter
IMPORTANT: Avoid Damage! Change the oil more
often if the machine is used in extreme conditions:
•
Extremely dusty conditions.
•
Frequent slow or low-speed operation.
•
Frequent short trips.
1. Park machine safely.
2. Clean area around dipstick, filler cap and filter.
3. Make sure engine is cool.
4. Put oil drain pan beside engine on drain valve
side.
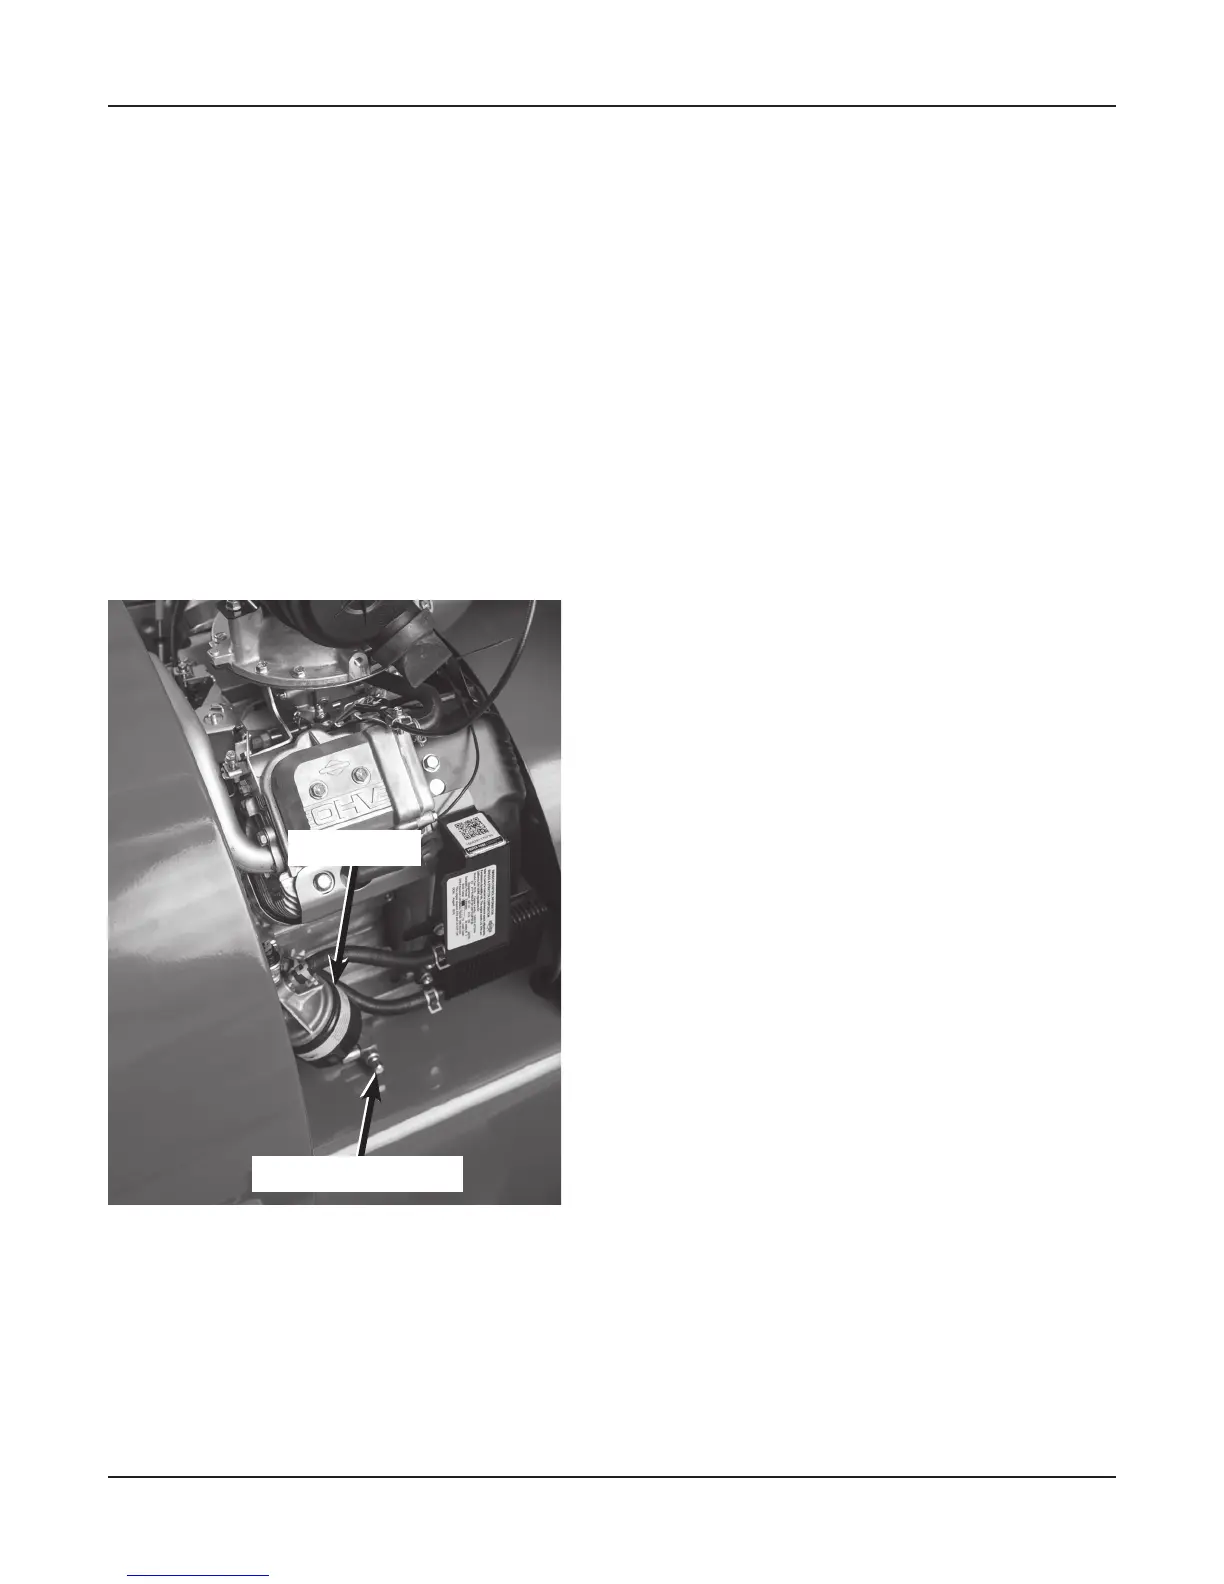
Oil Filter
Oil Drain Valve
5. Place 18” of 1/2 ID hose on drain valve.
6. Open oil drain valve fully.
7. Allow oil to drain into an oil drain pan.
8. After oil drains, securely tighten oil drain valve.
9. Remove drain hose.
IMPORTANT: Make sure engine and exhaust system
is cool before proceeding. The oil filter is located on
the left side of the engine.
10. Place some rags under the oil filter to contain
spilled oil.
11. Turn oil filter counterclockwise to remove. Pull the
oil filter to remove past the muffler.
12. Apply a film of clean engine oil to gasket of new
filter.
13. Install filter. Turn filter clockwise until gasket
makes contact with mounting surface. Tighten 1/2
to 3/4 turn after gasket contact.
IMPORTANT: Do not use wrench to tighten oil filter.
IMPORTANT: Refer to engine manufacturer’s operat-
ing manual for correct type and grade of oil.
14. Add approximately 1.75 quarts of oil.
15. Insert dipstick. Replace oil filler cap.
16. Start engine and run at slow throttle for approxi-
mately two minutes. Check for leaks around oil
filter and drain valve.
17. Stop engine.
18. Check oil level:
•
Remove dipstick. Wipe dipstick clean.
•
Insert dipstick fully and remove.
•
Add oil as needed to bring level to the FULL
mark without overfilling.
19. Insert dipstick.
Cleaning Engine Oil Cooler and Checking Air
Filter
Cleaning the Engine Oil Cooler
Keep engine oil cooler fins clear of debris to ensure
proper cooling.
Refer to the engine manufacturer’s owner’s manual pro-
vided with your machine for the complete procedure.