WHEELS & BRAKES
27
10
Always put the motorcycle on a
stable centerstand whenever
removing either front or rear wheel.
ATTENTION:
FRONT BRAKE: Supermotard.
The supermotard models are equipped with
Beringer hydraulic front brakes. Fluid level and
safety check are carried out in the same
manor as on the enduro brake. The brake
disc however, is of a coated cast iron type,
which demands a run in period. To obtain the
best result of braking power and durability,
the following recommendations should be
followed.
1. Disc and pads must be run in for 100-
300 km, depending on your riding,
using progressively applied power.
Do not overheat the disc. Avoid
violent, repeated or continuous
braking. A smooth surface on the
disc will indicate that the running in
period is complete.
2. Be careful. The first braking must be
very light. They are reserved to
remove the coating from the braking
track. In case of not respecting this,
a risk exists of damaging pads and
disc (vibration) not covered by the
guarantee. During the running in period,
braking power will be reduced
temporarily.
3. Inspect the brake disc regularly. It must
be brilliant or blue or dark brown. If the
brake area turns dull, as if sandpapered,
rapid wear of disc and pads may occur.
This can happen after many low power
brakings, or if you ride in rain for a long
time. In this case it is advisable to do
some powerful brakings in order to
laminate the pads friction surface and
put down a new protective deposit on
the disc.
4. For cleaning the caliper and hub of disc,
you must never use aggressive
chemicals, solvent or “brake cleaner”
Avoid high-pressure cleaner.
5. Wear:
· Min thickness of disc. 4.5 mm.
(Replace disc)
· Max rotation play between hub
and disc. 2 mm. ( Replace
hub)
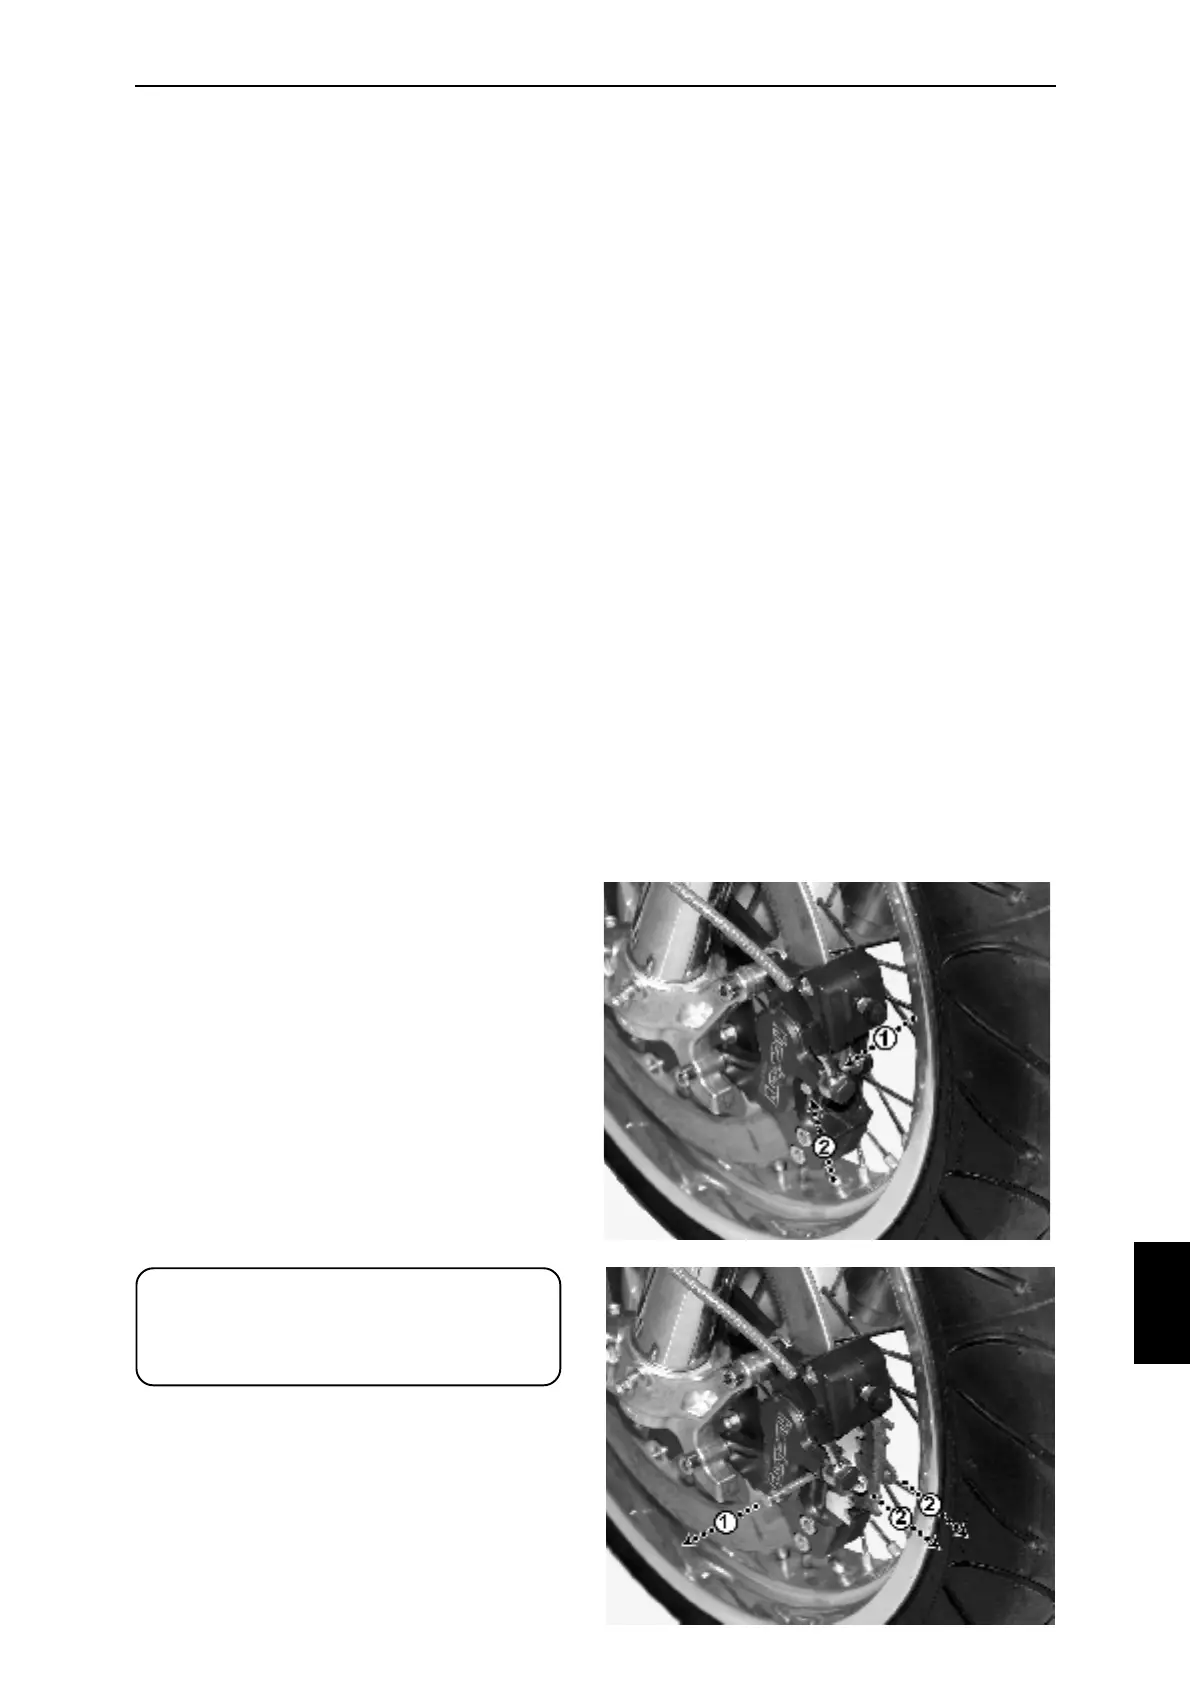
Fig.
10N
Fig.
10O
Brake pads:
Remove the clip (Fig. 10N-1) holding the brake
pad pin (Fig. 10N-2).
Remove the two brake pads by removing the pin
(Fig. 10O-1) and pulling the two pads out (Fig.
10O-2).
Fit new pads in reverse order.
Do not forget that a new pair of brake pads will
require a slight run in period.