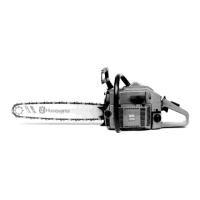
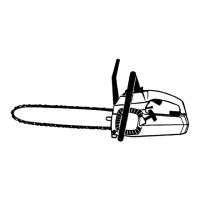
GENERAL MAINTENANCE
A good maintenance program of regular inspection
and care will increase the service life and help to
maintain the safety andperformance of your saw.
. Make all adjustments or repairs (except car-
buretor a~ustments) with:
– sparkplugwiredisconnected.
– engine cool as opposed to a saw that has just
been run.
. Check the saw for loose bolts, screws, nuts,
and fittings regularly. Loosefastenerscan
causean unsafeconditionas wellas damageto
yoursaw.
A WARNING
Have all chain sawserviceperformed by a quali-
fied service dealer other than the items listed in
the maintenance section of this manual.
A. GUIDE BAR AND CHAIN
Increase the service life of your Guide Bar and
Chain by:
—
—
—
1.
Using the saw properly and as recommended in
this manual.
Maintaining correct chain tension, page 7.
Proper lubrication, page 9.
Regular maintenance asdescribedin this section.
CHAIN MAINTENANCE
● Sharpen the chain when:
wood chips are small and powdery.
Woodchipsmadeby thesawchainshould
beaboutthesizeoftheteethofthechain.
saw has to be forced through the cut.
saw cuts to one side.
~ Alwaysweargloveswhen handling
thechain. Thechaincanbesharpenou h to cut
!
youeventhoughitistoodulltocutwoo .
a. SHARPENING INSTRUCTIONS
Items required:
Gloves
FlatFile
5/32” (4mm)Dia.File
DepthGauge
6“ FileHolder
l.) Stop Engine.
2.)Adjustthechainforpropertension.Page7.
3.)Workatthemidpointofthebar,movingthe
chainforwardby hand as eachcutteris
filed.
4.) SharpenCutters.
a.)Positionthefileholderonthetopplate
of the cutterand depth gauge. Fig-
ure28.
b.)Alignthe30° fileholdermarkswiththe
bar and parallelto the centerof the
chain.Figures29 & 31.
NOTE: Ifyourfileholderhasa 25° mark,disre-
gardthismarkandfileata 30° angle.
c.) Filefrominsidetowardoutsideofcutter,
straightacrossonforwardstrokeinone
directiononly. Use 2 or 3 strokesper
cuttingedge. Figure30.
d.)K_;~~odlcuttersthe samelength. Fig-
e.)File enoughto removean dama e to
{f
the cuttingedges(sidep ate an top
plate)ofthecutter.Figure30.
f.) Filechainto meetspecificationsshown
- 16–
inFigure31.
A WARNING
Maintain the proper hook angle according to
the manufacturer s specification for the chain
you are using. Too much hook angle will in-
crease the chance of kickback which can result
in serious injury. Figures 31 & 33.
5.) Correct Depth Gauges
a.) Placedepthgaugetoolovereachcutter
de thgauge.Figure32.
fb.) Fi edepthgaugewith aflatfileuntilitis
level with the top of the depth gauge
tool.
c.) Maintainrounded front corner of depth
gauge with a flat file. Figures 32 & 33.
NQT@ Theverytop of thedepth augeshouldbe
F
flatwith the front half rounded of with aflatfile.
A WARNING
The Depth Gauge Tool is required to insure
proper depth gauge. Filing the depth gauge too
deepwill increase the chance of kickback which
can result in serious injury.
b. CHAIN REPLACEMENT
1.)Use only the Low-Kickback replace-
ment chain specified for your saw in
the “Specifications” section.
2.) Replace the chain when cutters or
links break.
3.) See a qualified service dealer to re-
place and sharpen individual cutters
for matching your chain.
4.)Always have aworn sprocket replaced
by a qualified service dealer when in-
stalling anew chain to avoid excessive
wear to the chain.
File Holder
%9’ >
File
/
90°
Cutter O
&\
Depth Gauge
Figure 28
Figure 29
 Loading...