Do you have a question about the Husqvarna CS 10 and is the answer not in the manual?
Explains the meaning and purpose of symbols displayed on the machine itself.
Details the different warning levels (WARNING, CAUTION, NOTICE) and their implications for safety.
A welcoming message to the customer, thanking them for choosing the product.
Provides historical context about Husqvarna's innovation and product development heritage.
Outlines the owner's and employer's responsibility regarding operator training and safety awareness.
States the manufacturer's right to modify products and the owner's obligation to stay updated on safety methods.
Highlights key features like high performance, reliability, innovative technology, and advanced solutions.
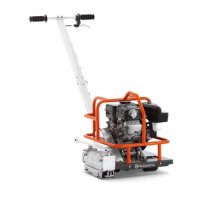
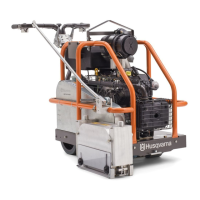
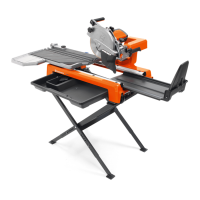
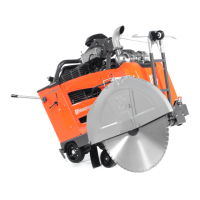
Describes the CS 10 as a combination saw driven by a wall saw, compatible with specific Husqvarna models.
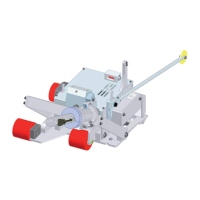
Explains the function and adjustability of the open swivel pulleys used for wire guidance.
Specifies the maximum wire length handled and the magazine capacity in meters and feet.
Details the saw's ability to be assembled for right or left-handed operation for precise corner cuts.
Identifies and labels the various components of the machine using a diagram and descriptive list.
Explains the purpose of the safety equipment section and the importance of reading manuals for combined products.
Details the function of protective covers designed to prevent accidental contact with cutting equipment and reduce accident risks.
Provides instructions for inspecting protective covers for damage and the need for replacement if damaged.
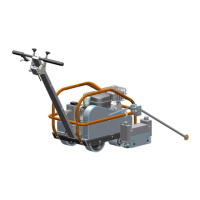
Emphasizes careful planning of cutting, saw mounting options (wall/ground), and assembly orientation (right/left).
Guides on positioning the saw, securing it with an anchor bolt, and adjusting feet for stability.
Instructions for adjustments when using an existing track, including removing end stops and drilling holes.
Step-by-step instructions for mounting the beam, swivel pulleys, lower magazine, and rail components.
Details on mounting the saw motor, drive wheel, and guard bracket, including safety warnings.
Instructions for aligning and mounting the upper magazine onto the rail, referencing a specific hole.
Guides on threading the wire around the workpiece, through the magazine, and preparing joints for wear prevention.
Instructions for threading and fastening the drive wheel guard and mounting the magazine cover.
Explains how to connect the water hose for cooling the saw motor, guard bracket, and wire, emphasizing proper positioning.
Refers to the operator's manual for instructions on connecting the saw motor to the power pack.
Lists essential personal protective equipment (PPE) like helmets, goggles, gloves, and clothing for safe operation.
Provides general safety rules, responsibilities, and warnings about unauthorized modifications or using faulty machines.
Advises users to exercise caution, stop if unsafe, and seek expert advice when unsure about tasks.
Details safety distances, environmental observation, avoiding bad weather, ensuring illumination, and clear footing.
Illustrates and explains the designated risk areas around the machine during wall cutting operations.
Shows diagrams and explains risk areas when using additional pulley wheels for cutting.
Illustrates and explains risk areas for floor cutting operations, including operator position.
Covers proper use, material types, operator fatigue, guard checks, wire selection, cooling, planning cuts, and securing material.
Provides instructions for safe transport and storage, including power disconnection and securing the equipment.
Lists prerequisites like software installation, reading manuals, PPE, ensuring no unauthorized persons, and checking assembly.
Refers to the power pack manual for starting instructions and outlines specific steps for wire cutting starting.
Specific steps for WS 482 HF, including selecting gear and driving mode for wire cutting.
Instructions on aligning the cutting arm with the rail and the warning about disabling the depth feeding control.
Explains how to tension the wire correctly to avoid breakage and ensure it seats properly in all wheels.
Guides on starting rotation using the green button, turning the control clockwise, and checking direction.
Instructions for storing the wire after cutting, including moving the saw and adjusting guide wheels.
Details on cutting techniques, output percentage, power usage factors, wire tension, and using guide wheels for wire capture.
Instructions on stopping the machine by returning controls to zero and referring to the power pack manual.
States user limitations for maintenance, need for authorized workshops for extensive work, and importance of proper maintenance.
Lists daily checks including safety equipment, cleaning the machine, and checking guide wheels and bearings.
Outlines service intervals (50/100 hours) at accredited workshops to ensure optimal performance and longevity.
Lists specifications like power, speed, torque, magazine/wire capacity, weight, protection degree, and noise emissions.
A table showing the relationship between spindle speed and wire speed in meters and feet per second.
A table recommending diamond wire models based on abrasive materials and reinforcement degree in concrete.
Details the warranty claim process, RGA requirement, customer responsibility for shipping, and Husqvarna's return shipping policy.
States the standard two-year warranty for manufacturing defects and mentions component manufacturers' separate periods.