55
CARTRIDGE FILTER
The cartridge should be cleaned every two to four weeks,
depending on the amount of use. Signs that the filter
requires cleaning include:
• Reduced jet power
• Hazy gray water
• Raling noise in the pump or filter
• Heater not working
REMOVAL
1 Acvate the STANDBY/DRAIN ASSIST mode.
2 Remove the filter cover and open the small, black air vent /
bleeder valve on the top of the filter lid.
3 Li the Gray lock tab to disengage and turn the locking ring
counter clockwise.
4 Pull the filter lid upwards, and li the cartridge element
straight up and out of filter housing.
CLEANING
5 With a garden hose and spray nozzle, hose off the cartridge
element, ensuring to carefully separate every pleat.
6 To remove collected loons, body oils, etc. soak the
cartridge in warm water and a filter cleaning/emulsifying
compound (available at your HYDROPOOL retailer).
7 A cleaning cylinder may be purchased from your
HYDROPOOL Retailer.
8 Rinse thoroughly and dry before replacing.
9 Hydropool recommends purchasing a spare filter cartridge
so that you always have a clean substute ready to rotate.
10 Aer the element has dried - if necessary, lightly brush
between pleats with a fine paint-brush to remove
remaining dirt parcles.
Do not use a wire brush or other devise to clean
cartridge element.
Do not put in dishwasher or washing machine.
RE-INSTALLATION
11 Place the cartridge filter back into the filter housing.
12 Replace the filter housing lid, pushing it down to seat,
ensuring that the lid o-ring does not become twisted.
13 Hydropool recommends that the lid o-ring be lubricated
with a non-petroleum based lubricant (i.e. Silicone gel)
when it becomes dry. This will help to prevent twisng
and pinching as the lid is installed, and significantly
increase longevity of the o-ring.
14 Install the filter lock-ring, turning clockwise unl the lock
tab snaps into place.
15 Close the air vent/bleeder valve.
16 Take the system out of STANDBY/DRAIN ASSIST mode.
17 When the pump starts circulang on low speed, it will be
necessary to release trapped air in the filter. Carefully
loosen the air vent/bleeder valve counter-clockwise unl
there is the hissing sound of air escaping. Once there is a
steady stream of water, close the vent valve, ensuring
that the o-ring does not become pinched.
CLEANING THE ACRYLIC SURFACE
The acrylic surface can be cleaned and polished using a so
cloth and acrylic cleaner, available at your Hydropool retailer.
· Important: Do not use detergents - the
remaining residues will adversely affect water
chemistry, making it difficult to maintain
proper water balance
· Do Not use abrasive cleaners – damage to the
acrylic surface will occur.
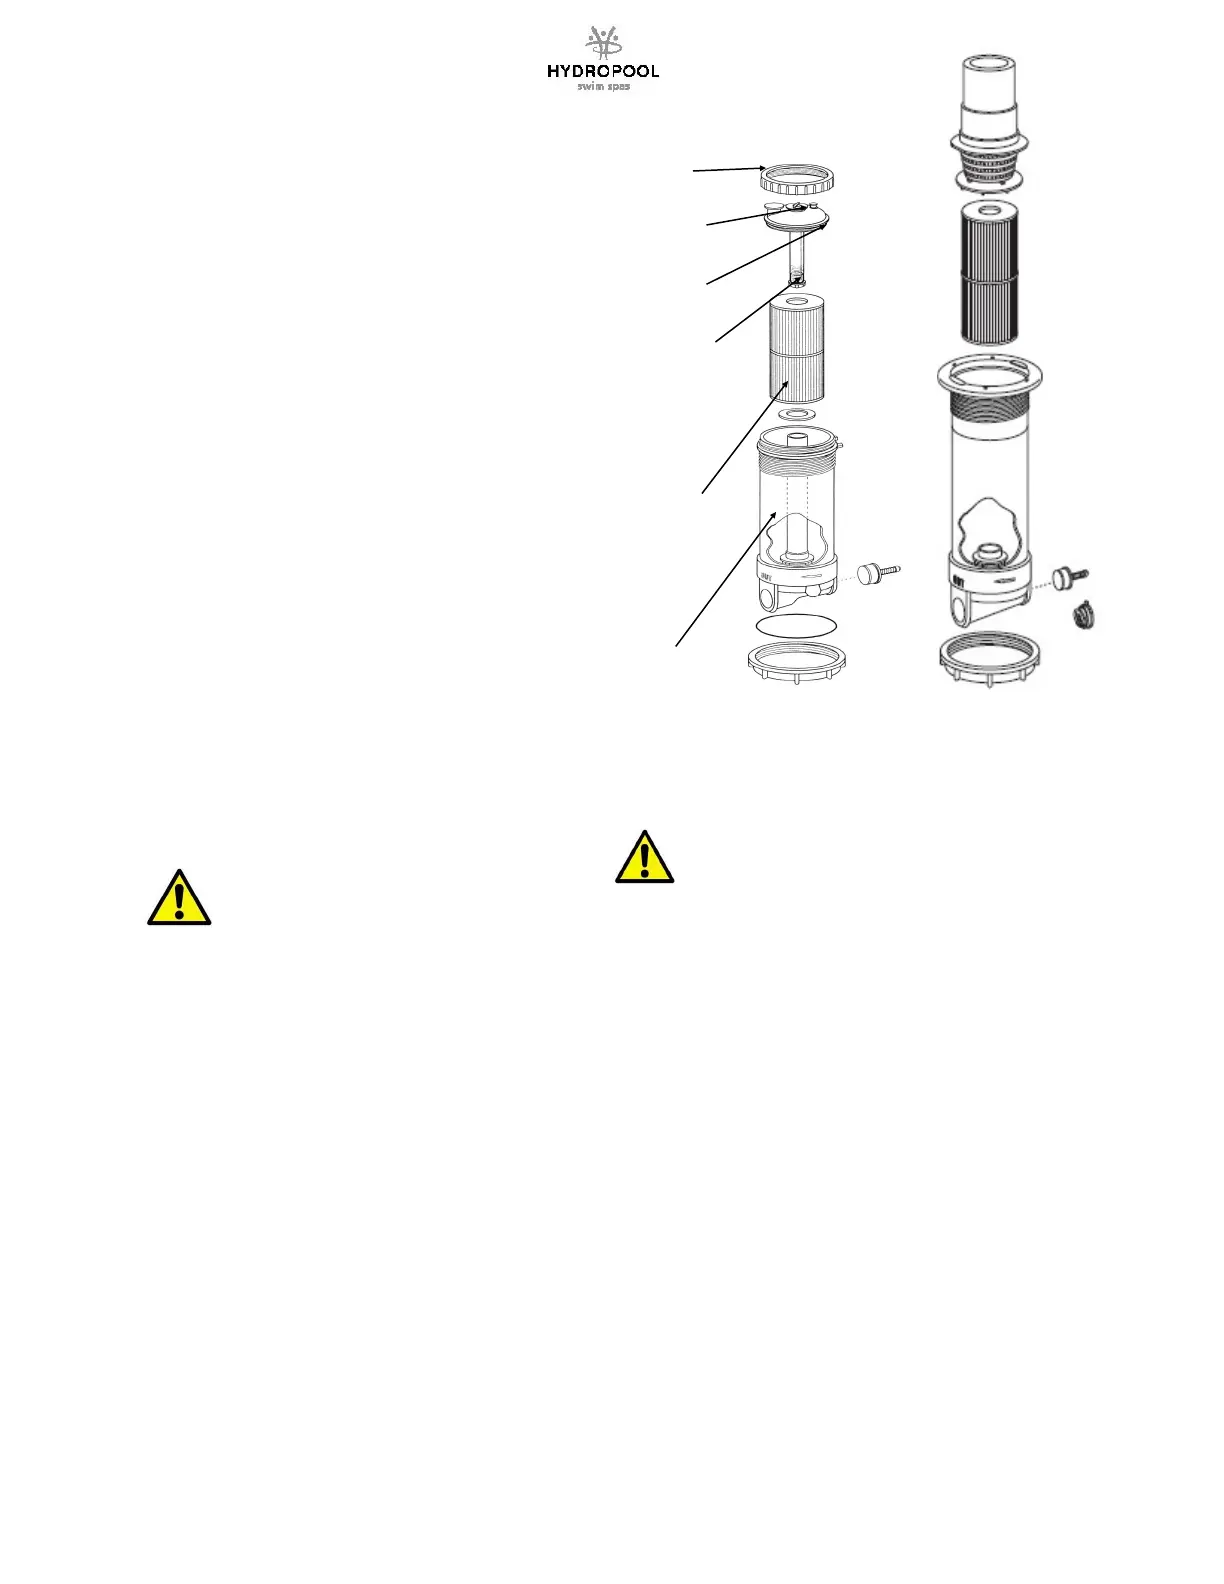
FILTER
HOUSING
LOCKING RING
BUILT IN
CHEMICAL
DISPENSER
AIR VENT VALVE
CARTRIDGE
FILTER
ELEMENT
FILTER LID
NOTE:
HYDROPOOL reserves the right to void the warranty
of your spa if there is any indicaon of the use of
products containing Hydrogen Peroxide.