D0360 REV. I ©2018 SMART DC INSTALLATION INSTRUCTIONS www.hysecurity.com | 3
REPLACING THE SMART DC CONTROLLER
To replace a SDC board, take the following steps:
1. Back up (make a copy) of the existing board’s menu
settings. See "www.hysecurity.com/gatesafety" on
page 1 and "Smart DC Controller Worksheet"
on page 2.
2. Turn OFF power to the Control Box (both AC & DC
switches).See Figure 3.
3. Use tape to identify the various accessory
connections and then disconnect all accessory
cables attached to the board. See Figure 4.
4. Disconnect all harness connectors and any
HY-5A or HY-5B vehicle loop detectors. Use
needle nose pliers to crimp the HY-5A or HY-5B
standoffs and then push the standoff through
the mounting hole. See Figure 4.
5. Use a Phillips-head screwdriver to remove the
seven screws from the board and three screws
at the top of the control box. Set the Smart
DC Controller board and the ten screws aside.
See Figure 4.
6. Note the orientation of the replacement
board and align the holes with the mounting
standoffs. Secure the board using the screws
removed in Step 5.
7. Reattach all accessories, harness connectors,
and HY-5A or HY-5B vehicle detectors to their
proper locations on the replacement Smart
DC Controller board. Make sure all jumpers
are wired correctly. See Figure 4.
8. Turn ON the Control Box AC & DC power switches
(Figure 3), and then set the operator type and other
parameters by following "Setting the Operator
Type" on page 4.
NOTICE
Tighten the three screws on top of the control
box rst, then tighten the remaining screws
that secure the board.
DANGER
Failure to select the correct operator type
(OT) can result in gate operator malfunction
which has the potential to cause serious injury
or death due to the improper operation of
the gate.
Figure 3. Turn AC and DC Power On
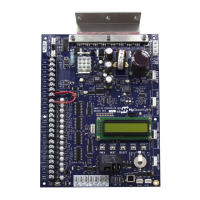
Figure 4. Control Box - Cut-away view of the SDC
Board in a SwingSmart DC Operator
DC POWER
I/O
AC POWER
I/O
Phillips Head
Screws (7x)
CONTROL BOX
P THREE
MOUNTING STANDOFF
MOUNTING ST
MOUNTING
STANDOFF
SDC BOARD
HY-5A or HY-5B
HY-5A or HY-5B
HY-5A or HY-5B
HY-5A or HY-5B
CUT-AWAY
VIEW