12
Leading Innovation in Torque and Tension Since 1968
The World’s Most Trusted Industrial Bolting Systems
3-5
Setting the Pressure on the Pump
To set the pressure on the pump, follow this procedure:
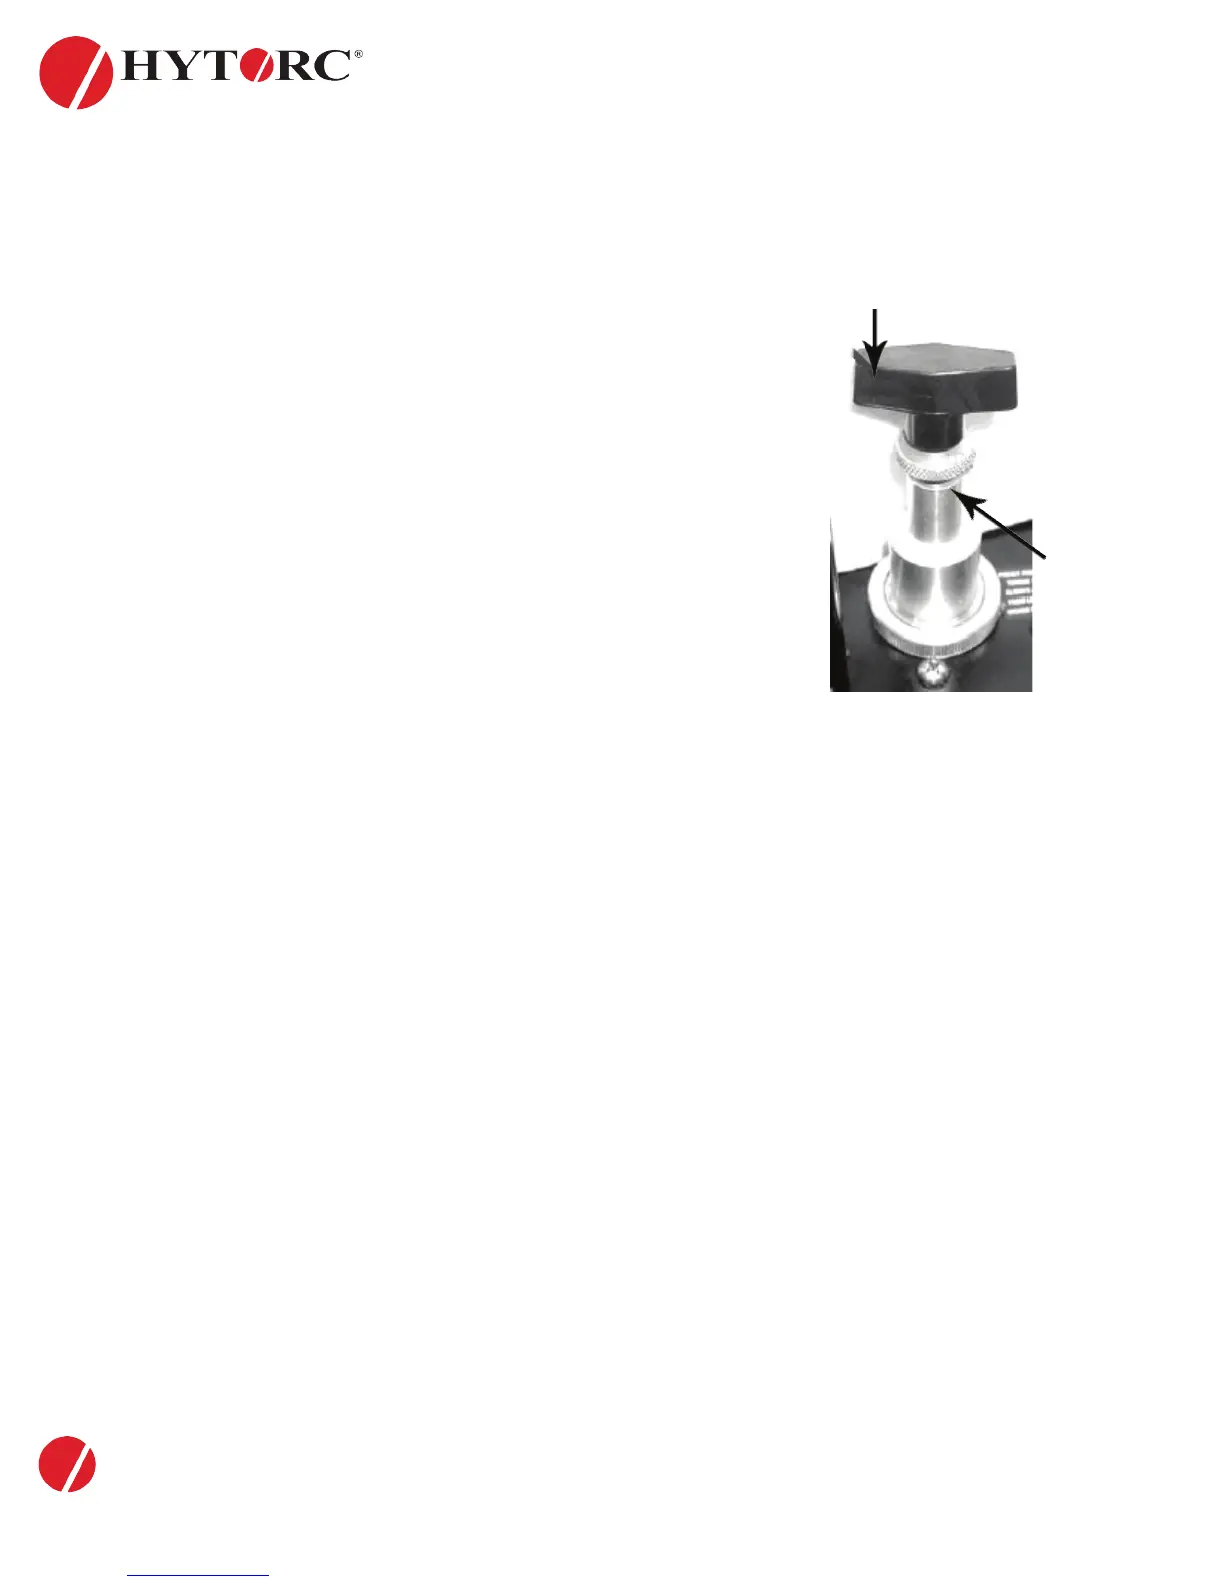
1. 1. Loosen the knurled locking ring below the “T” handle on the pump’s
external pressure regulator. Then turn the “T” handle (shown below)
counterclockwise (CCW) until it turns freely and easily.
2. Turn the pump “on”. Using the pump’s remote control pendant, push
down the advance switch (or button on air pumps) and hold it.
3. While holding the pump in the advance mode, slowly turn the “T” handle
clockwise and observe the pump pressure gauge rise.
4. When your gauge reaches 4,000 PSI, stop turning the “T” handle and let
the gauge settle out.
5. If the pressure continues to rise (above 4,000), release the advance button
and back off your pressure slighitly - by turning CCW on the “T” handle.
6. Then re-depress the advance switch on your remote and slowly bring
pressure up to 4,000 again.
7. When the pressure is correct, turn the pump “off’ and tighten the knurled
lock nut provided under the “T” handle. This sets pump pressure, which
determines torque tool output.
8. Once your target pressure is set and locked, cycle the pump once more to
ensure that your pressure setting did not change as you turned down the
knurled knob
NOTE: Always adjust the regulator pressure up - never down.
3-6
Applying the Torque Machine - the Tightening Process
1. 1. Once the target pressure is set (refer to 3-6) Cycle the tool several times to full pressure to assure proper
operation.
2. Place the right side of the ratchet link directly over the nut. Ensuring the hex is fully engaged and the
reaction pad portion of the link abuts solidly against an adjacent nut or other stationary object. (see 3-3 for
proper tool plament)
3. Ensure hose connections are clear of any obstacles.
4. After all the above are conrmed, apply momentary pressure to the SYSTEM to assure the reaction point is
stable.
3-7
Operating the Torque Machine
1. By pushing down on the remote control button in the advance position, the rear of the tool will be pushed
back until the reaction arm makes contact with its reaction point.
2. Continue to hold down the button as the socket turns until you hear an audible “click” which will signify
the hydraulic cylinder inside the tool is fully extended and will not turn the socket further.
3. Continuing to hold down the remote control button will result in a rapid buildup of pressure to the point of
where the gauge reads what was preset prior to applying the wrench.
Locking
Ring
T-Handle
 Loading...