14
3
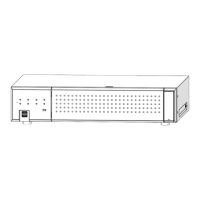
Rack mounting
Step 3
Install the recorder in the rack by using four rack
mounting screws.
Secure using the rack mounting screws (×4).
Tightening torque: 2.0 N·m ~ 2.4 N·m {1.48 lbf·ft ~ 1.78 lbf·ft}
Rack mounting screws (M5 × 12 mm, locally procured)
Important:
• The operating temperature range of this product is
0 °C ~ +45 °C {32 °F ~ 113 °F}.
* HDDs deteriorate at high temperatures, affecting their
service life. It is recommended that the product be
used at a temperature of about +25 °C {77 °F}.
• The following measures should be taken when installing
the rack to ensure that the product is used within the
operating temperature range.
嵣 Install a fan or other equipment to lower the
temperature inside the rack.
嵣 Allow a distance of at least 1U (44 mm {1-23/32
inches}) between the top and bottom of the product.
嵣 Do not put doors on the front of the rack or block
the sides.
Install the recorder in an EIA standard 19-inch rack (Depth:
550 mm or more).
Note:
• Use four M5 × 12 mm screws (locally procured) to install
the recorder in a rack.
• The illustration on this page is schematic. Details of the
shape are omitted.
Installation procedure
Step 1
Remove the five rubber feet from the bottom of the
recorder using a flathead screwdriver.
Use a screwdriver to remove the screws holding the rubber feet.
Remove rubber feet
Step 2
Attach the rack mount brackets (included) on both
sides of the recorder.
Secure them using the rack mount bracket xing screw
(included) (×4).
Tightening torque: 0.88 N·m ~ 1.08 N·m {0.65 lbf·ft ~ 0.80 lbf·ft}
Rack mount bracket fixing screws (included)
Rack mount brackets (included)
Note:
• The following illustration shows two types of mounting holes
in the rack mount bracket. Please use the holes of A.
A
B
 Loading...
