25
Step 4
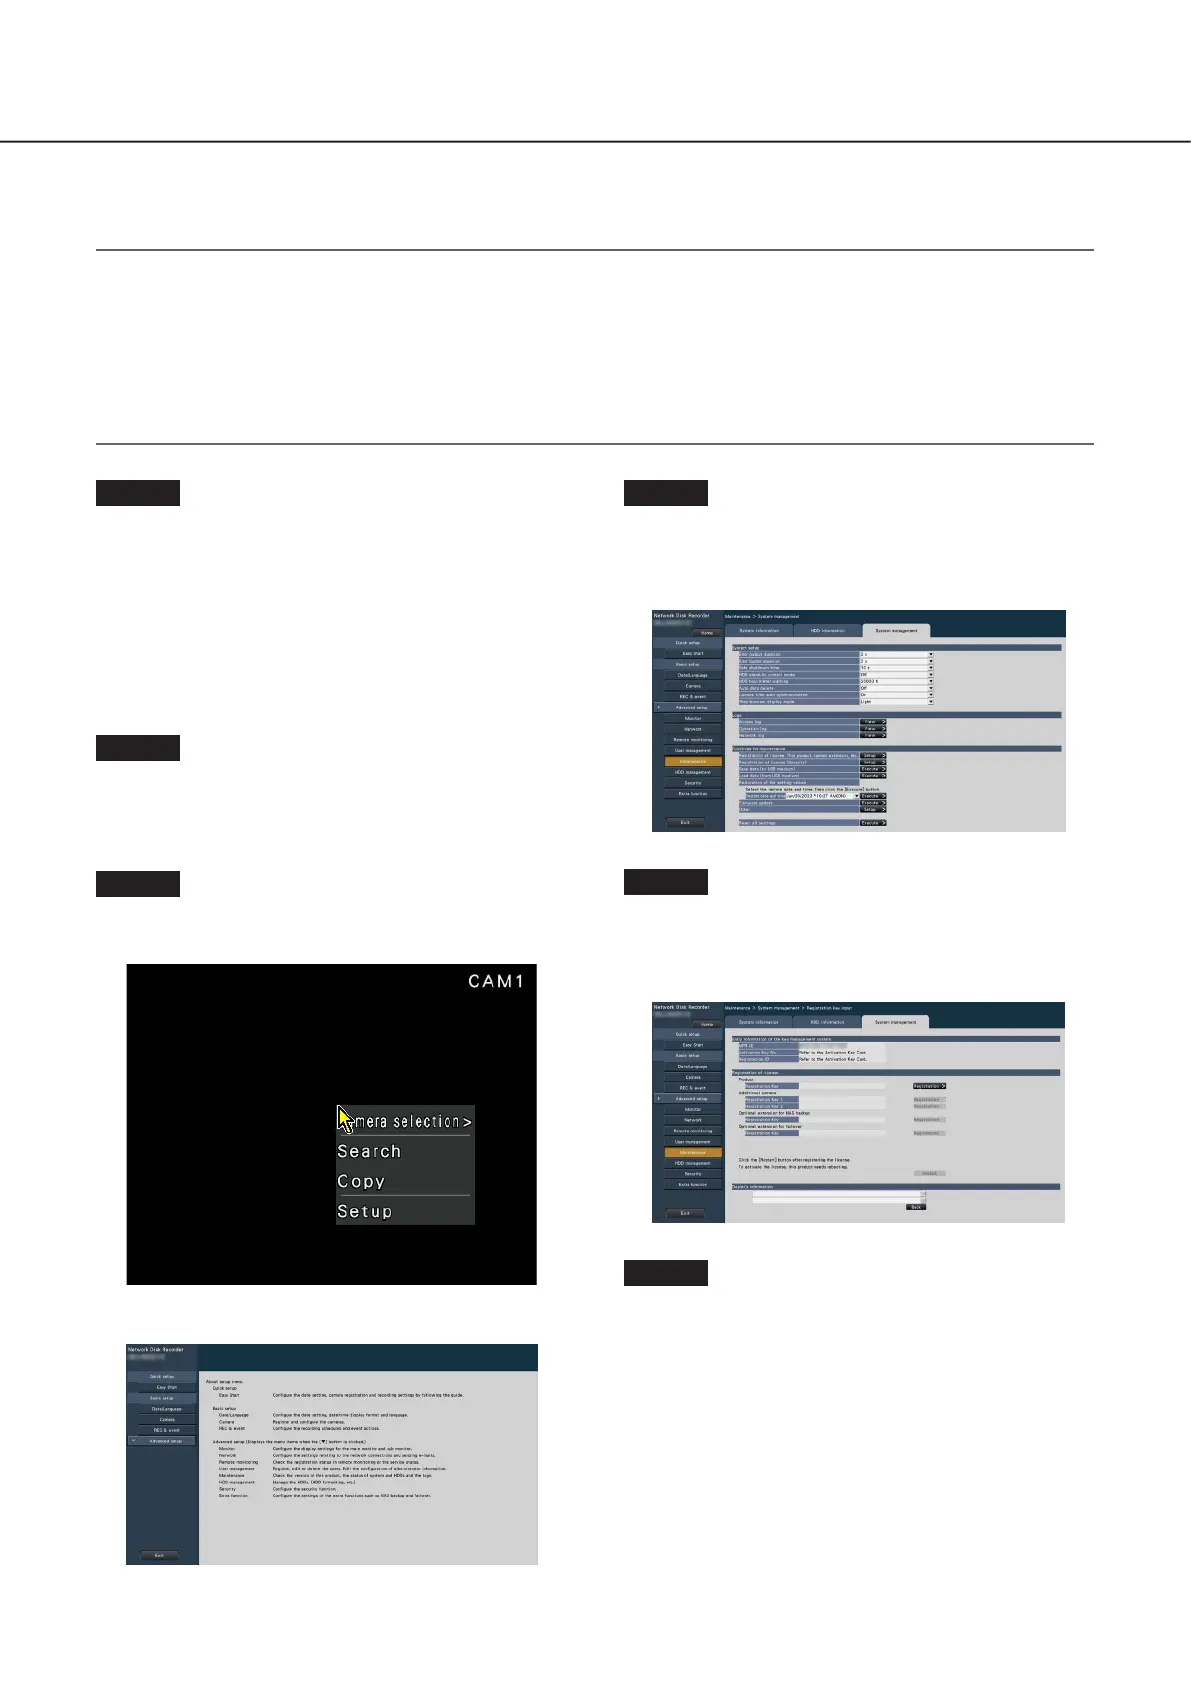
Click [Advanced setup] - [Maintenance] - the [System
management] tab on the setup menu.
→ The "System management" page will be displayed.
Step 5
Click the [Setup >] button of [Registration of license
(This product, camera extension, etc.)].
→ The registration window will be displayed.
Step 6
Click the [Registration >] button of "Product" -
"Registration Key".
→ The "Registration key input" window will be displayed.
When using the recorder for the first time, using the secure function, or increasing the number of the cameras to be connected, it
is necessary to register the recorder license (Registration Key).
Important:
• In the following cases, the recorder must be rebooted by clicking the [Restart] button. The licenses will not be effective until
the recorder is rebooted.
嵣 When the Registration Key of the recorder is registered
嵣 When the license of the additional camera kit, the additional business intelligence kit, or additional RAID kit is added
• The added cameras shall be registered on "Easy start" (☞ Refer to the included "Easy Start Guide") or on the "Camera
registration" tab.
Each setting value is the default. Configure each setting according to your needs.
Step 1
Obtain the "Registration Key" for the recorder by
following the instructions on the included "Activation
Key Card".
To add cameras, get the additional license registration key
number in the Additional Camera Kit (option). To use the
secure function, get the additional license registration key
number in the Secure Communication Kit (option).
Refer to the "Activation Key Card" for further information.
Step 2
Start the recorder. (☞ Page 23)
→ When the system check is complete, the wide view
screen will be displayed on the main monitor.
Step 3
Click the [Setup] of right-click menu on the image
display area.
→ The setup menu will be displayed.
6
Register the license (Registration Key)
 Loading...
