4. Undo the union nut at the gas valve outlet.
5.
Ensure that the O-ring and nut retainer are secured to the pipe.
6. Remove the fan/mixer/gas valve outlet pipe assembly. Tilt the fan to safely remove the
assembly. For instructions on removing the fan, see Replacing the fan on page 91, starting
from step 11.
7. Remove the ignitor cables (green and red).
8. Remove the four (CX150) or six (CX 199) nuts securing the lid to the heat exchanger. The
burner is attached to the underside of the heat exchanger lid.
9. Carefully lift the lid upwards away from the studs. The gasket/refractory/burner should stay
with the lid as it is removed.
10. Remove the screws securing the ignitor, and then remove the ignitor and ignitor gasket.
11. Remove the refractory by sliding it over the burner.
12. Turn the heat exchanger lid over.
13. Remove the screws securing the burner to the heat exchanger lid, and remove the burner and
gasket. The burner gasket may be damaged during removal, and will likely need to be
replaced.
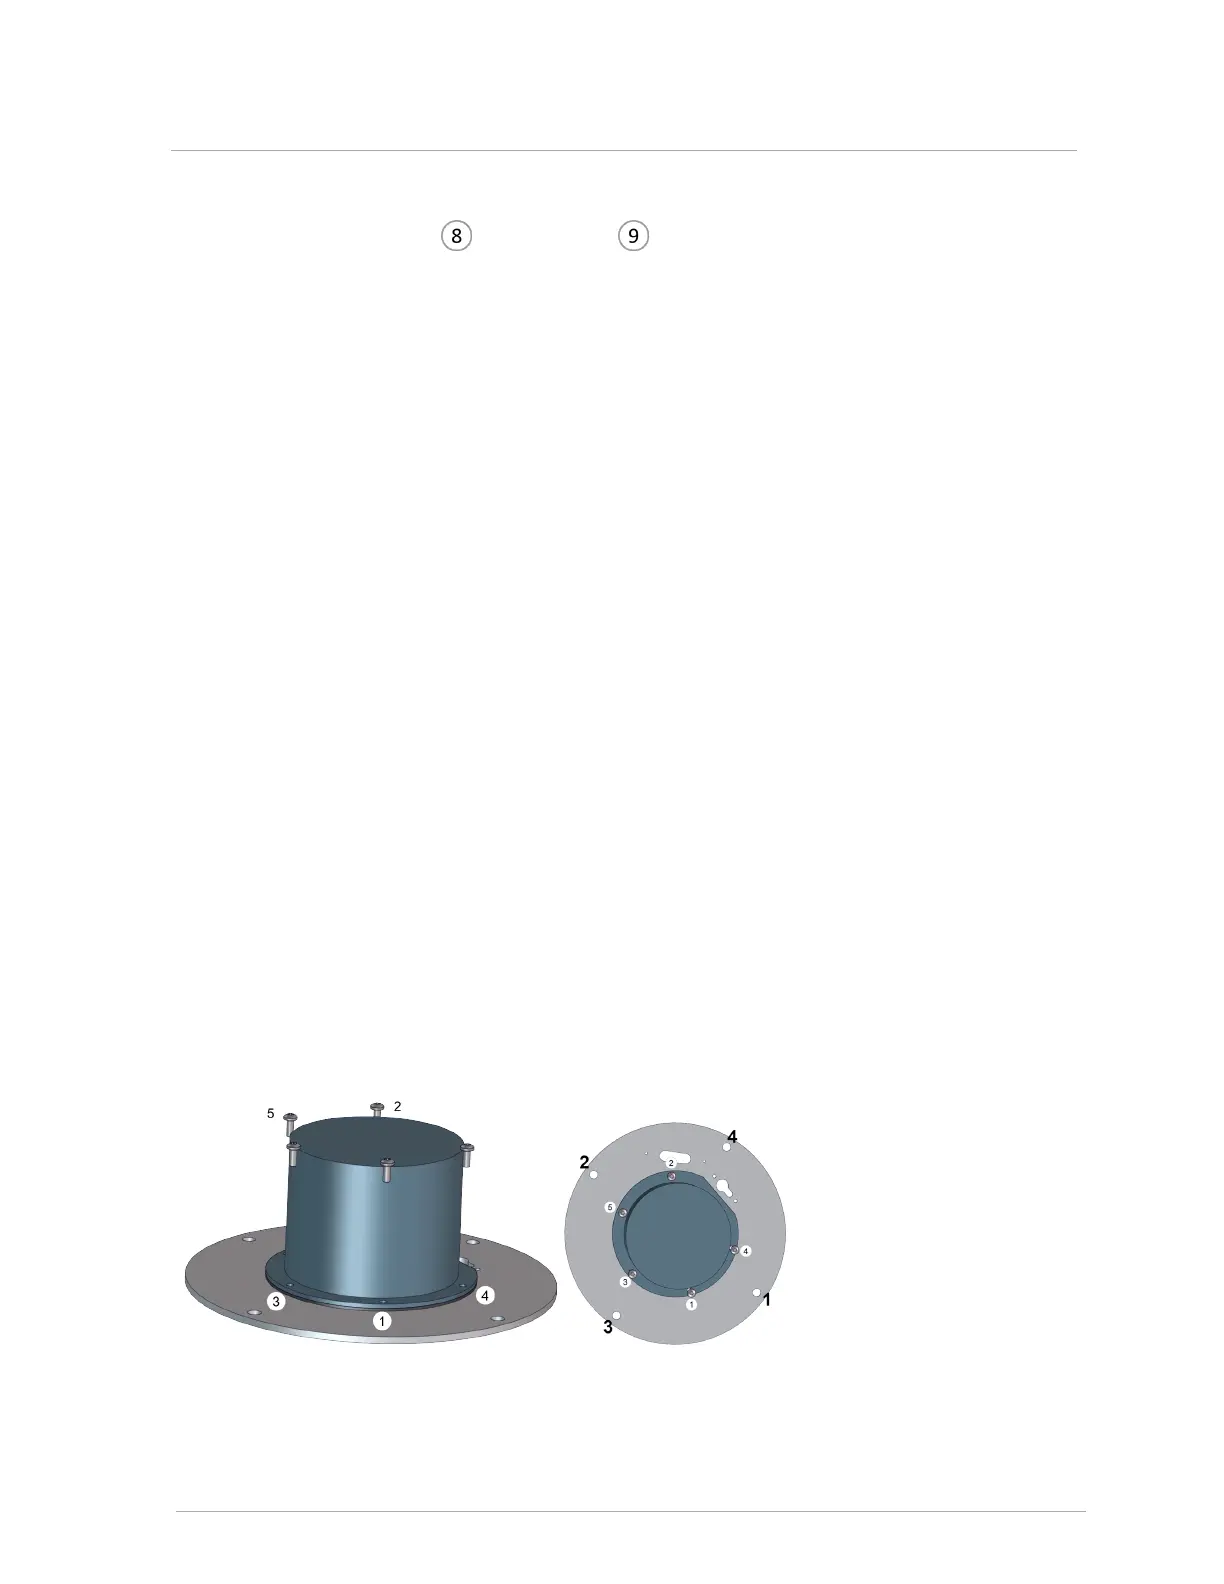
14. Install the new burner and gasket, ensuring that all screws are tightened evenly by repeating
the tightening sequence a few times as shown in the images below.
15. Reinstall the refractory. Carefully slide it over the burner all the way to the lid, ensuring that the
openings for the ignitor, view port and heat exchanger studs are aligned correctly.
16. Reinstall the ignitor gasket and ignitor with two screws.
17. Re-install the lid with burner and gasket/refractory assembly. Ensure that you tighten each nut
evenly by following the order indicated in the pattern below.
18. Re-install the remaining components in reverse order.
19. Turn on the electric power and gas supply to the combi boiler.
20. After firing the combi boiler, check for leaks at the gas valve inlet and at the connection
between the fan and the heat exchanger lid (if the fan was removed).
21. Check the gas valve tuning, and adjust as needed.
22. After removing test equipment check test ports and replace door.
Figure 45 Order for tightening screws on burner and nuts on the lid
7.3.3 Replacing the burner