Note: If the rack is locked, unlock the doors. Then unlock the side panels by sliding the security bar to
the unlocked position.
2. Remove the rear door.
3. Remove the side panels. For more information, see “Removing and replacing side panels” on page 89.
4. Remove one screw from the right side of the top cover and one screw from the left side of the top
cover. Do for both the front and rear of the cover.
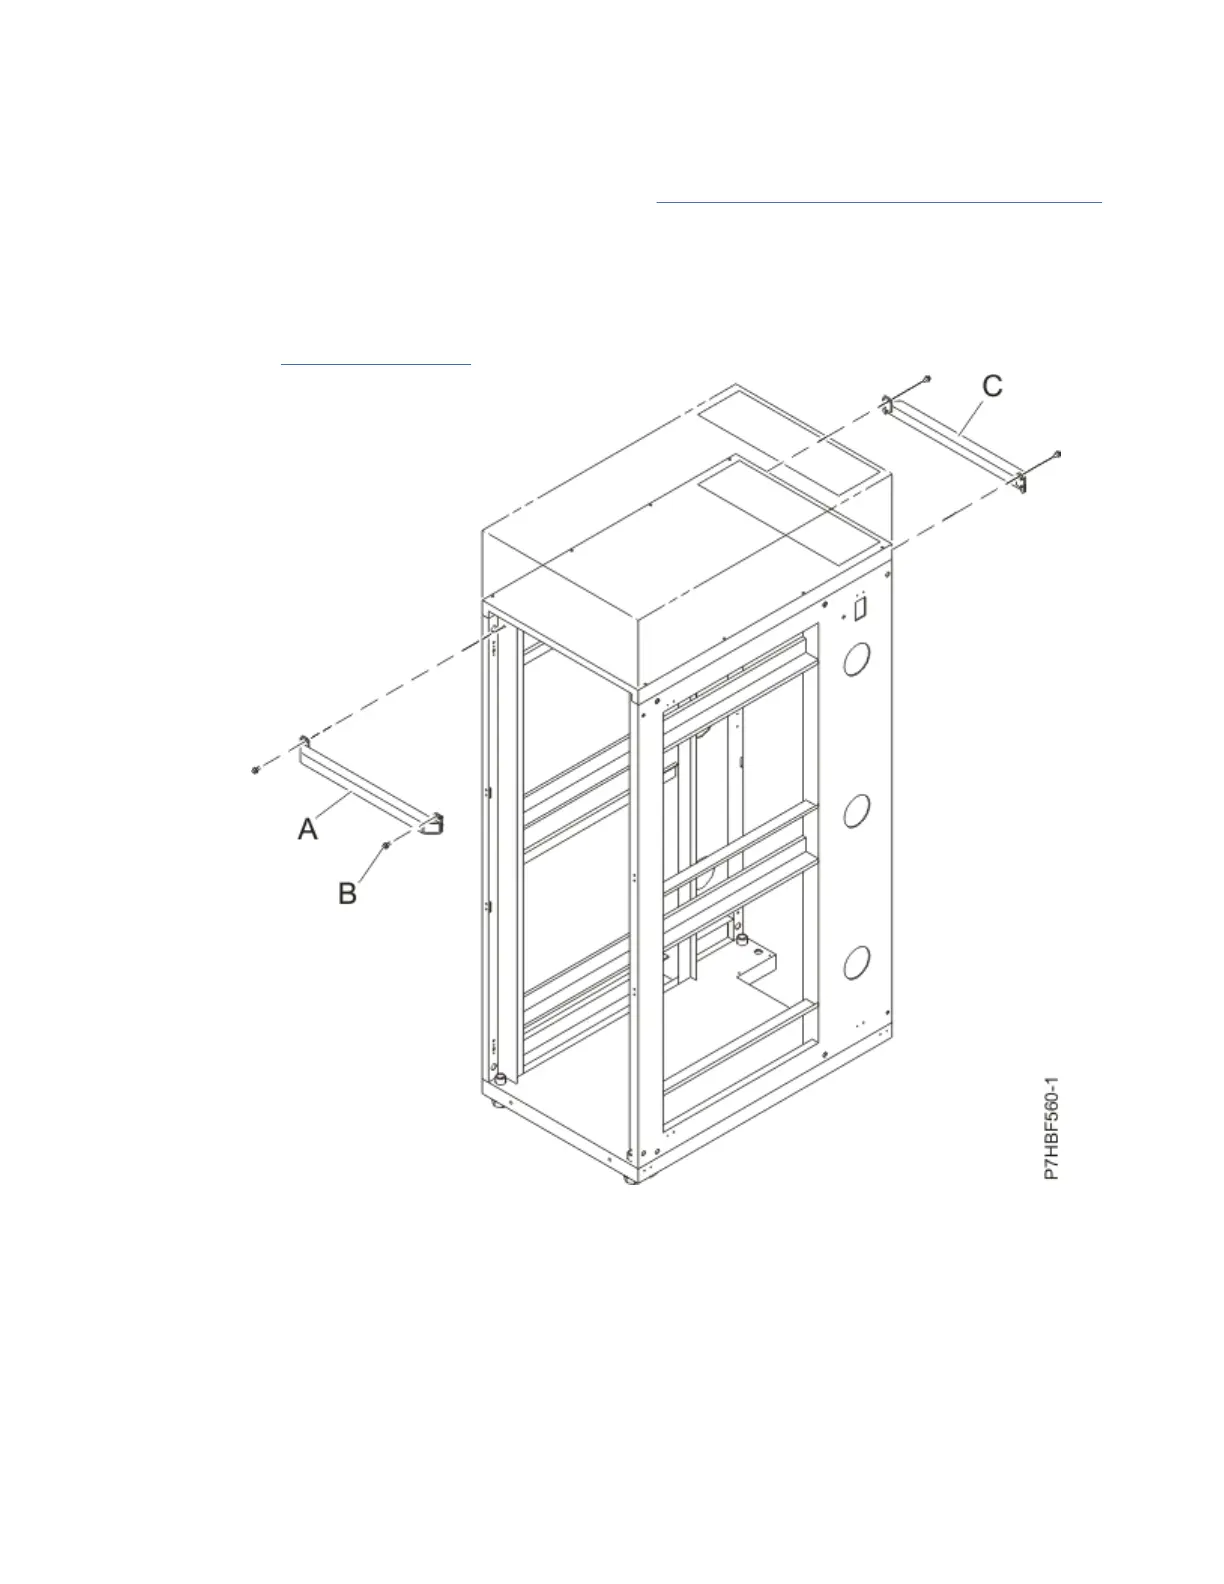
5. Locate the front (A) and rear (C) rack braces that were provided in the shipping container. Fasten each
rack brace at the top of the front and rear of the rack, just below the top cover.
6. Use the four screws (B) that were removed from the top cover to secure each rack brace to the rack, as
shown in Figure 65 on page 94.
Item Description
A Front rack brace
B Retaining screws (2 screws for each brace)
C Rear rack brace
Figure 65. Securing the rack brace
7. Remove the remaining six screws from the left and right sides of the top cover (D). The screws are
accessible through the three small rectangular openings on each side of the rack top cover.
94
Power Systems: Racks and rack features
 Loading...