Installing an I/O module
The BladeCenter unit has 10 hot-swap I/O module bays that are compatible with
three types of I/O modules (see “Rear view” on page 7 for the location of the I/O
module bays). See the Installation and User’s Guide for a description of the types of
modules that can be used in each bay.
Note: Before you install a new I/O module, read the documentation that comes
with the module for detailed instructions.
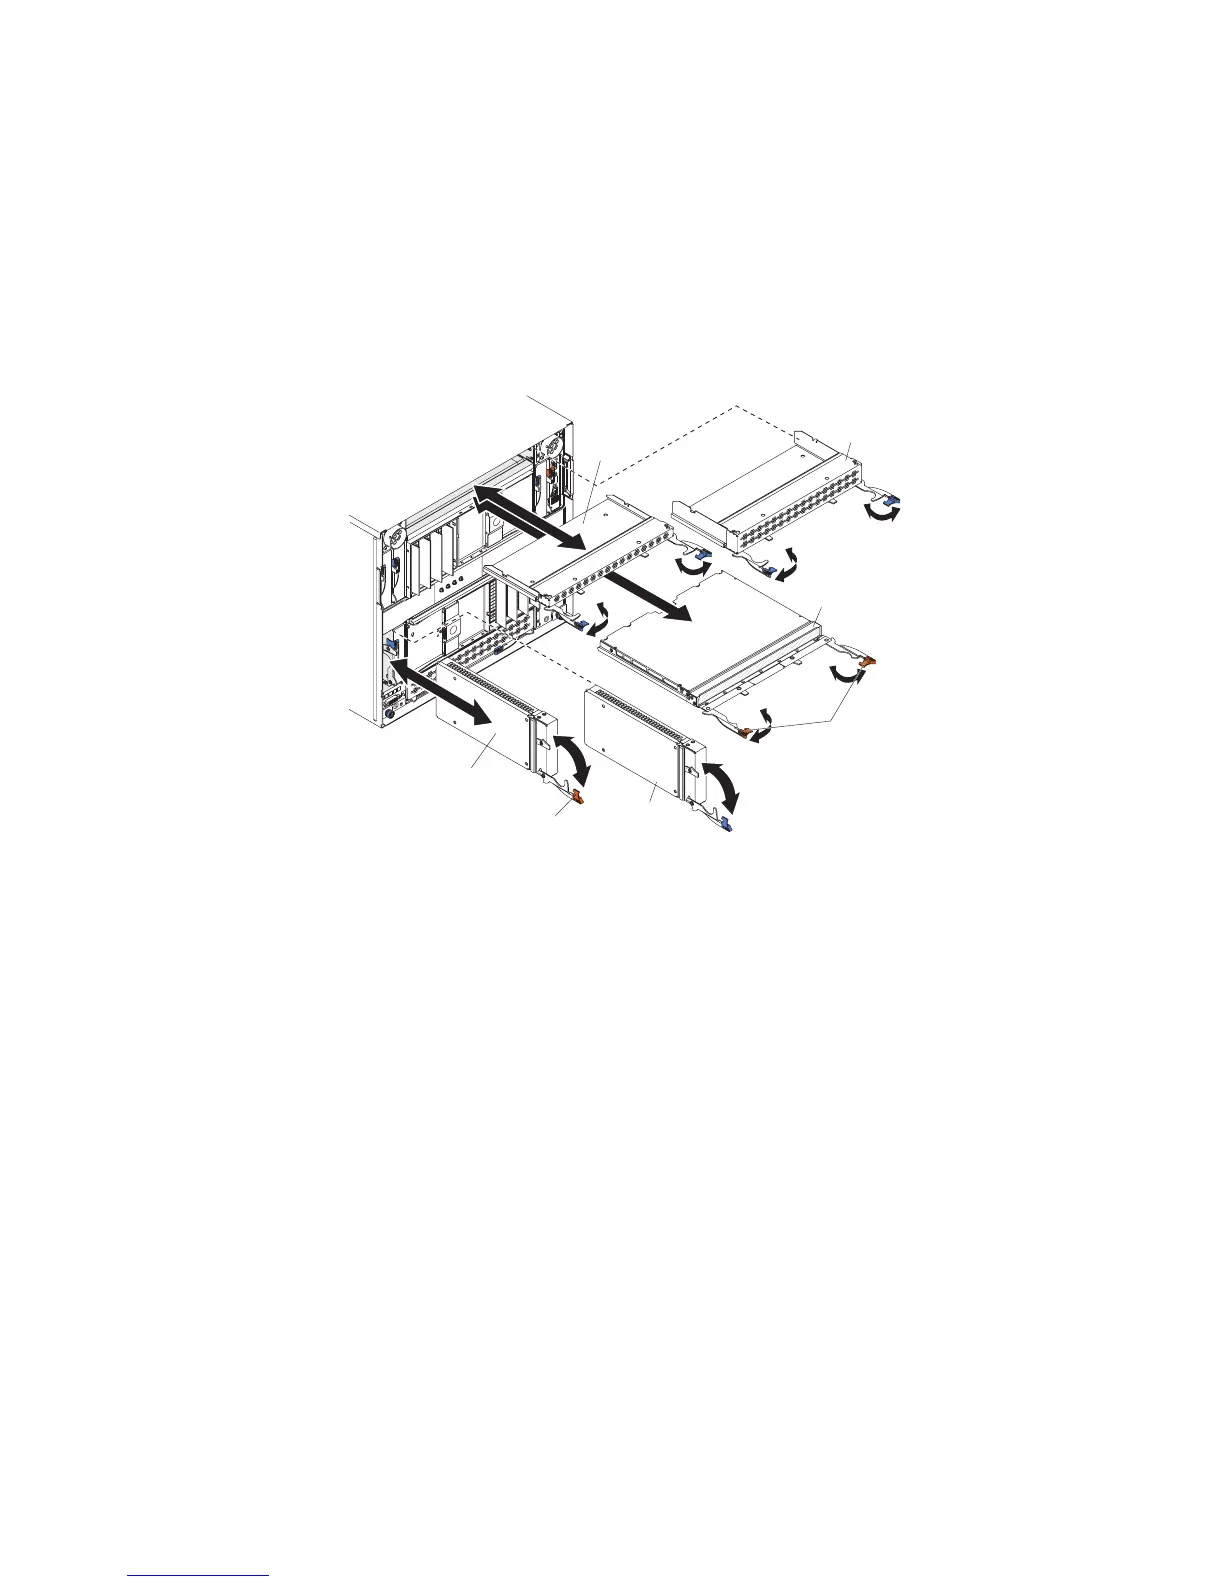
To install an I/O module or filler, complete the following steps.
I/O
module
Module
filler
I/O module
Single
module
filler
Double
module
filler
Release handles
(open)
Release handle
(open)
Note: These instructions assume that the BladeCenter unit is connected to power.
1. Make sure that the release handle or handles are in the open position.
Note: The modules and fillers in I/O bays 1 through 6 each have one release
handle; the modules and fillers in I/O bays 7 through 10 each have two release
handles.
2. Slide the module into the module bay until it stops.
3. Push the release handle or handles to the closed position.
4. Reconnect all cables to the module.
Chapter 4. Removing and replacing BladeCenter components 45

 Loading...


