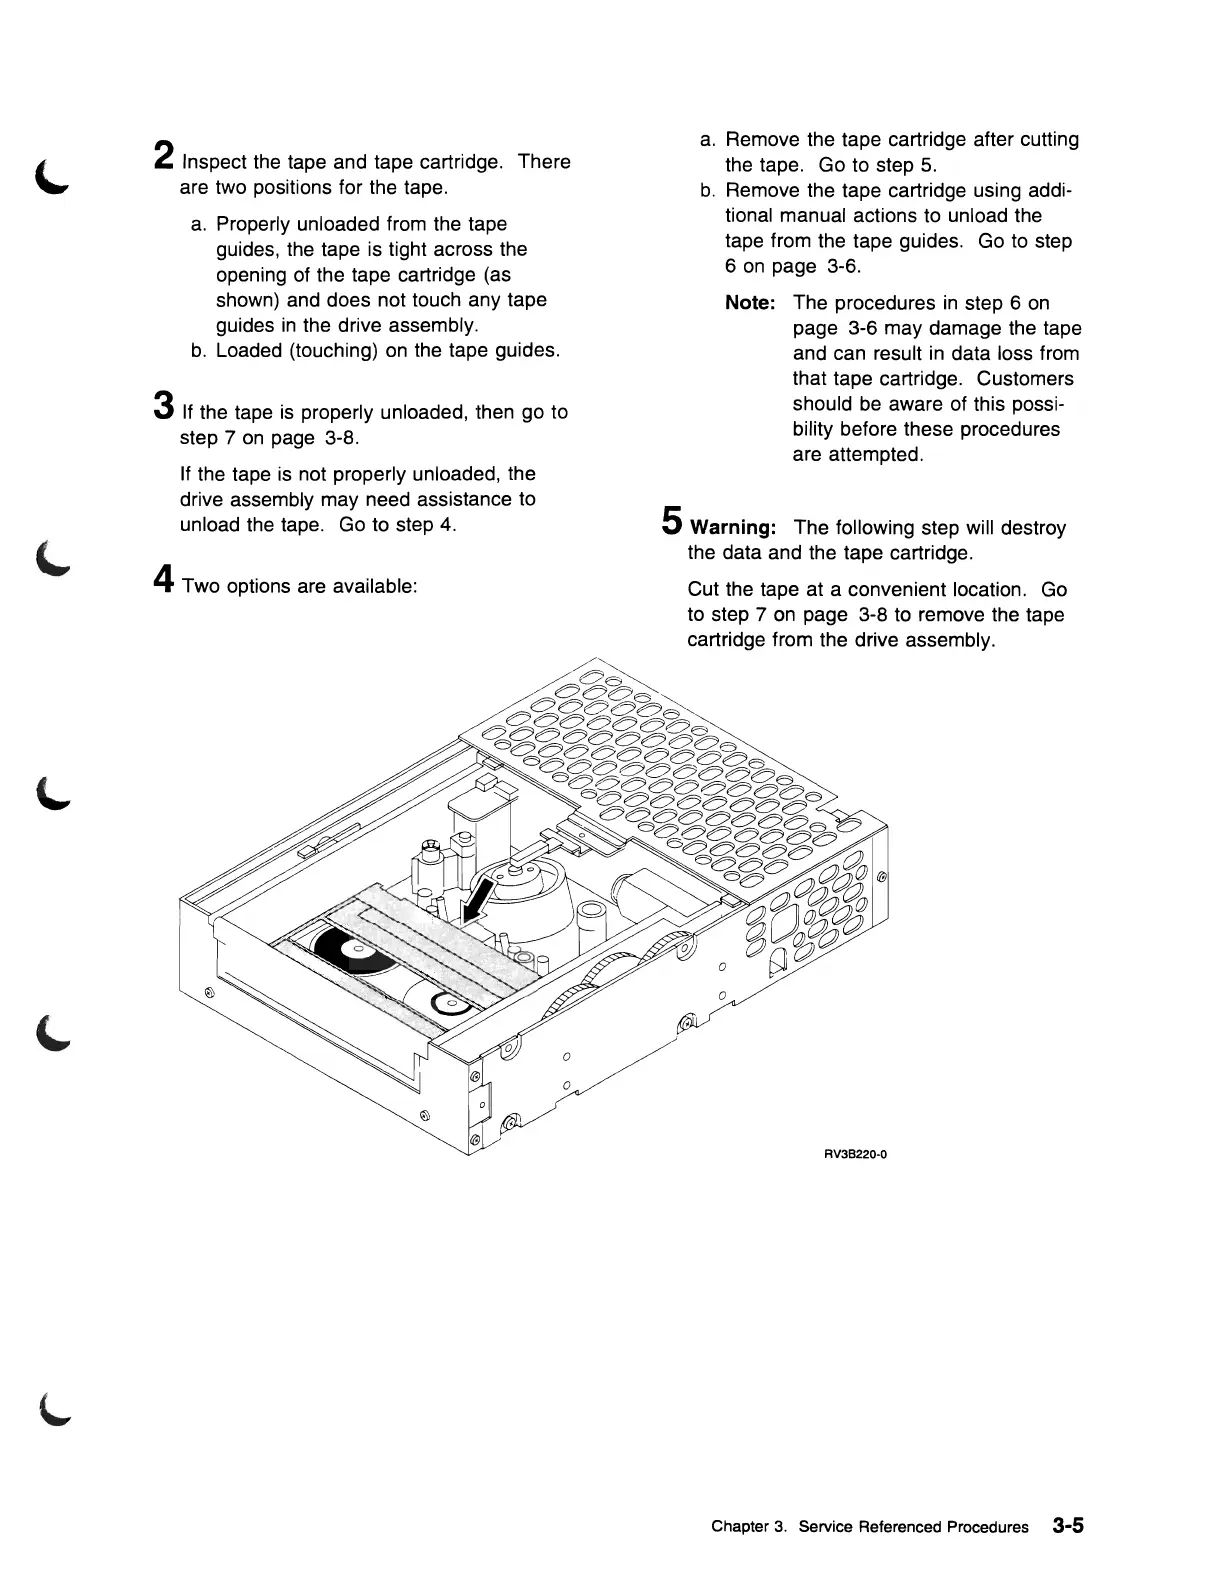
2 Inspect the tape and tape cartridge. There
are two positions for the tape.
a.
Properly unloaded from the tape
guides, the tape
is
tight across the
opening of the tape cartridge
(as
shown) and does not touch any tape
guides
in
the drive assembly.
b.
Loaded (touching)
on
the
tape guides.
3
If
the tape
is
properly unloaded, then go to
step 7
on
page 3-8.
If
the tape
is
not properly unloaded, the
drive assembly may need assistance to
unload the tape. Go to step
4.
4 Two options are available:
a.
Remove the tape cartridge after cutting
the tape. Go
to
step
5.
b.
Remove the tape cartridge using addi-
tional manual actions
to
unload the
tape from the tape guides. Go to step
6
on
page 3-6.
Note: The procedures
in
step 6
on
page 3-6 may damage the tape
and can result
in
data loss from
that tape cartridge. Customers
should
be
aware of this possi-
bility before these procedures
are attempted.
5 Warning: The following step will destroy
the data and the tape cartridge.
Cut the tape at a convenient location. Go
to step 7
on
page 3-8 to remove the tape
cartridge from the drive assembly.
Chapter
3.
Service Referenced Procedures 3-5
 Loading...


